I think it was more than 12 years ago that I began shooting videos with Lie-Nielsen Toolworks. The first two I did with them were just carving patterns - no project, just learning the layout and execution for some 17th-century style carvings. This year I’ve been writing some blog posts here about groups of joined works - “shop tradition” is the term we use in furniture history studies. I’ve begun a new series of carving videos - to be offered through vimeo-on-demand. This time instead of grouping the carvings like I did back in those LN videos, I’m going to present them in their associated groupings.
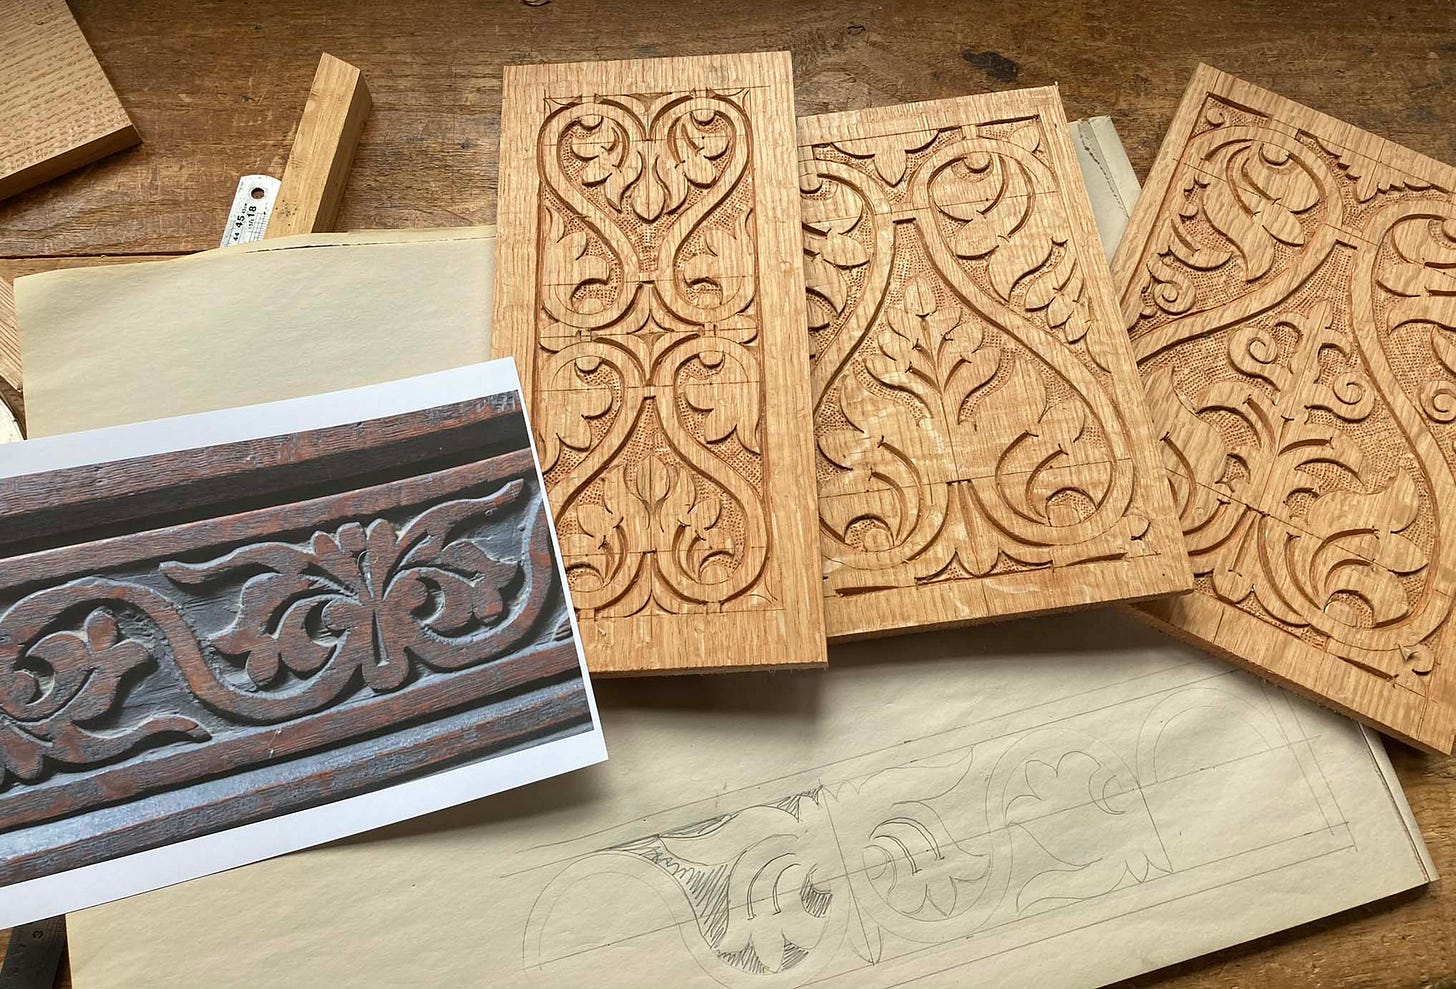
I spent a couple of days shooting the 3 panels in the photo above - they all stem from the works attributed to Dedham (and/or Medfield) Massachusetts in the 2nd half of the 17th century. I wrote three posts about the Dedham joinery tradition back in March of this year, a combination of review of the literature, some thoughts on carving them and looks at the details of several of the objects from this group.
I’ve begun editing the videos I shot - in them there’s no discussion of the history, just layout, carving, tool use, etc. Right now, it’s 2 videos, part one is just about an hour - it shows the layout and all the cutting of the small panel on the left in the photo above. Then next “chapter” runs about 90 minutes and it covers the middle and right-hand panels. Those two build on the format of the first, but larger and with more details.
I’m going to add two more carvings - one the drawer front in the photo and the other a diamond (or lozenge) shaped panel that is part of the pulpit from the 2nd meeting house in Medfield Massachusetts. So I’ll add it as a third, shorter video. There’s many variations in the surviving panels from the group, but the ones I’ve chosen are, to my eye, the nicest.
Here’s a clip from the footage I’ve been working with.
The part I’m at now is adding in captions running through the video indicating which tool I’m using on a given part. This is the hardest thing to convey - my tools are a mixture of antique and new, English, Swiss, German, American. The numbering system, when there is one, is not standard between them. Sometimes there isn’t one.
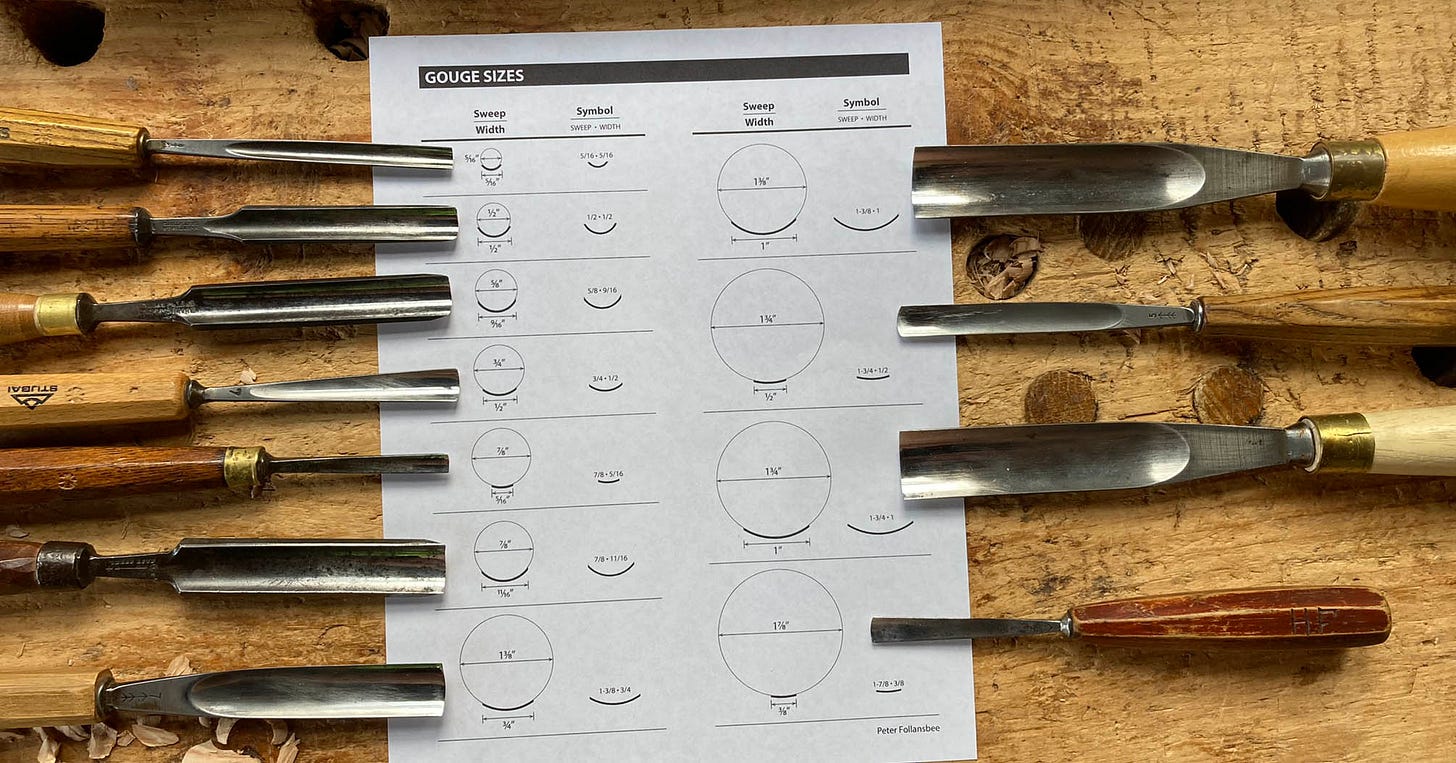
The route I’ve taken, with the help of Jeff Lefkowitz, is to render them with two numbers - the first the “sweep” - the circle a particular gouge is a segment of and the 2nd number indicates the width. One tool I use on most every carving is a Swiss made #7 that’s about 3/4” wide. It is a segment of a 1 3/8” diameter circle - so I’d call it a 1 3/8” sweep, 3/4” wide. (yes, I know Swiss made tools are metric - there’s only so far I’m willing to go). I copied the idea of this designation system from Hans Karlsson - I don’t see the “sweep table” on their website right now, but these things change from time to time. https://klensmide.se/?lang=en
I printed out the chart Jeff made for me so I could mark it up as to which tool is which. I mostly know them by the handles, so when I’m carving I think “oh, the hickory antique one…” and grab them accordingly.
Here’s that chart as a PDF - it’s one page. Lately I’ve added some tools to my kit, so have to get a hold of Jeff to update it. When we do, I’ll post it again.
When I’m finished with the video subscribers to this blog will get a code for a discounted price. We’ll get to it. Meanwhile, the view one recent morning - down river.


I meant to include a link to the Lie-Nielsen videos. They're still valid - I'm happy with the results and think they still stand up. But time moves on and I'm sure I've changed either how I carve or how I present it. Books, videos, etc - they're just a snapshot in time... https://www.lie-nielsen.com/nodes/4243/home-education-videos-peter-follansbee
Ted often shot the river--happy to see the tradition continued--