[today’s post is free-to-all, a re-write of one I did in 2011, with added video.]
It doesn’t matter why, but I’ve been cleaning the shop this week - just back from teaching the box class and about to go to Yale for an afternoon of demonstrating period joinery for whatever students that show up. So unpacking, then sorting to pack what I need for the Yale demo.
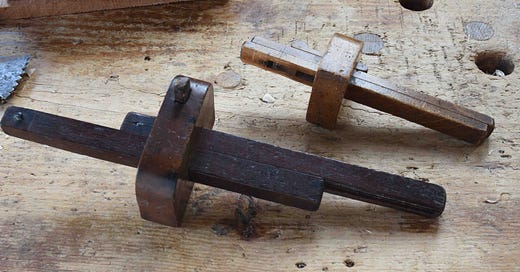
In all that hustle I ran across two mortise gauges cleaning up the 2nd bench - I remembered one of them, but had forgotten the other. I wrote about them both 13 years ago, when I had just acquired one of them. I copied some of the photos from the old post and added a video showing how the gauges work.
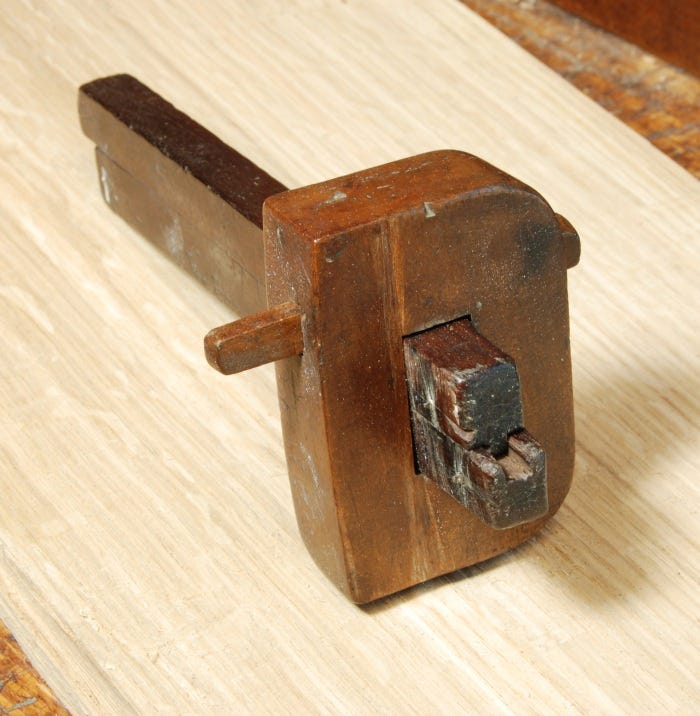
They’re both old, how old I don’t know. Both are nice tools with some interesting features. The beech one (top/right in that photo above) is more involved than its neighbor. I tried unsuccessfully to copy it many years ago. I’ll start with that one.
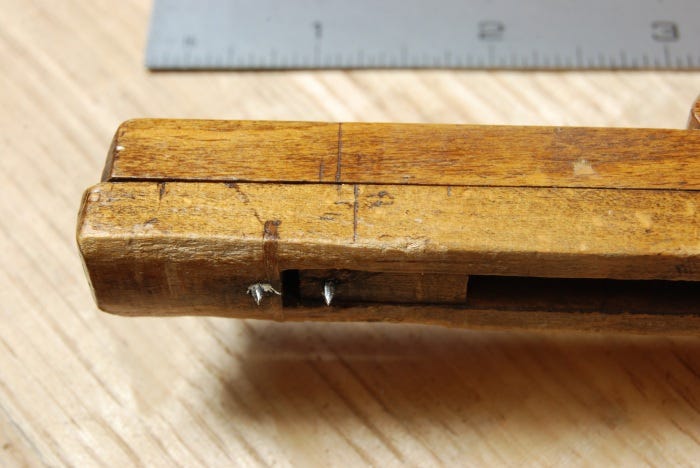
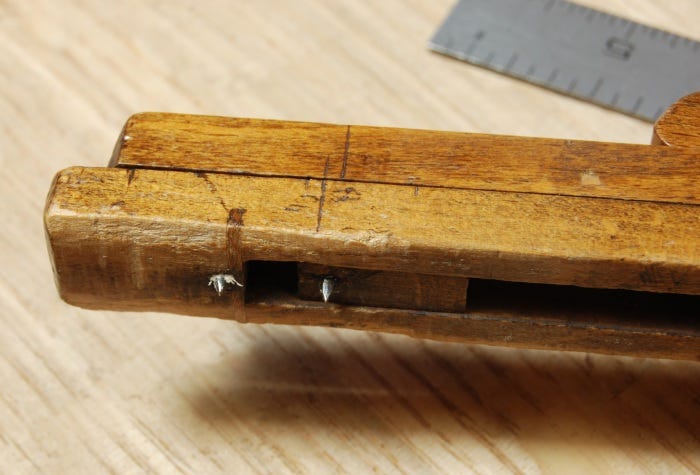
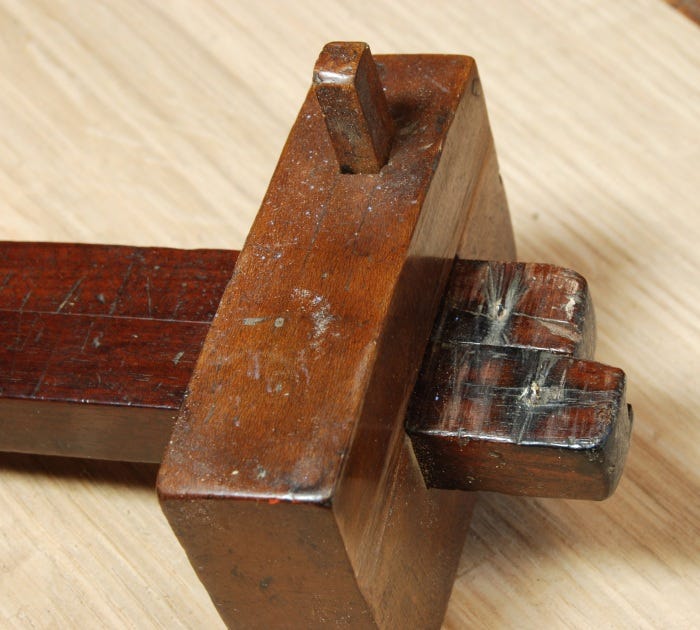
Two beams slide through the mortise in the fence, but they’re connected to each other in two ways - one is a small block mounted on one beam, with a pin inserted into it. That block slides in a through-mortise chopped in the other beam. A pin inserted into that beam just beyond that mortise becomes the fixed pin, the one in the block moves as you slide the beams forward and back.
At the tail end of those beams is another connection. A small brad driven into the beam that has the block in it is nipped short and slides in a slot cut in the matching beam. Ingenious.
There’s more to it than that. There’s registration marks scribed on the beams to line them up according to the mortise you want to mark out. Shift things this way & you have 5/16”
and this way gets you 7/16”
When you line up the two longer scribe marks you get a 3/8” mortise. I didn’t get a shot of that - but it’s in the video.
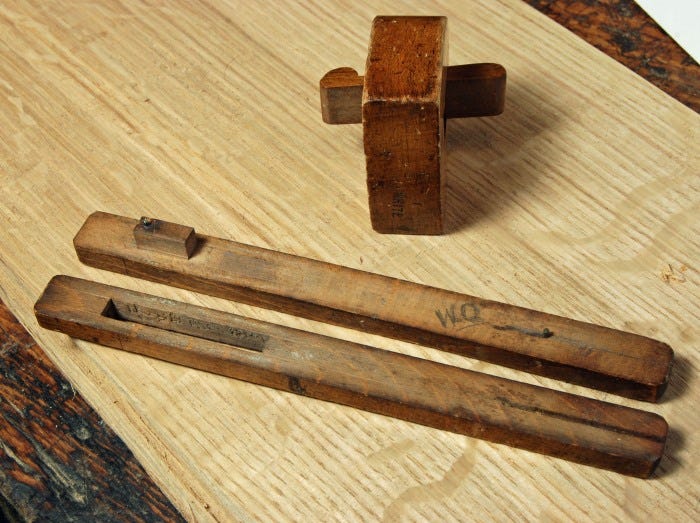
The other gauge I bought at Ed Lebetkin’s when he had a shop above Roy Underhill’s school. Two beams again, connected with a tongue-and-groove run along their mating edges. The pins are both on the same side of the beams -
Here you can see the pins - so you set each beam according to the spacing you want and simply tighten the wedge that locks them into the fence.
I shot some video of these two gauges, then kept going and looked at two others I often use.



I don't remember where you wrote about the first gauge some time ago - Popular Woodworking Magazine maybe? I made one, but didn't understand your description of the width marks. That was clear this time, I'll add the marks in the morning. I sometimes have trouble getting both pins to leave a mark with them on the same side, so having to flip the gauge over might not be all bad.
So, talking to Yale students? Quite the challenge.
Just speak reeel slowww and loud, so they don’t get all confused…