the dressing box - small-panel, faux muntin decoration

[I don’t use my old blog much, mostly as an archive. But I just posted a non-woodworking piece there - because there I can let it sit for a while. About a door with 20 years’ worth of observations about weather, birds, etc - I could use help deciphering it if you’re inclined. https://pfollansbee.wordpress.com/2026/05/30/a-19th-century-door-with-a-local-story/ ]
In the past few days I got back to the dressing box I’m making. It had been stalled for a bit, then log-splitting took priority over it. But now I’ve pushed it forward and began assembling it. One holdup was the top front rail - I had to finish its decoration before I could begin assembly. I’ll back up & talk about what that decoration entails - it’s one aspect of this body of work that gives me the most trouble. I’ll start with this related cupboard, now at the Metropolitan Museum of Art in NYC.
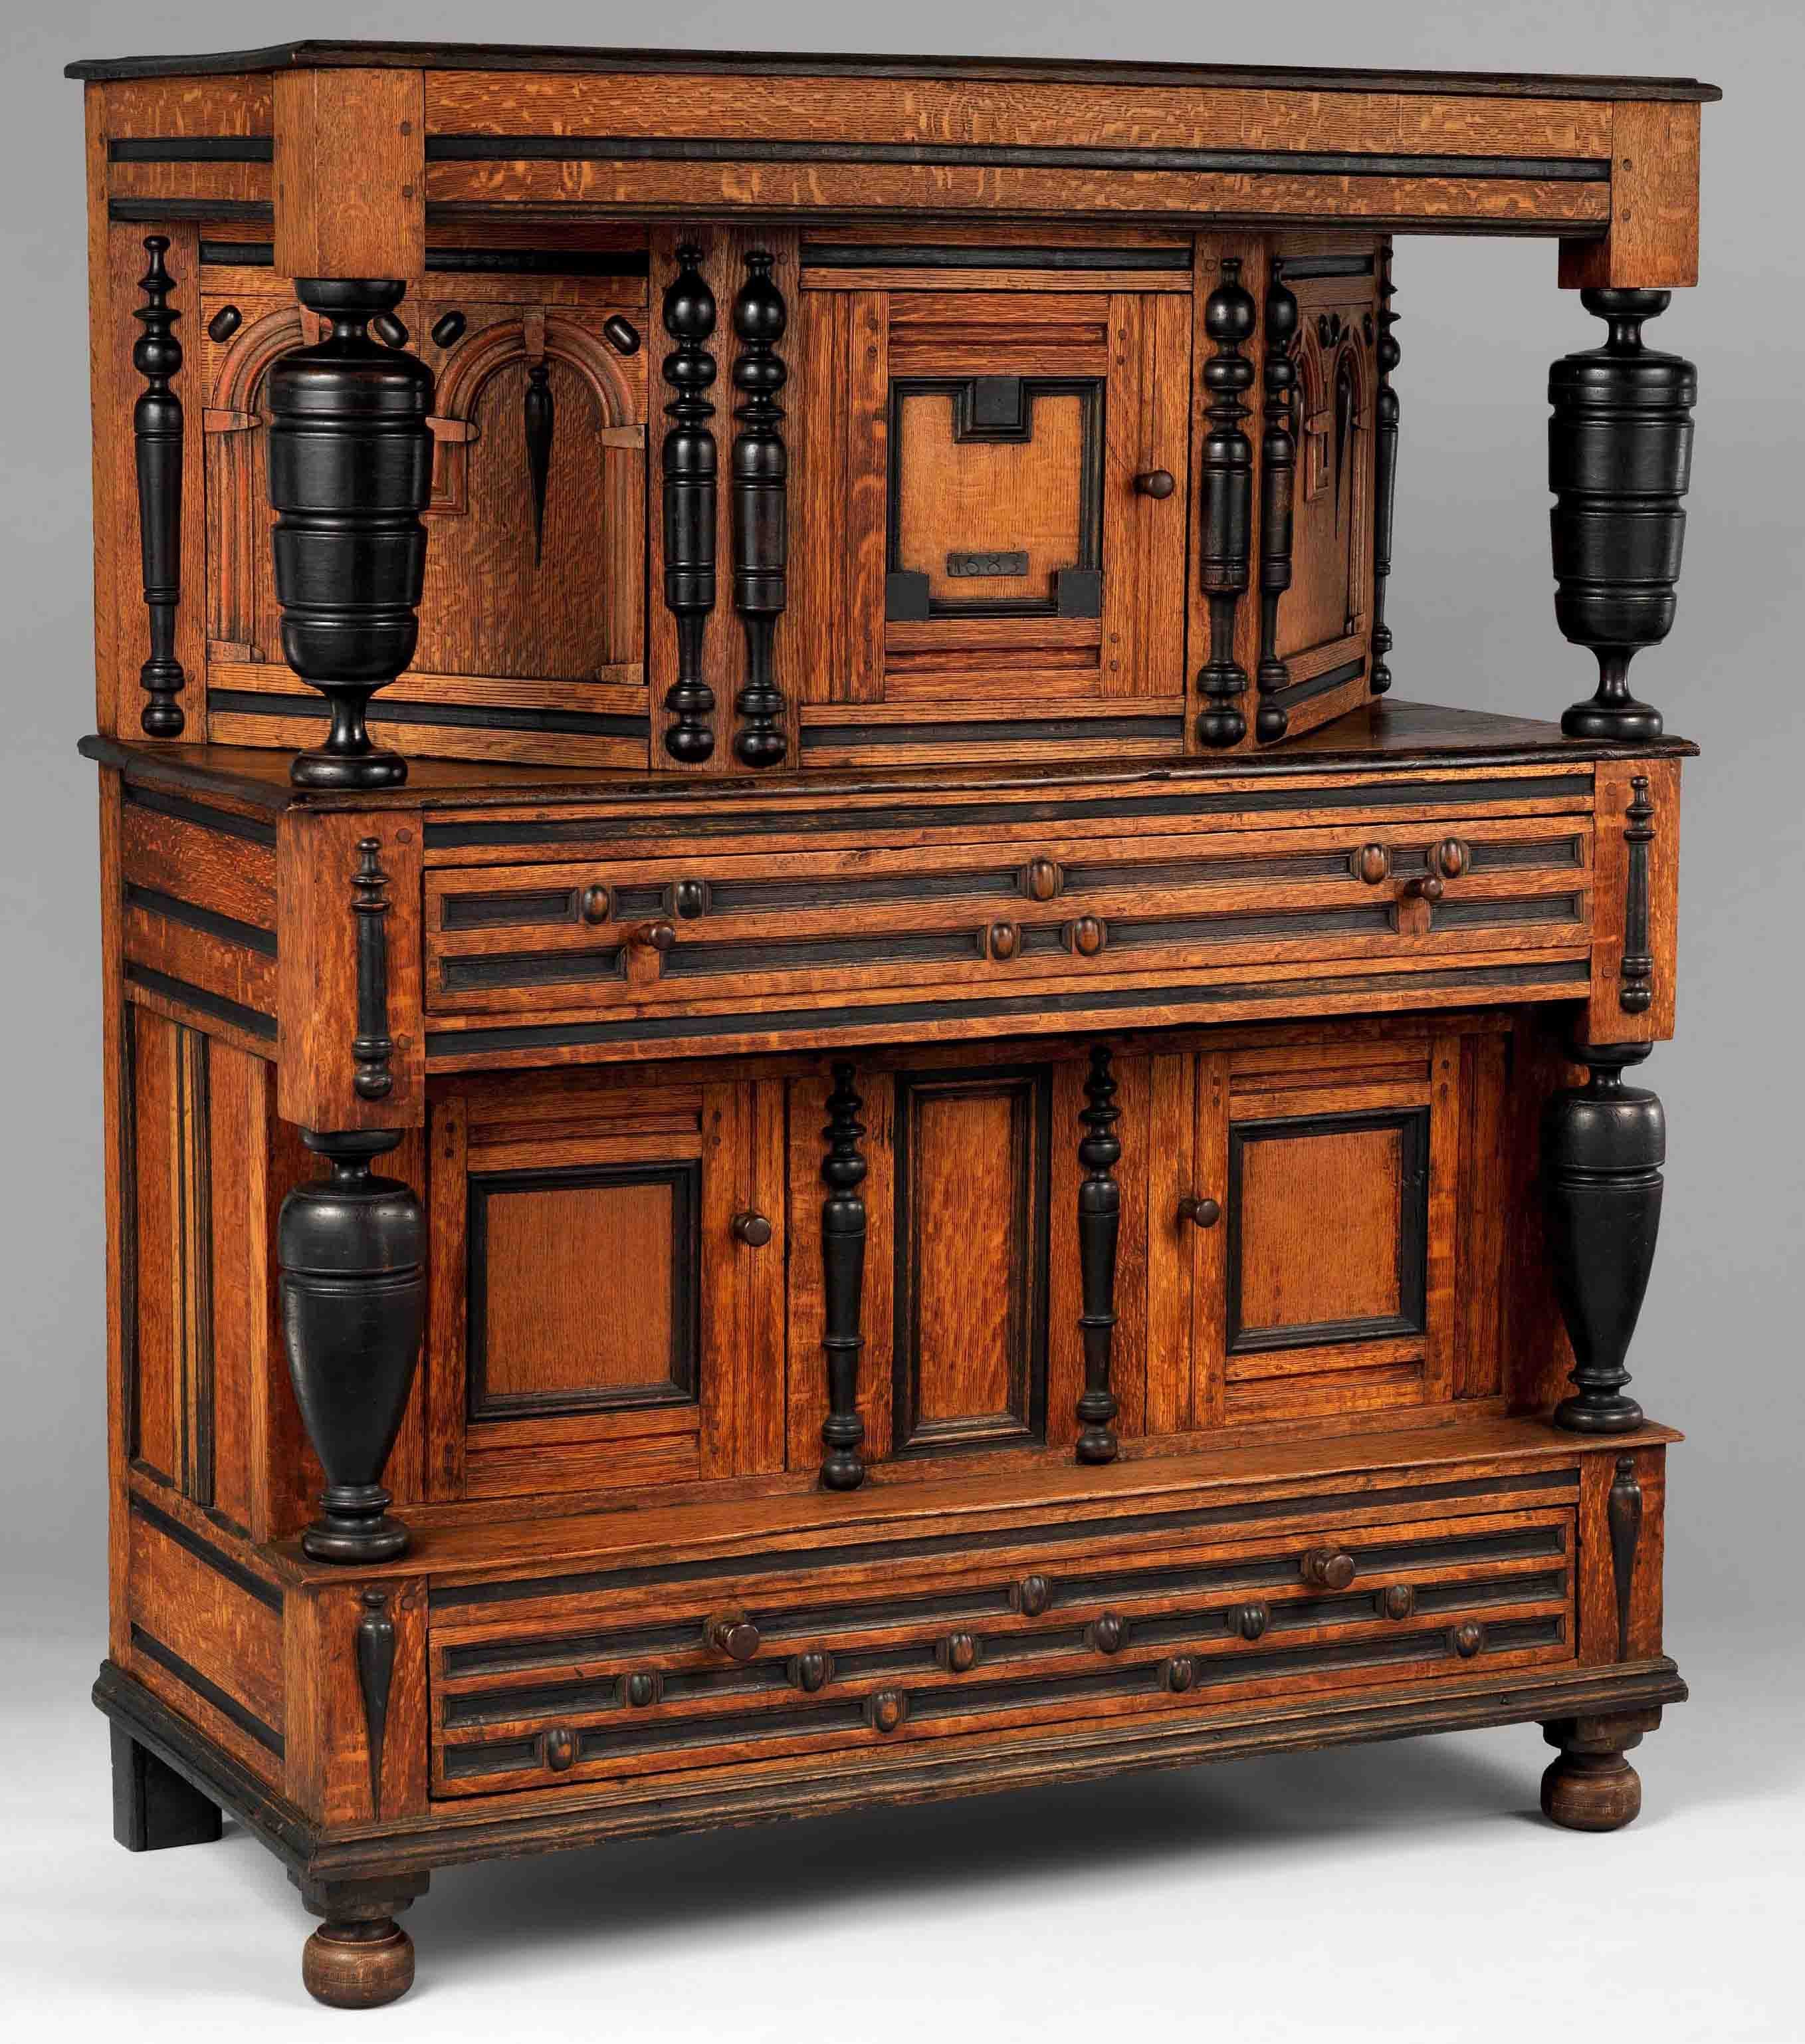
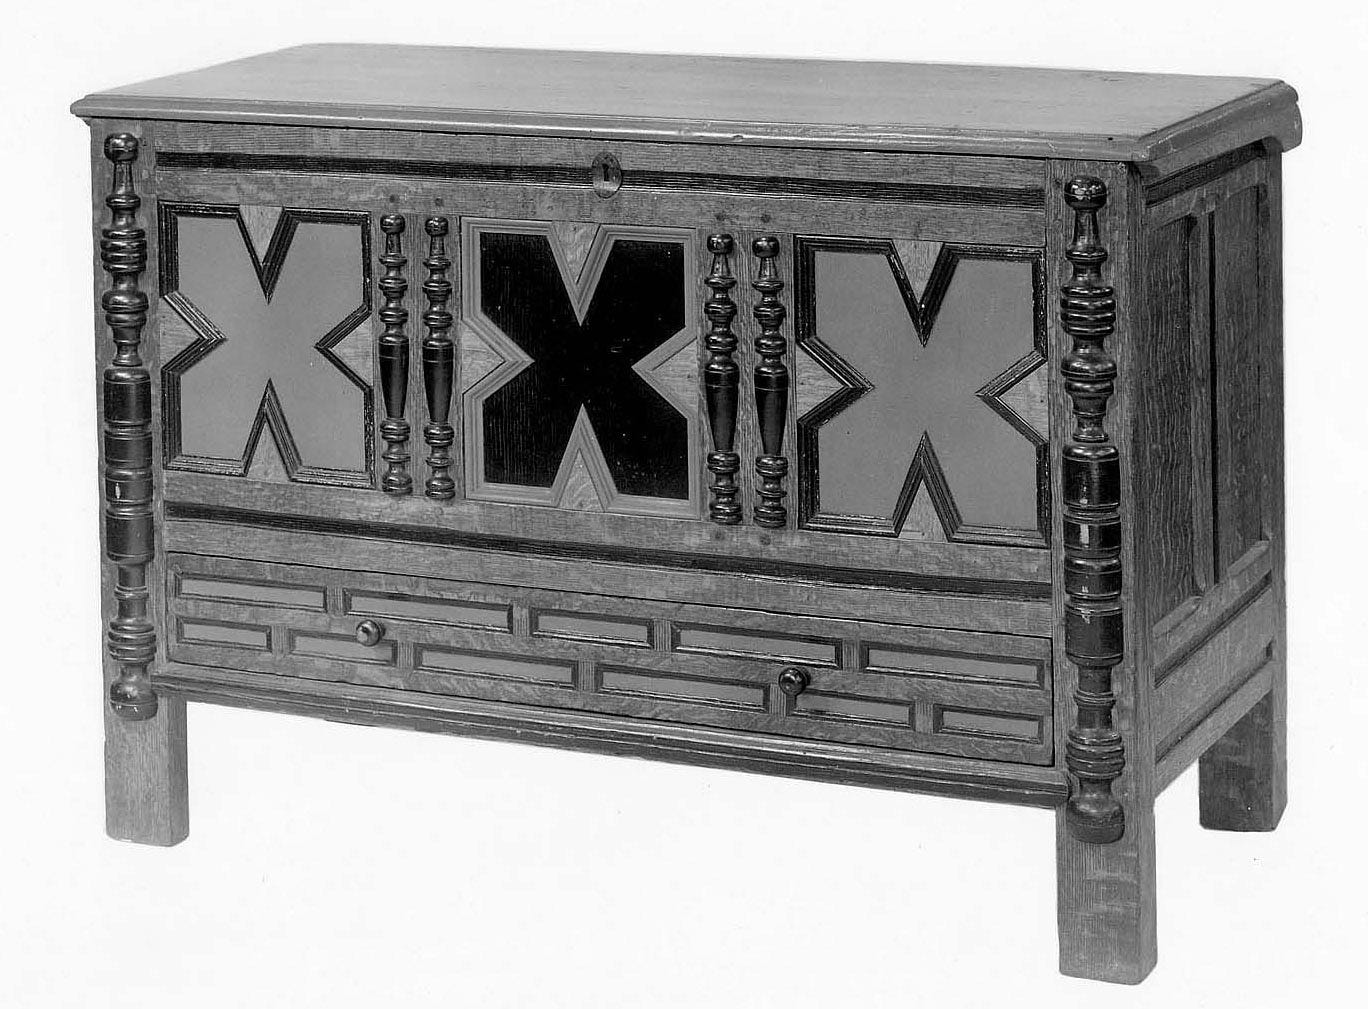
The decoration on the two drawers is what we’re looking at. Irving Lyon, writing in the 1930s about this work, called this “the small panel” feature. It’s 2 rows of molding flanking a flat-bottomed groove. Then applied inserts are mitered to split the rows up - making it look as if it’s a series of small framed panels. It’s a hallmark of this unidentified shop - they’re not the only ones to do this, but they use this feature a lot. Shows up well on the drawer of this chest at the Museum of Fine Arts - disregard the early 20th century paint job -
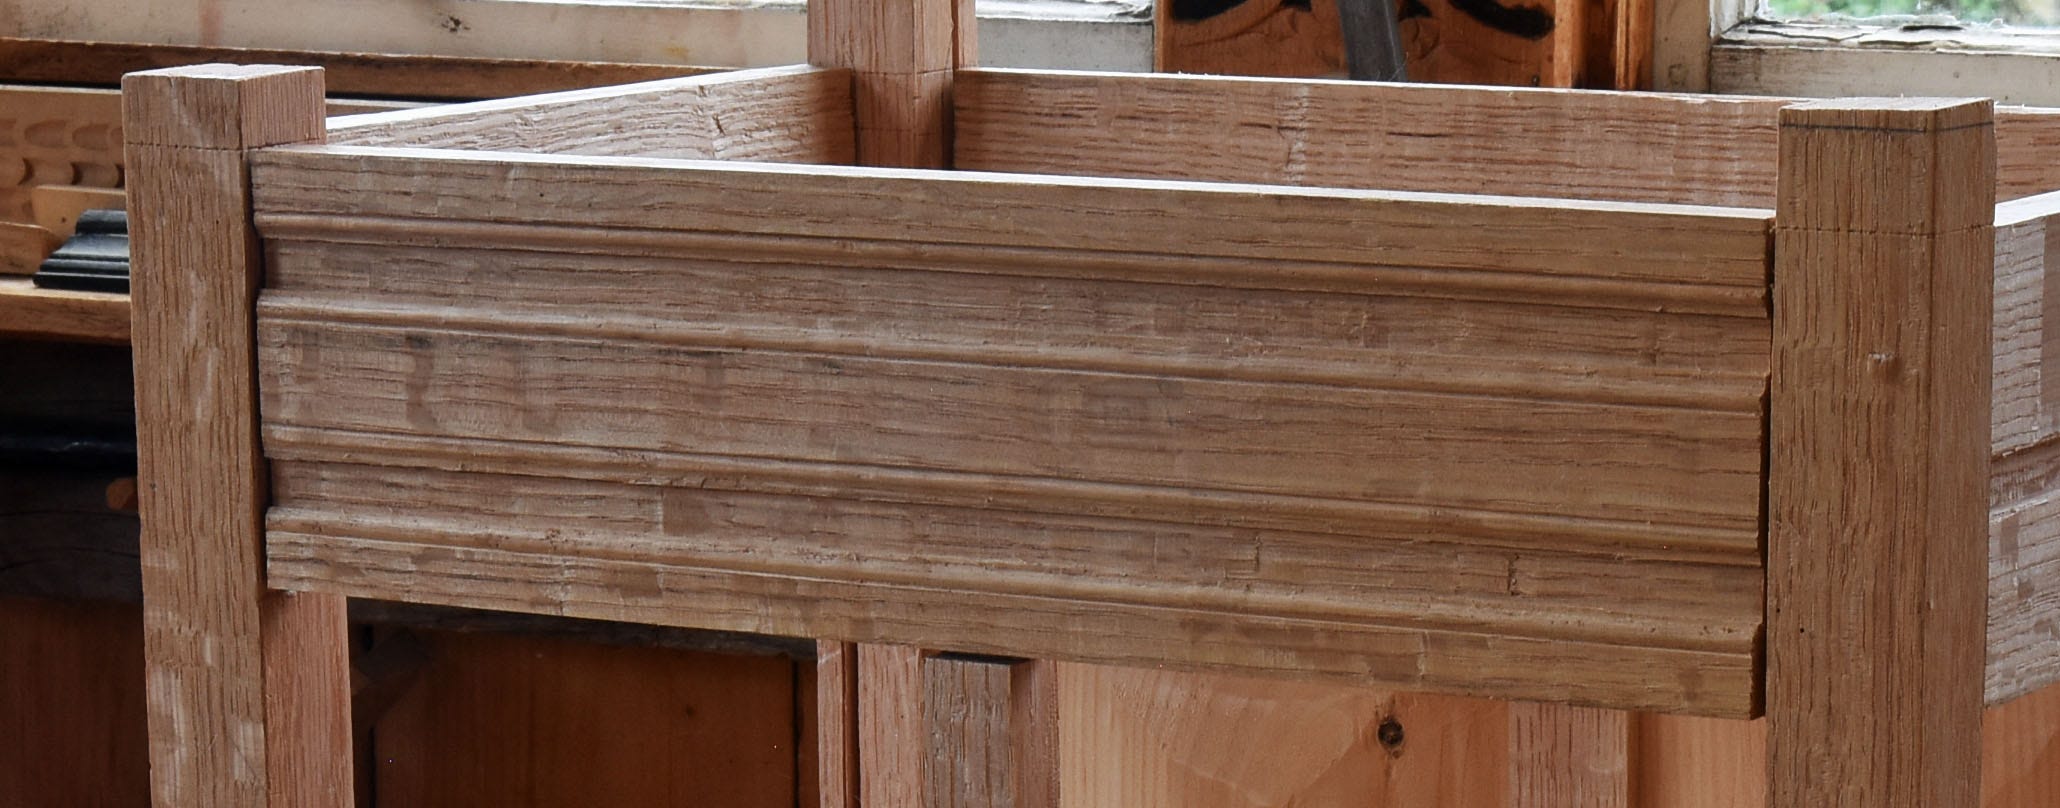
I had cut the moldings on my top rail before cutting the tenons - first a plowed groove then a scratch stock running alongside both edges of the plowed groove. Here’s that rail in an early test fit:
So I took it apart and made a strip of very thin oak, about 1 1/2” wide. The thickness should match the depth of that flat-bottom groove - in my case, 2 1/2 sixteenths. Now comes all the fussy details. I mitered the corners on one end of the “muntin” blank - then held it in place to scribe where the opposite end would be. From there, two more miters laid out with a miter square. The overall length of the muntin equals the distance from the outer edge of the top molding to the same point on the bottom molding. It should be the same on all of them, but usually isn’t. These moldings are made by scraping - so some sloppiness creeps in.
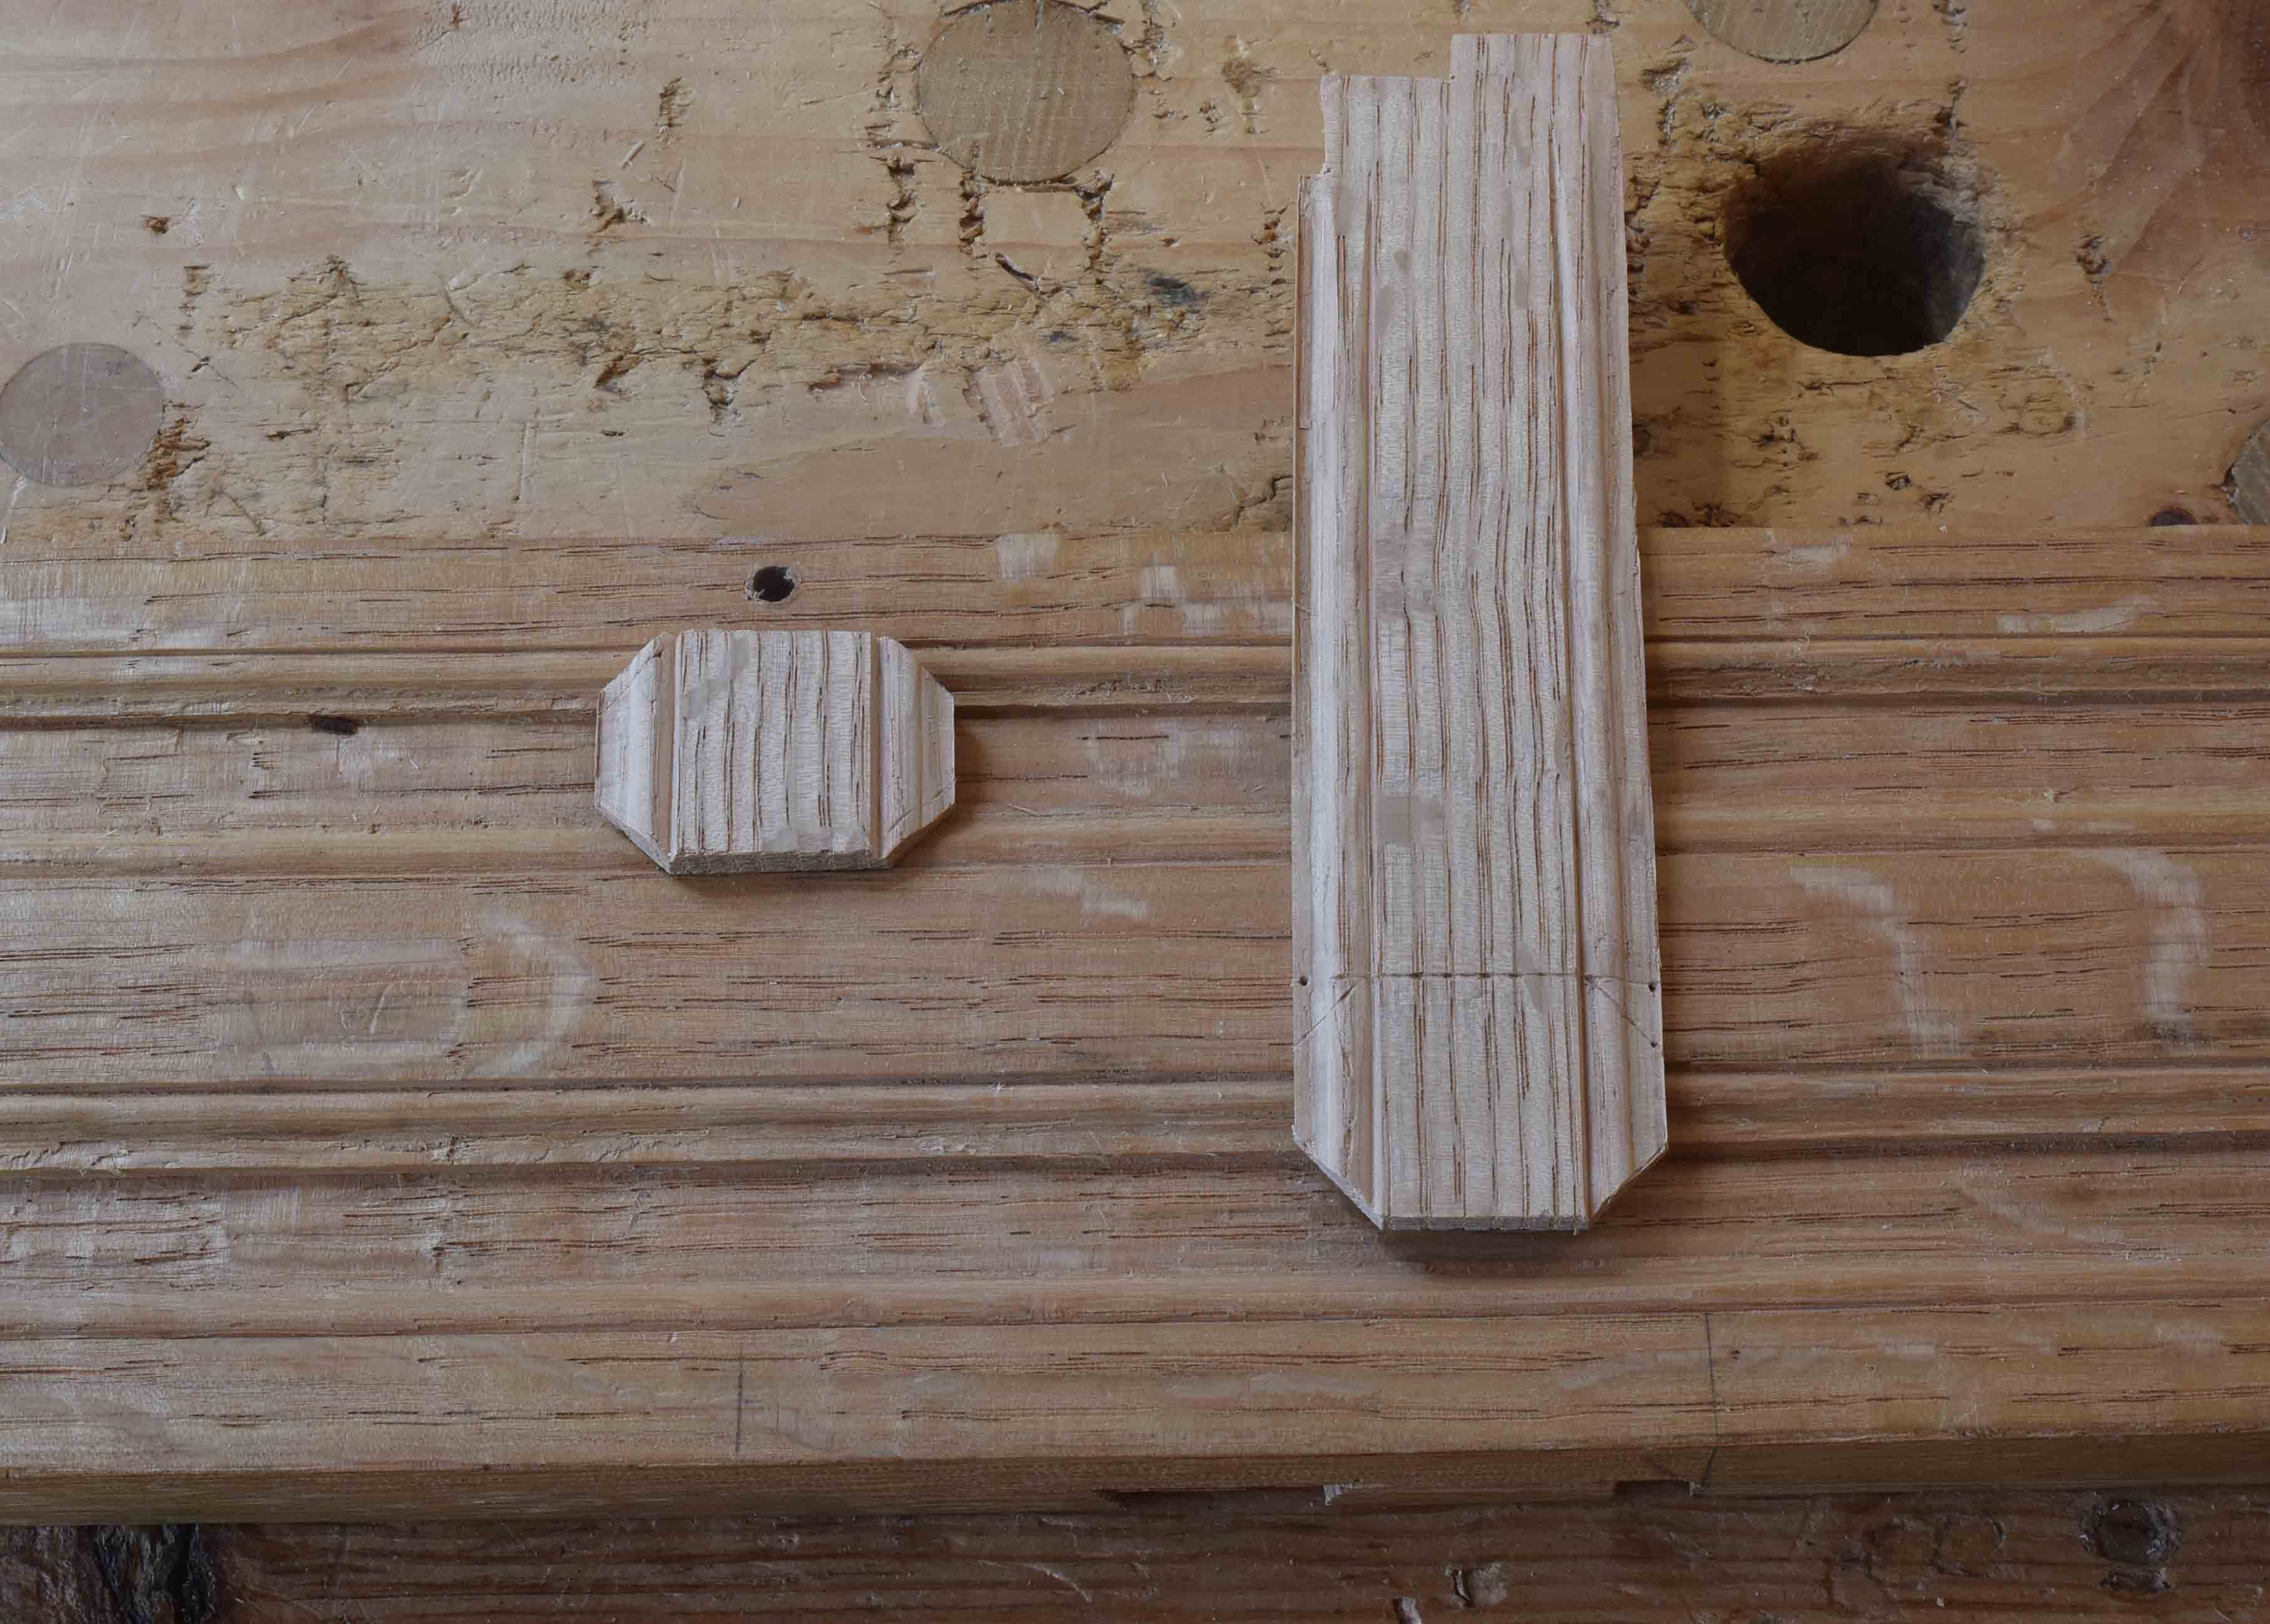
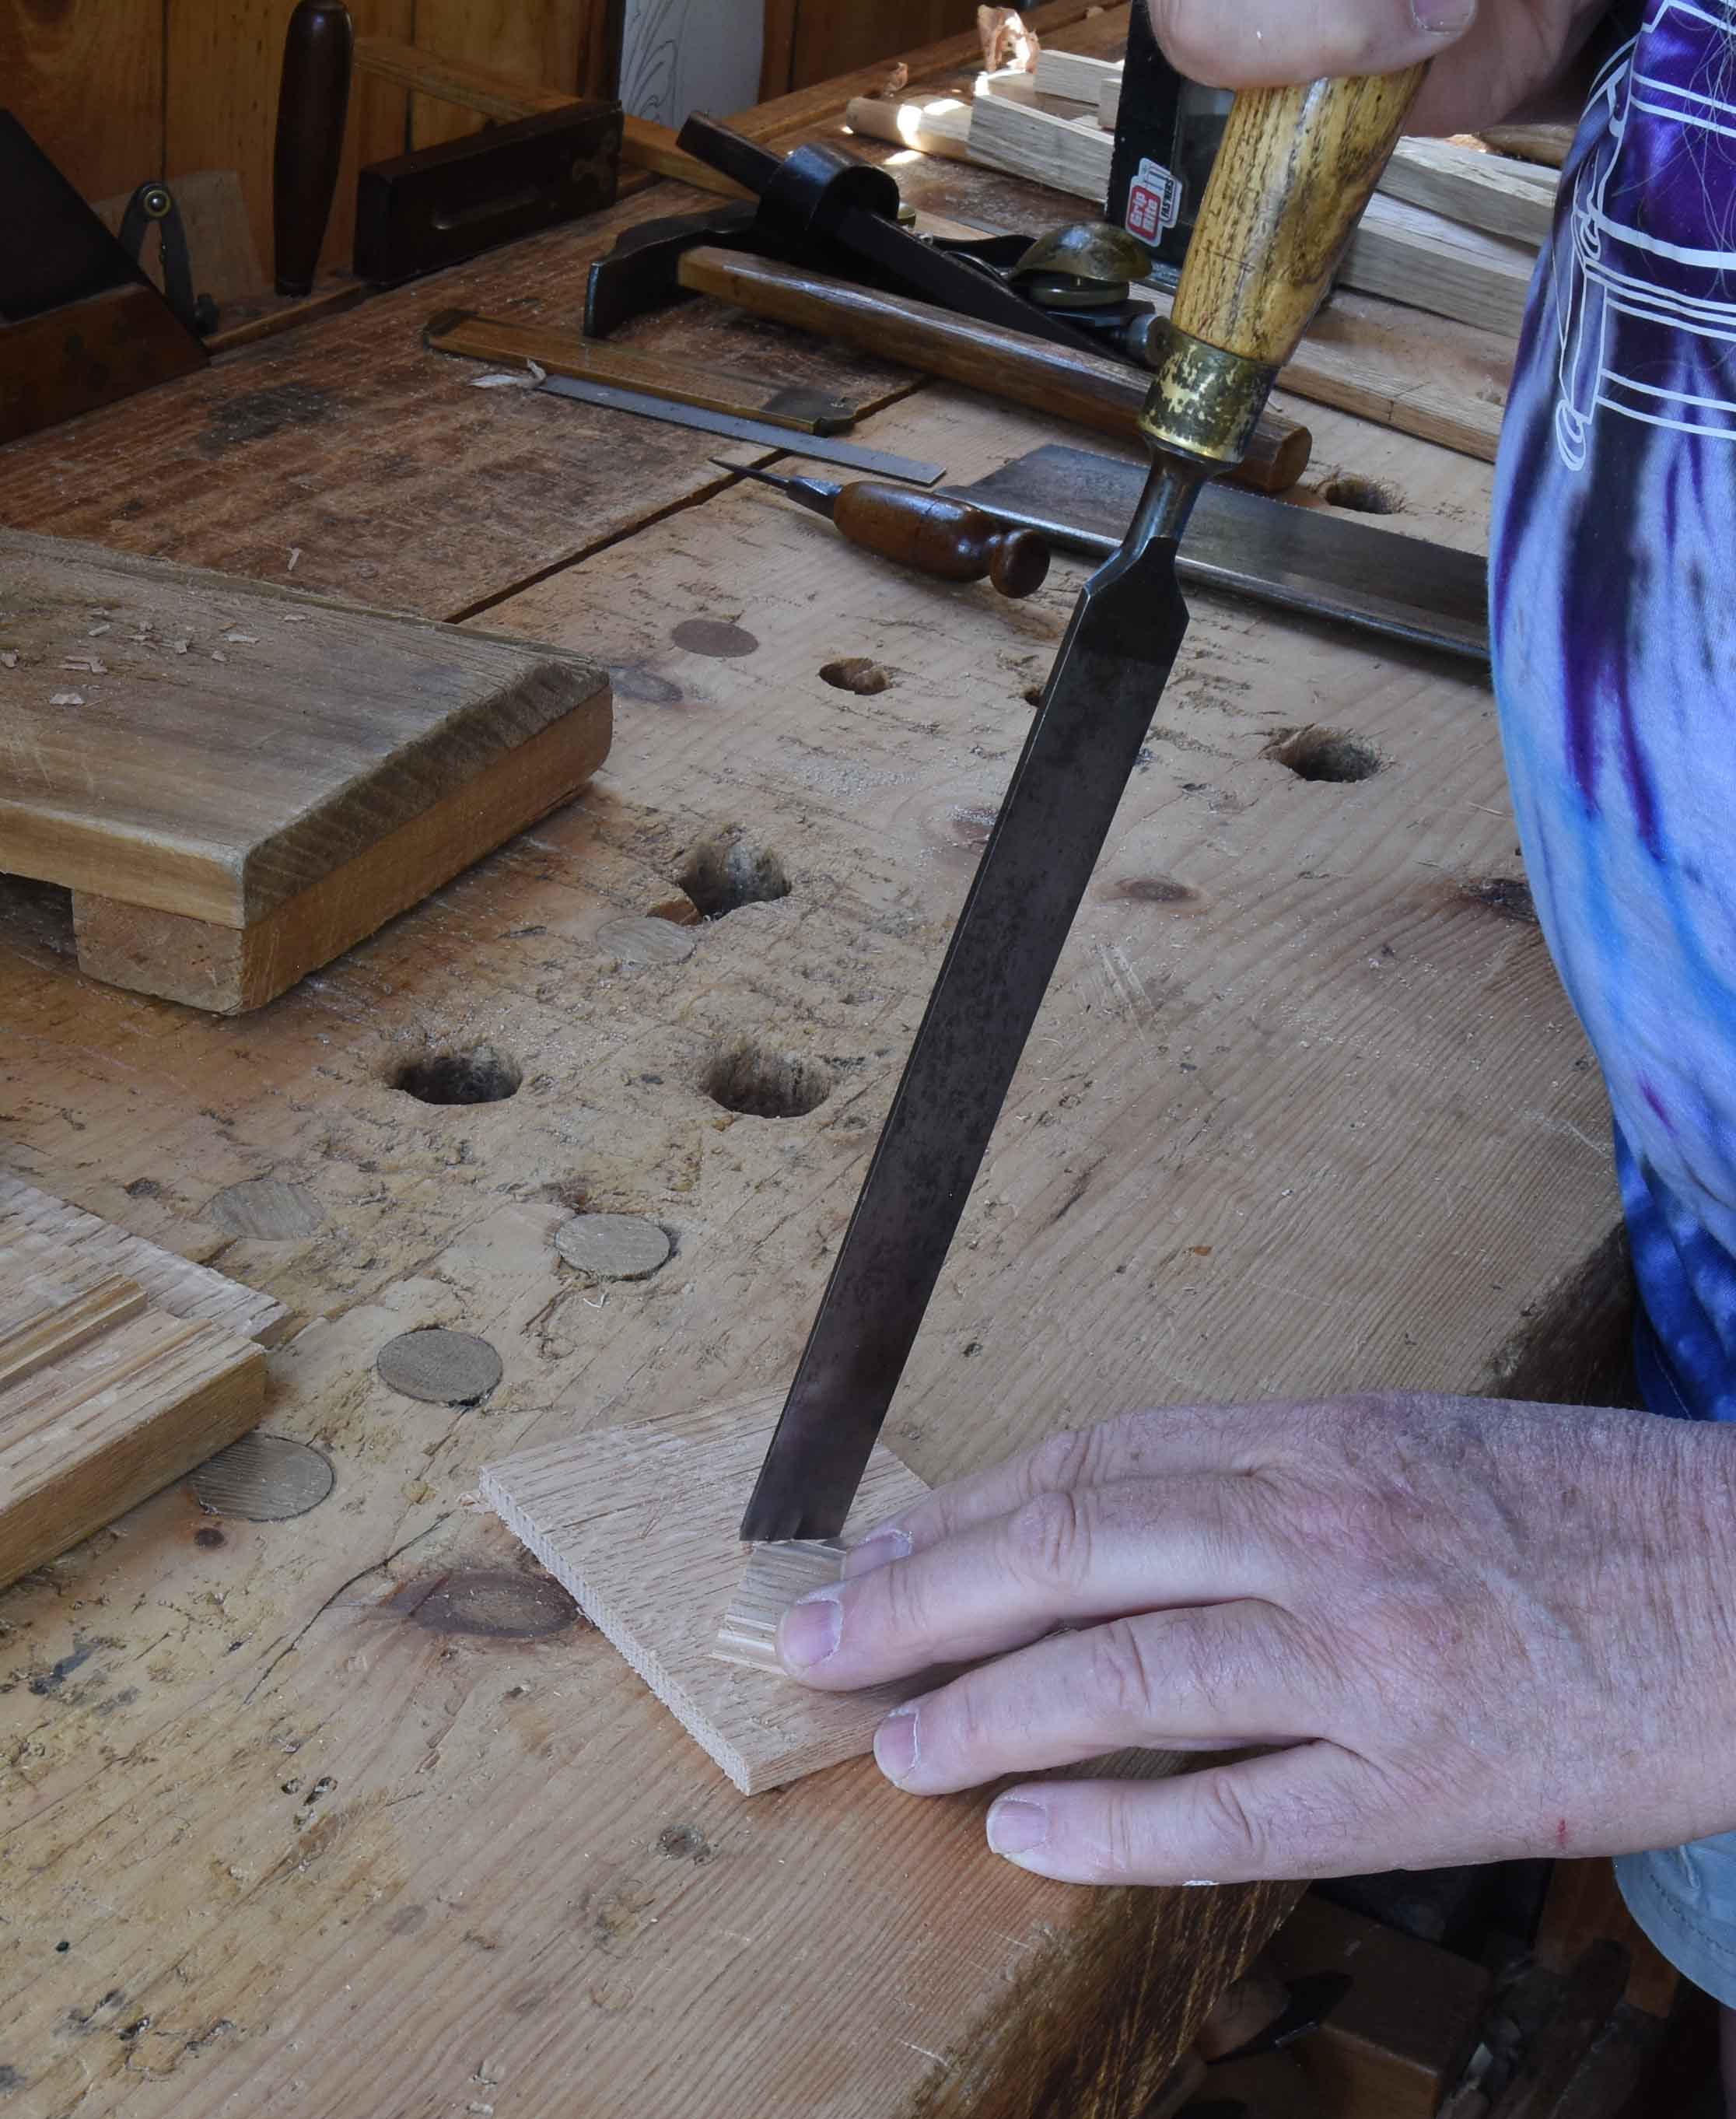
I don’t bother with a miterbox for these pieces, they’re too short to hold in the miterbox. I cut the square ends with a backsaw, then pare and chop the miters with a long paring chisel. The material is so thin it’s not difficult. I use a levering action to slice across the miter - taking small bites until I reach my scribed line.
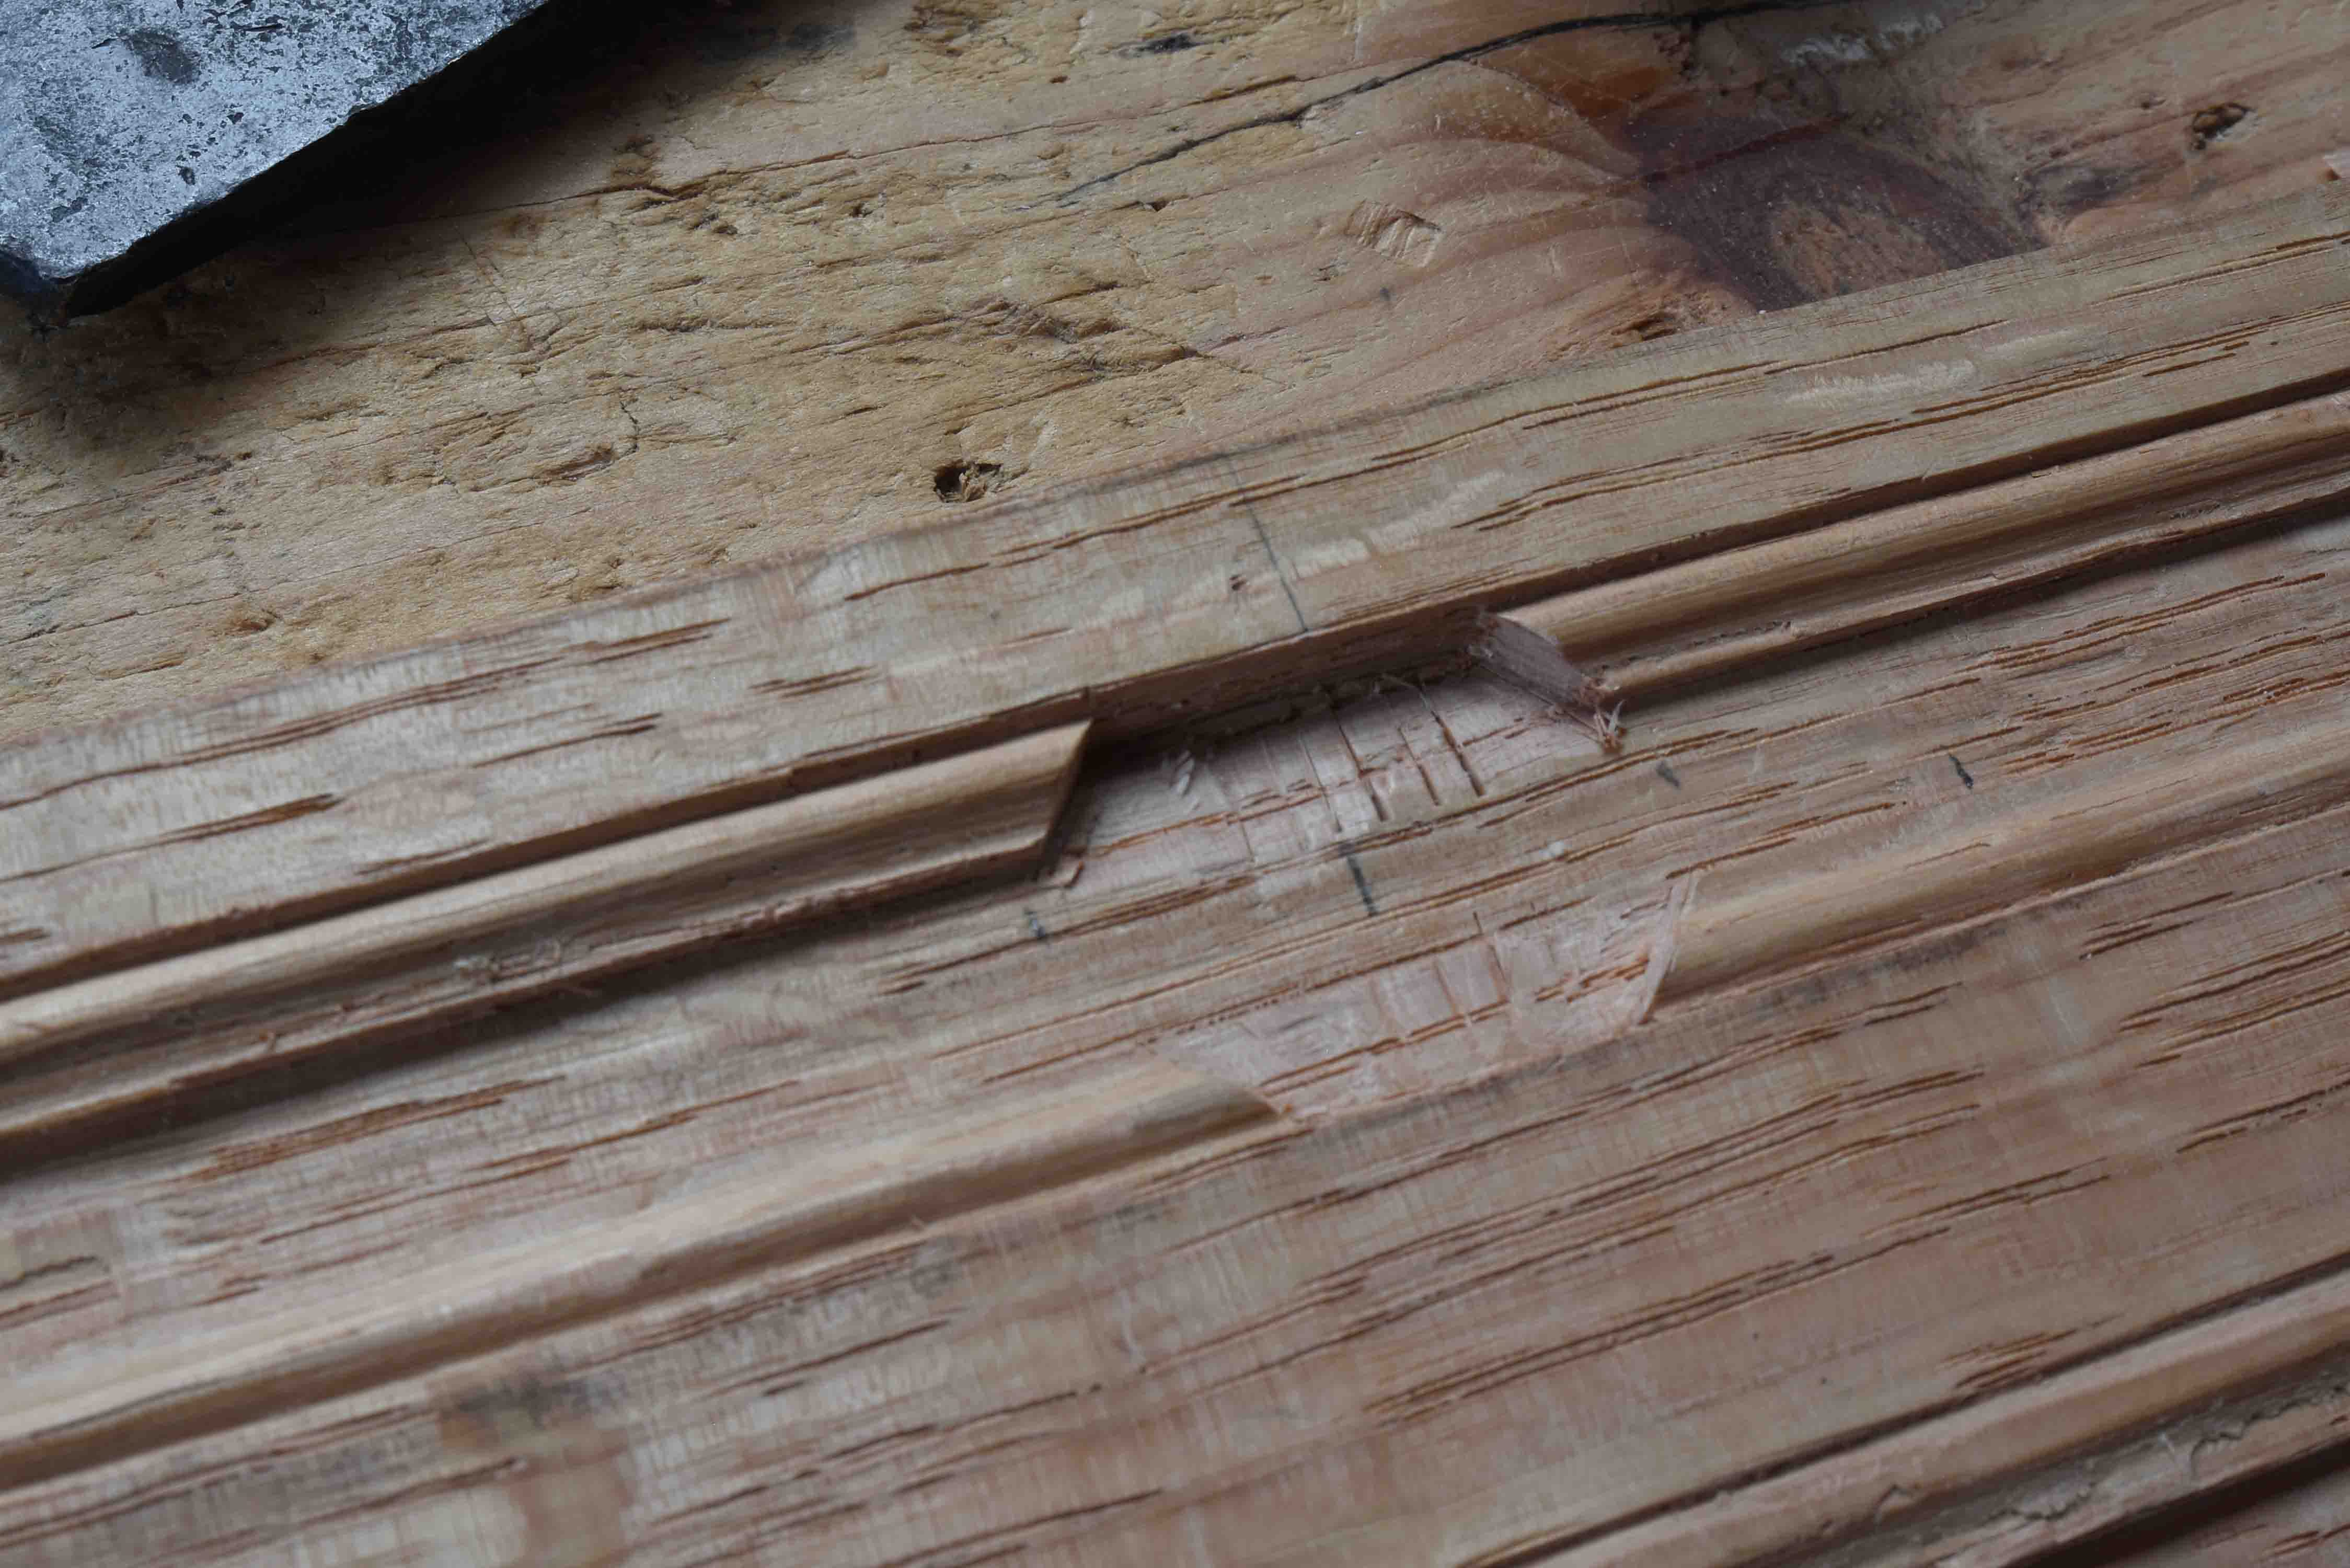
Then comes chopping into the molded rail to make the cavity these muntin pieces drop into. More scribing, then more chisel work. First chopping into the molding:
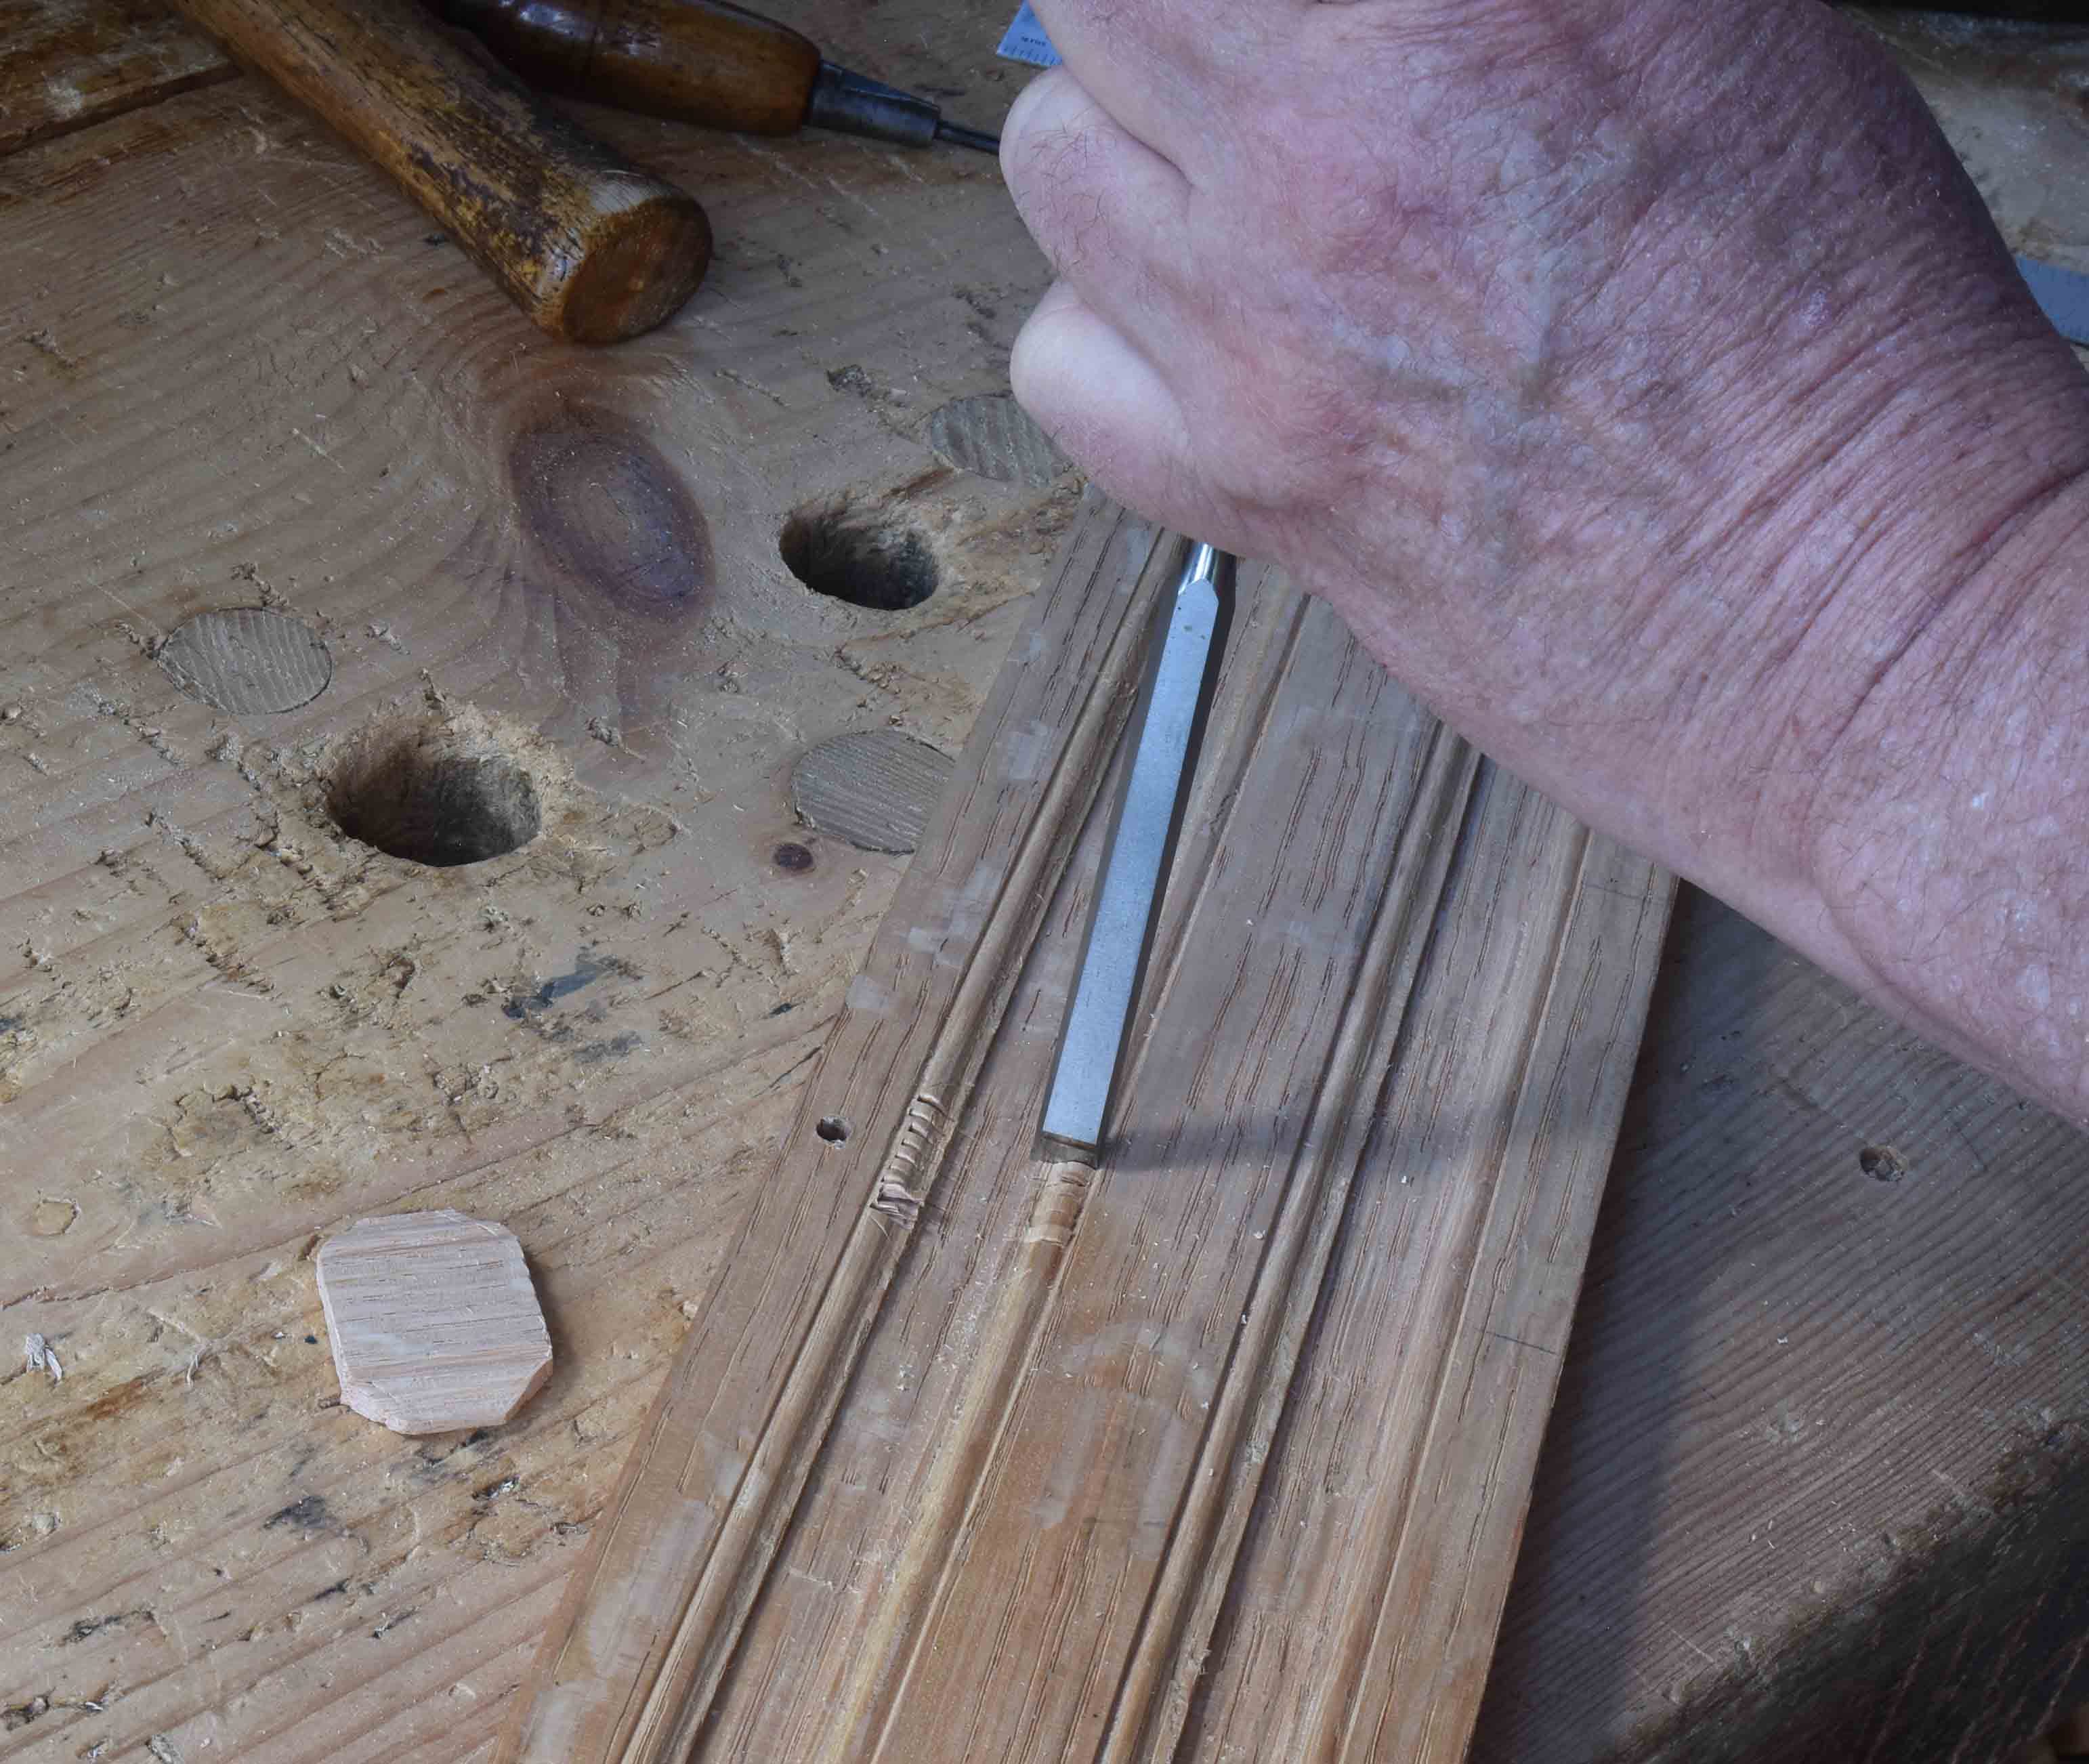
Then detail cutting to reach my scribed lines and bring the cavity down to a flat, even depth.