


Reposted: a look at layout for the Dedham chest carvings
my layout ideas

[August 16, 2024 - I scanned back through the blog to see what I had written about the Dedham Massachusetts carvings that I feature in my new video series. This is a post I did back in March of this year, as I was preparing for a demo at North Bennett St School in Boston. I’ve made the post free to all this time - so people can get an idea of what’s behind the carvings in the videos… which are here https://vimeo.com/ondemand/dedhamcarvingsfollansbee
Here’s the post from March:
I’ve written a few posts about the joined chests that we call “Dedham” chests - based on some of them clearly having been made in Dedham, Massachusetts between 1650-1700. (there have been 3 posts on the subject so far, all this month…)
Tomorrow I’m doing a stint as guest lecture/demonstrator at North Bennet St School in Boston. https://www.instagram.com/nbssboston/?hl=en - I’ve done similar gigs there every so often, it’s always fun. Captive audience, you know. One of the things I chose to focus on is carving the panel designs used by those Dedham joiners - the reason is simple. As first-year students learning how to prepare drawings one of the pieces they draw is the chest at Wadsworth Atheneum that’s part of this group. Seemed a perfect fit given my recent review of that material.
First question is what is the layout? Some have used a template; either half or quarter of the pattern. That works, but it’s not how it was done in the 17th century. My interest has always been to try to understand how this stuff was made then. So - no template. In those earlier posts I mentioned the 1979 article by Robert Blair St. George about this group - it’s where I first learned about them. St. George had a detailed diagram of what he thought the layout was. It’s easy for me now to look back 40+ years later & pick apart that work - but I have the advantage of having 20 years of daily practice making this sort of stuff - so I got to test all kinds of crazy ideas (& a few sane ones.)
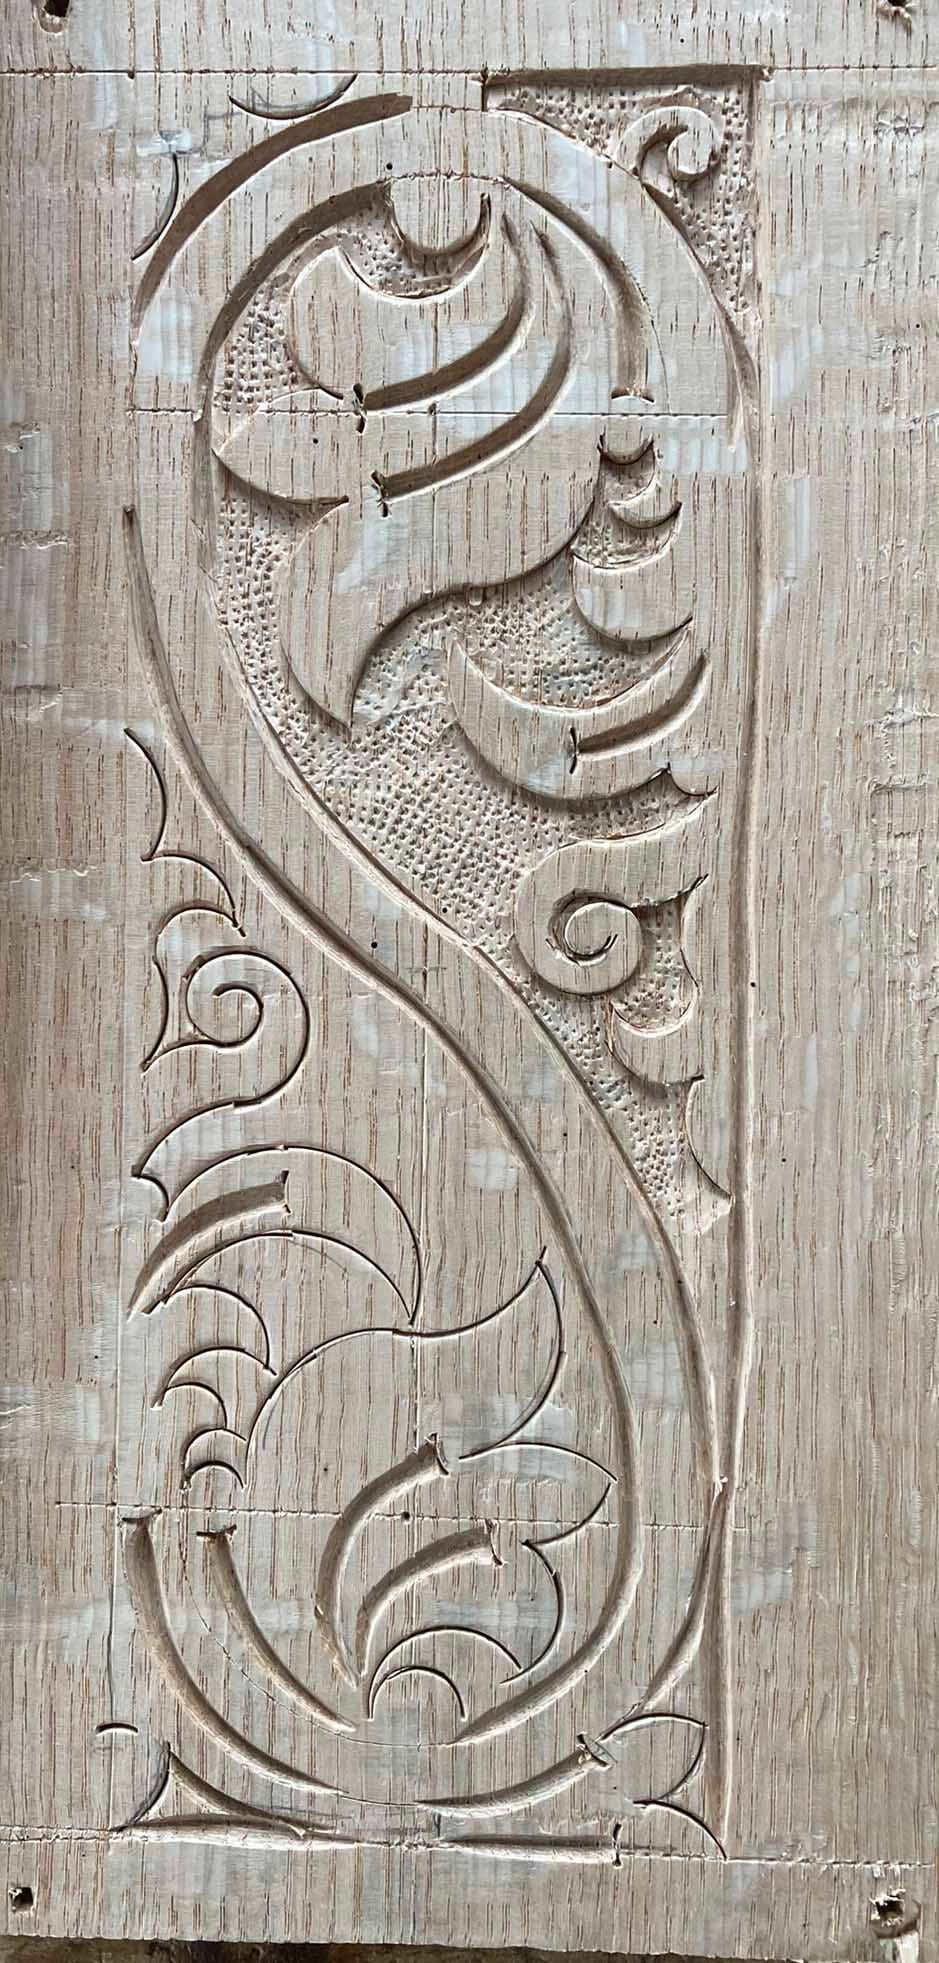
All those pizza slices are crazy - so I’ll show you what I think the best layout is, and some exceptions and alternate ideas. On some/most of the panels there are layout lines remaining - struck with an awl, marking gauge and compass. Here’s the one from Wadsworth -

A few factors - there’s a general proportion to the panels these joiners used. The ones I have overall measurements for range from 8 3/4” x 12” to 10 3/4” x 14” - most are in that c. 9” x 12” range. Some have wider margins than others - which affects the carving’s spacing. (there’s only one chest as far as I know with those c. 11” x 14” panels).
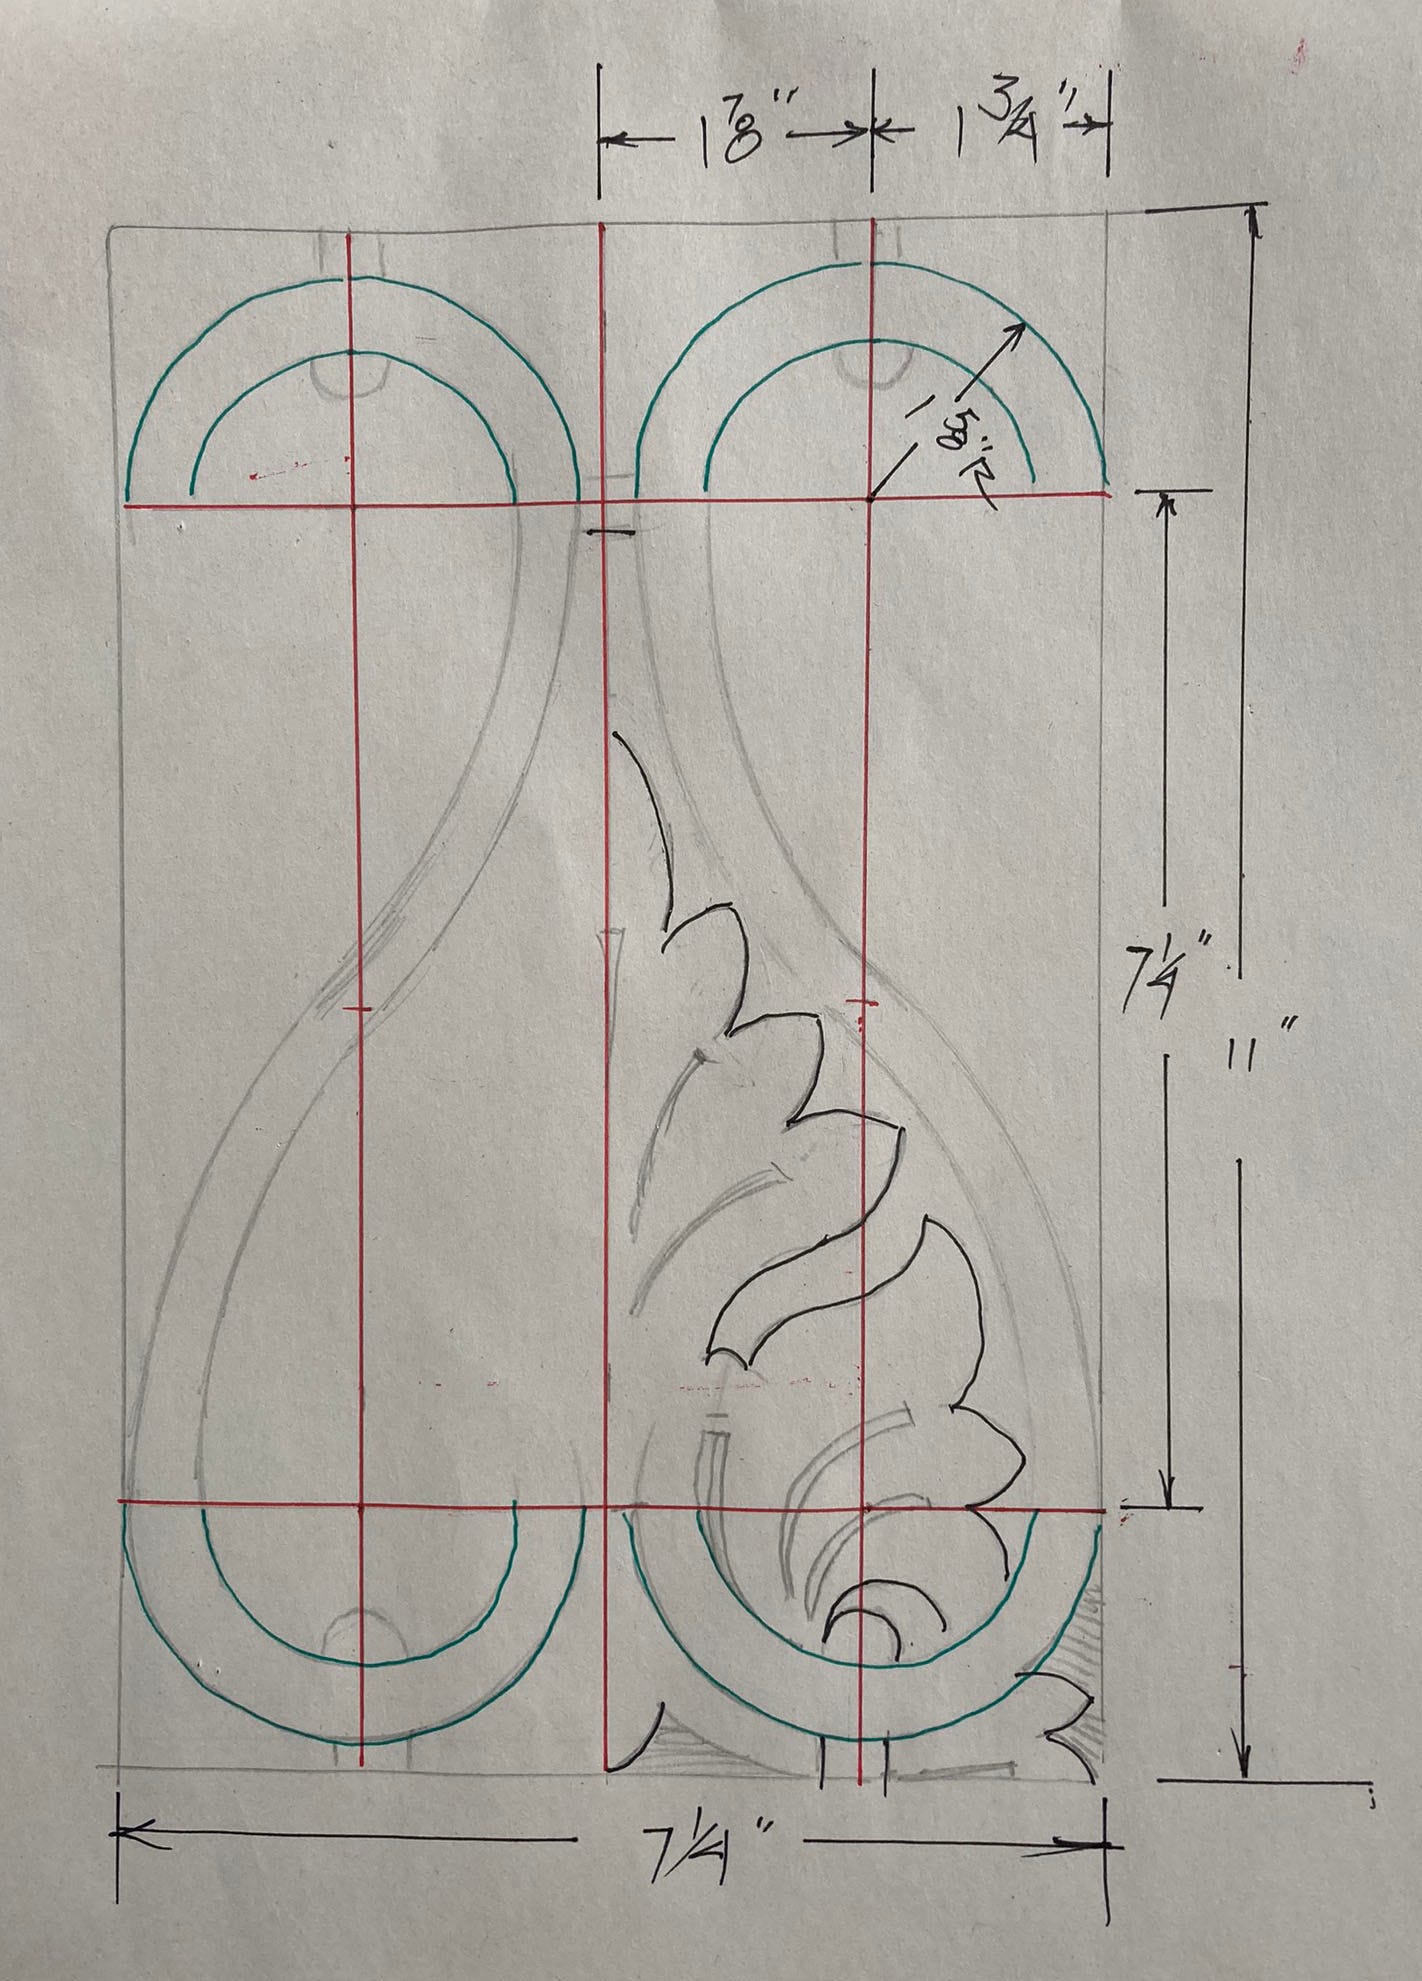
So I start with the overall width/height, knock off some margins - then start to figure things out. There are horizontal lines struck across the panel near the top & bottom - and vertical lines dividing the panel into 4 columns. These lines intersect at the centerpoints for the arcs top & bottom.
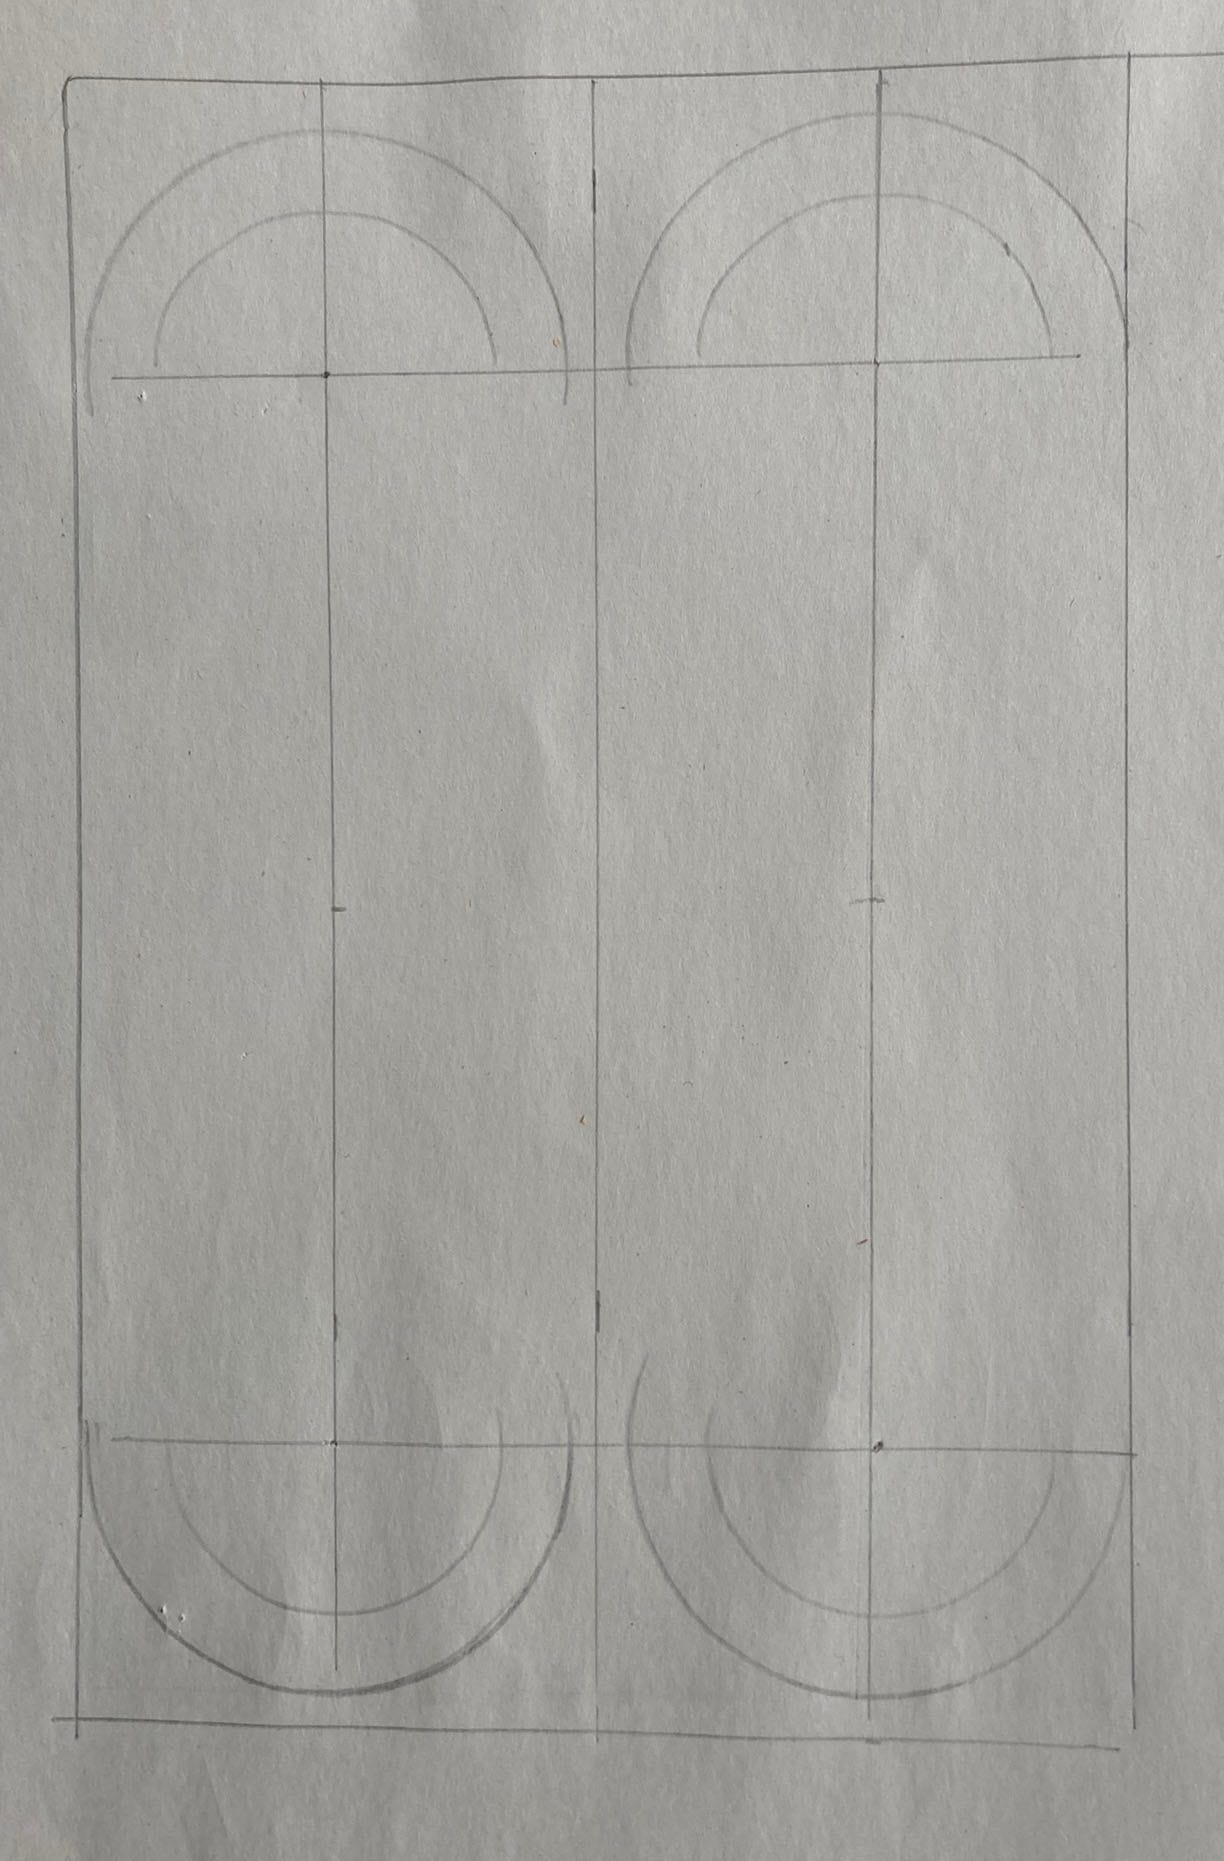
One thing to keep in mind - those vertical columns are not all the same width - there’s that space down the center. First comes the centerline, then I eyeballed an arc that reaches from the left/right margin to near the centerline and a similar distance from the top or bottom margin. That first centerpoint gives me the spacing for both the horizontal and vertical lines that come next. You don’t even have to know any numbers. Then I strike the arcs and reset the compass & strike the inner arcs.
[I think about these panels vertically - but I carve them & draw them horizontally - oh well…so that means some horizontal and vertical lines might be mixed up below - try to still think of the long lines below as the vertical lines and so on... ]
Next comes the part that frightens people - but it’s not all that hard. Freehand arcs to connect the half-circles top & bottom. I made a mark half-way between the two horizontal lines. That’s where the freehand arcs reverse.
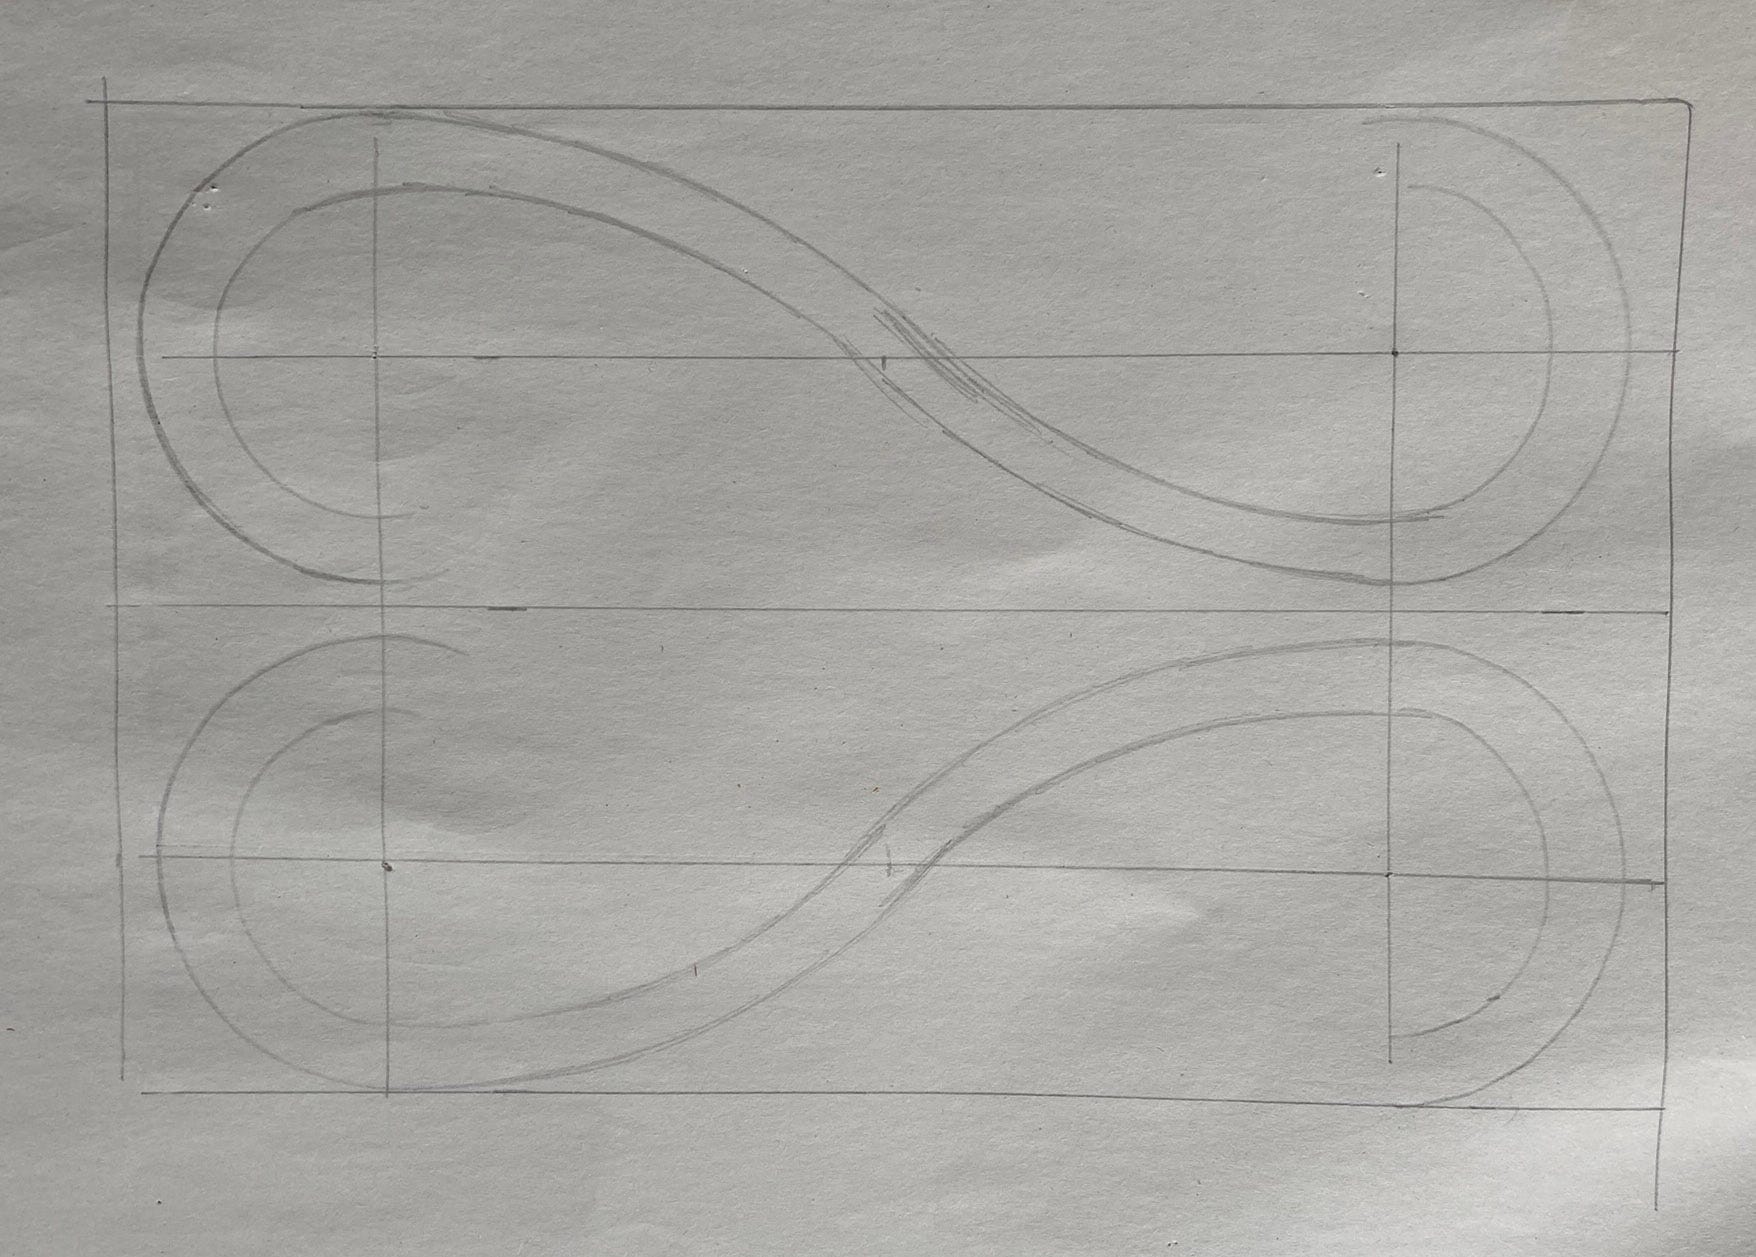
One way to think about it - is you’re only drawing a section of that arc at a time. I aim to connect the outer bit of the half-circle to one side of that center-mark I made. Then the inner arc comes to the other side of that center-mark. This is one part I have no evidence for - that mark I made along the vertical line - but I find it helps a lot. I’ve done them freehand by eye alone. I usually lay the heel of my hand on the panel and pivot from there to swing that arc. Try it, it’s easy.
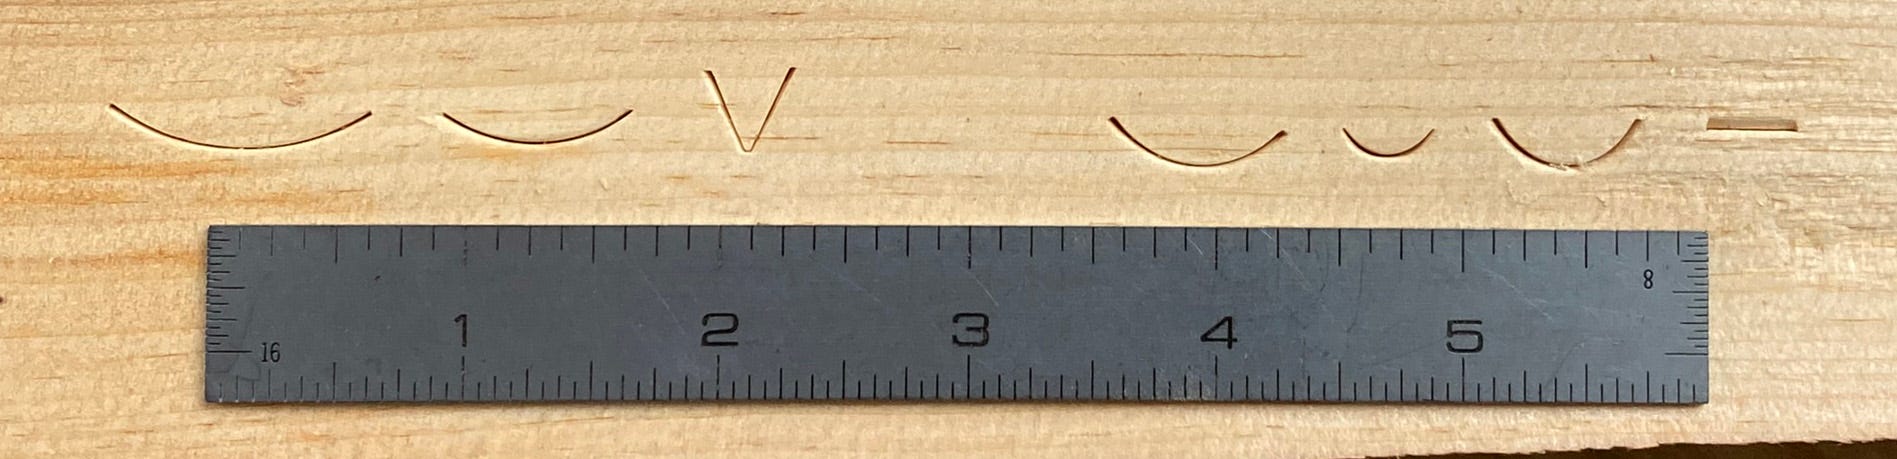
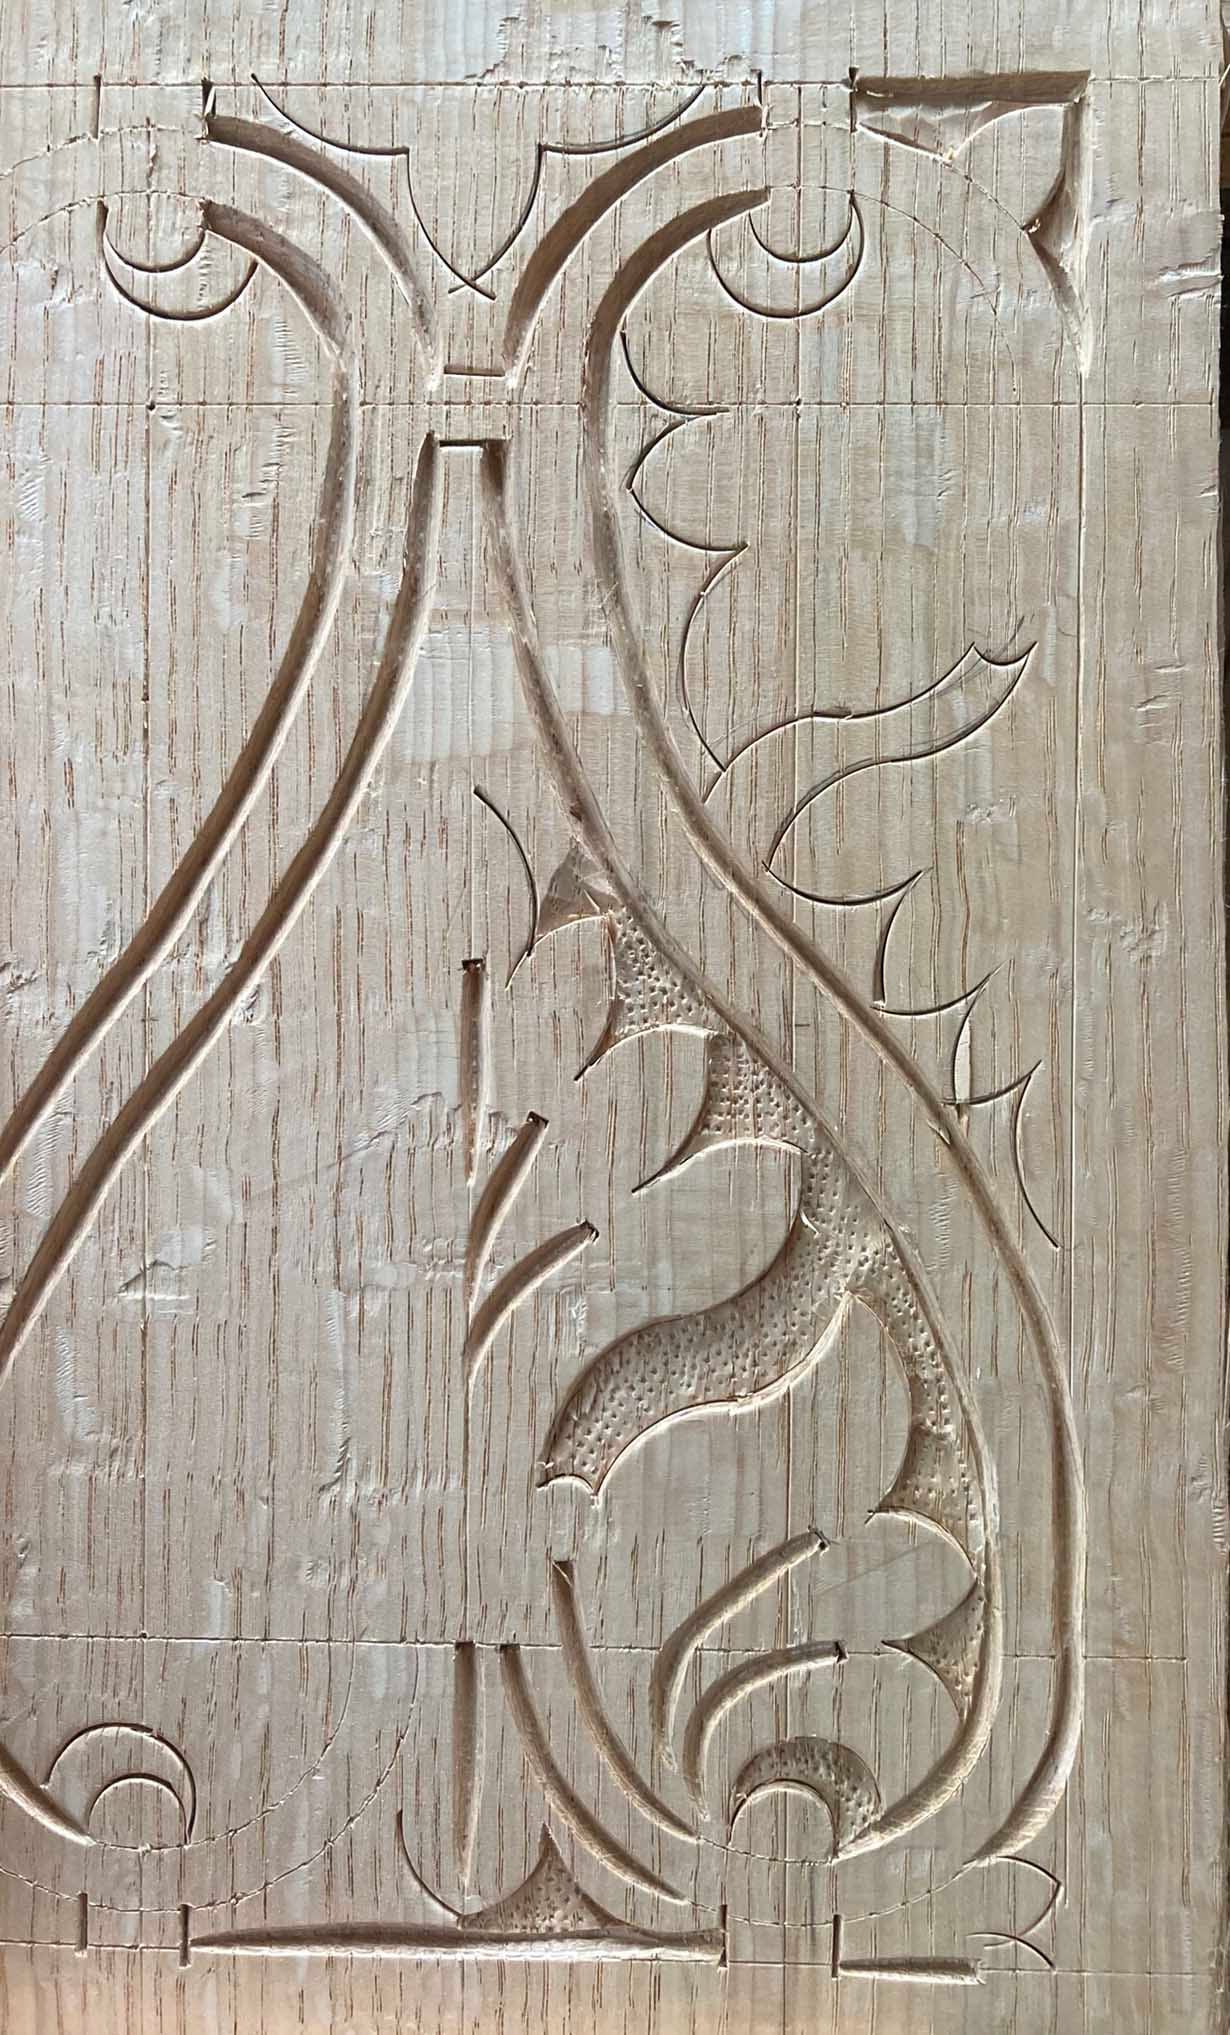
All the leafy shapes inside those long S-curves are struck with gouges (and maybe one small chisel) -
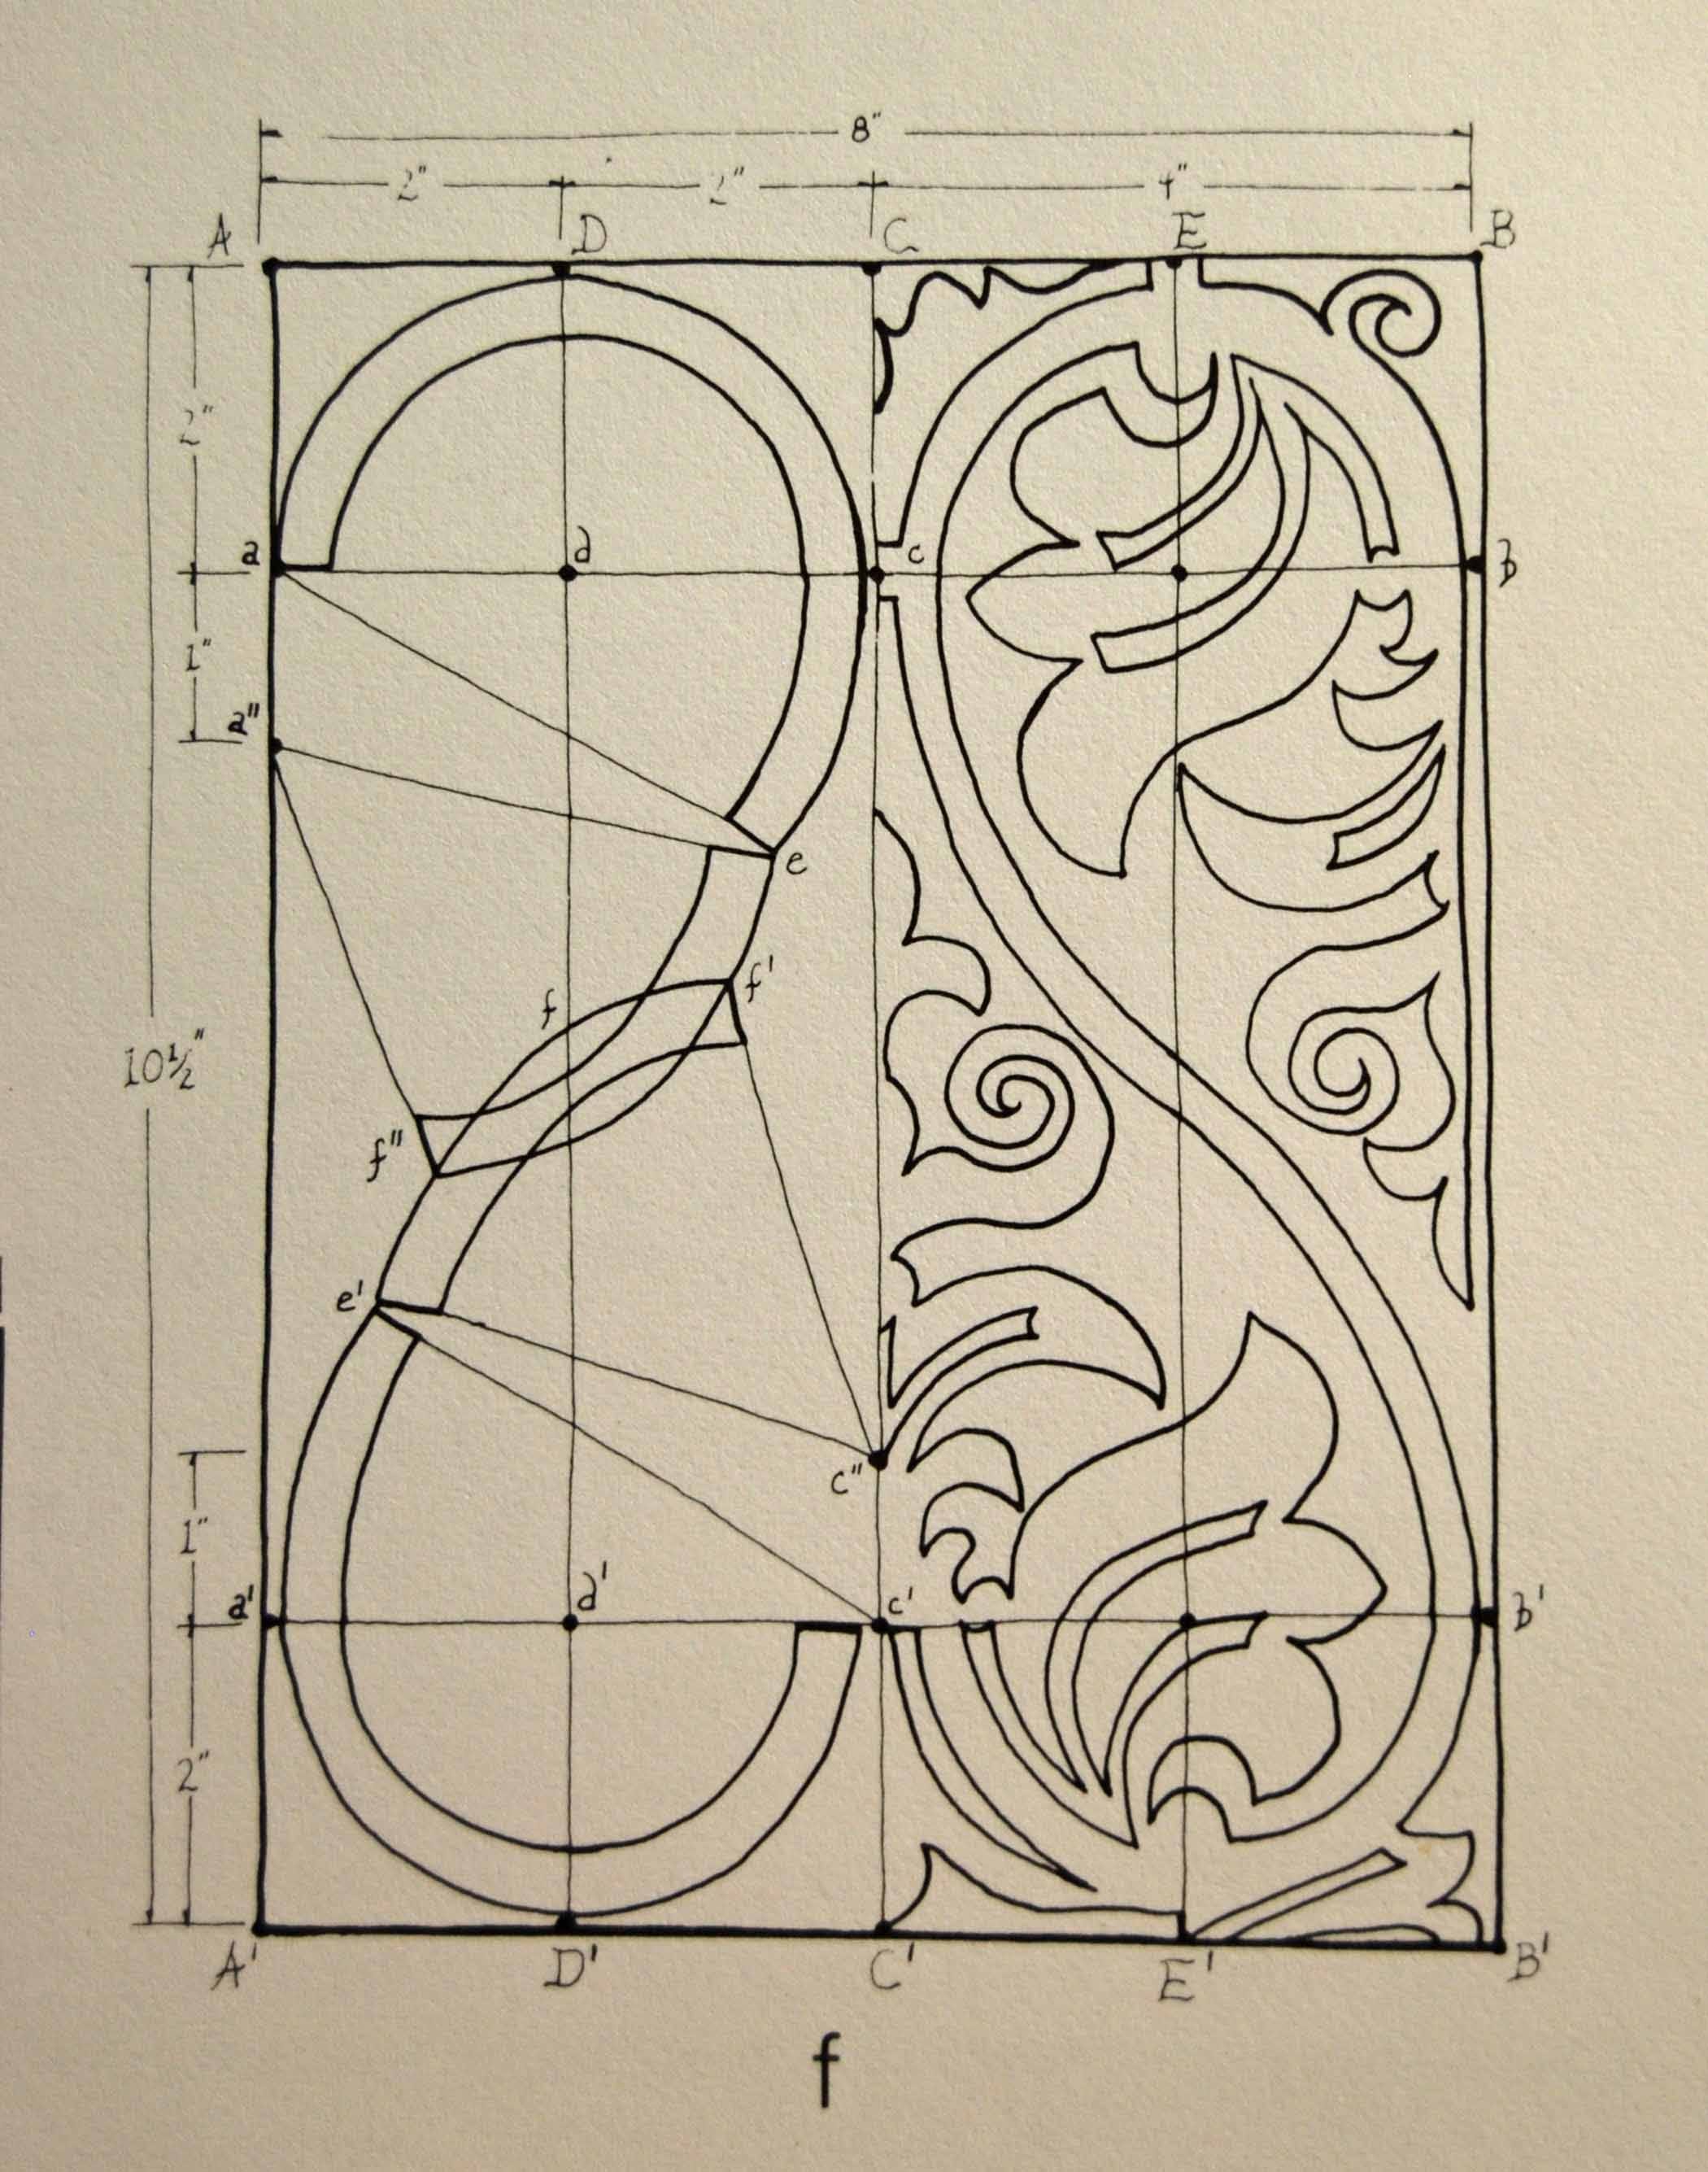
Depending on the pattern there’s more or fewer gouges involved. The V-tool outlines along the overall shape - then I go to work with the gouges. Below is my version on paper of a pattern I struck and carved, based on a narrow panel fragment from Dedham. The green lines are compass work, the red lines marking gauge, awl/square and for the black lines/leaf shapes - I held various gouges this way & that & traced their shapes to get the leaves’ placement.
It takes a lot of tools. Here’s what I used for the outlines - then a narrow (1/2”) very shallow gouge for cutting down the background. Those tools to the left I used a lot, those to the right, most of them only made one or two cuts each -
And that’s where I stopped. Tomorrow I’ll do a bunch of this for & with the students. Good chance I’ll learn something to make it even simpler after showing it to them…
Peter,
I'm slowly working my way though the latest series of Dedham carvings.
A lateral thought occurred to me when you mentioned and pointed out the 'spacers' located at the curves of the "S" shape and at the top and bottom junctions.
If I viewed that pattern - or something similar - that was created in traditional (non-welded) wrought iron work, (gates for example), then the constituent curved parts would be joined at those points with wrap-around straps that would be wrought into place to fasten the whole thing together.
Very much resembling that shape in size , position and scale.....
I seems to me that many wooden "S" shape patterns do not have that detail and it is tempting to think that those designs may have been inspired by one of those first-generation-New-England joiners seeing wrought-iron work in the old world and taken form into his patterns.
Best regards from Wales - Hwyl fawr.