

[a long post about making a repro box…]
I hadn’t made one of these smaller boxes in a few years, but seeing the Thomas Dennis example at the Brunk Auction site got me inspired to make another one (well, 2 at least, but I set out to make one.) [the Brunk auction https://live.brunkauctions.com/auctions/brunk/vander-sande-collection-session-i-march-12-2025-17333/catalog#catalog
The auction page has great photos of it and lists its size as 5 x 13-1/4 x 7-1/2 in. I dug out my notes which I made nearly 16 years ago when Bob Trent & I first saw in at Yale University’s Furniture Study…the then-owner brought it in to show us.
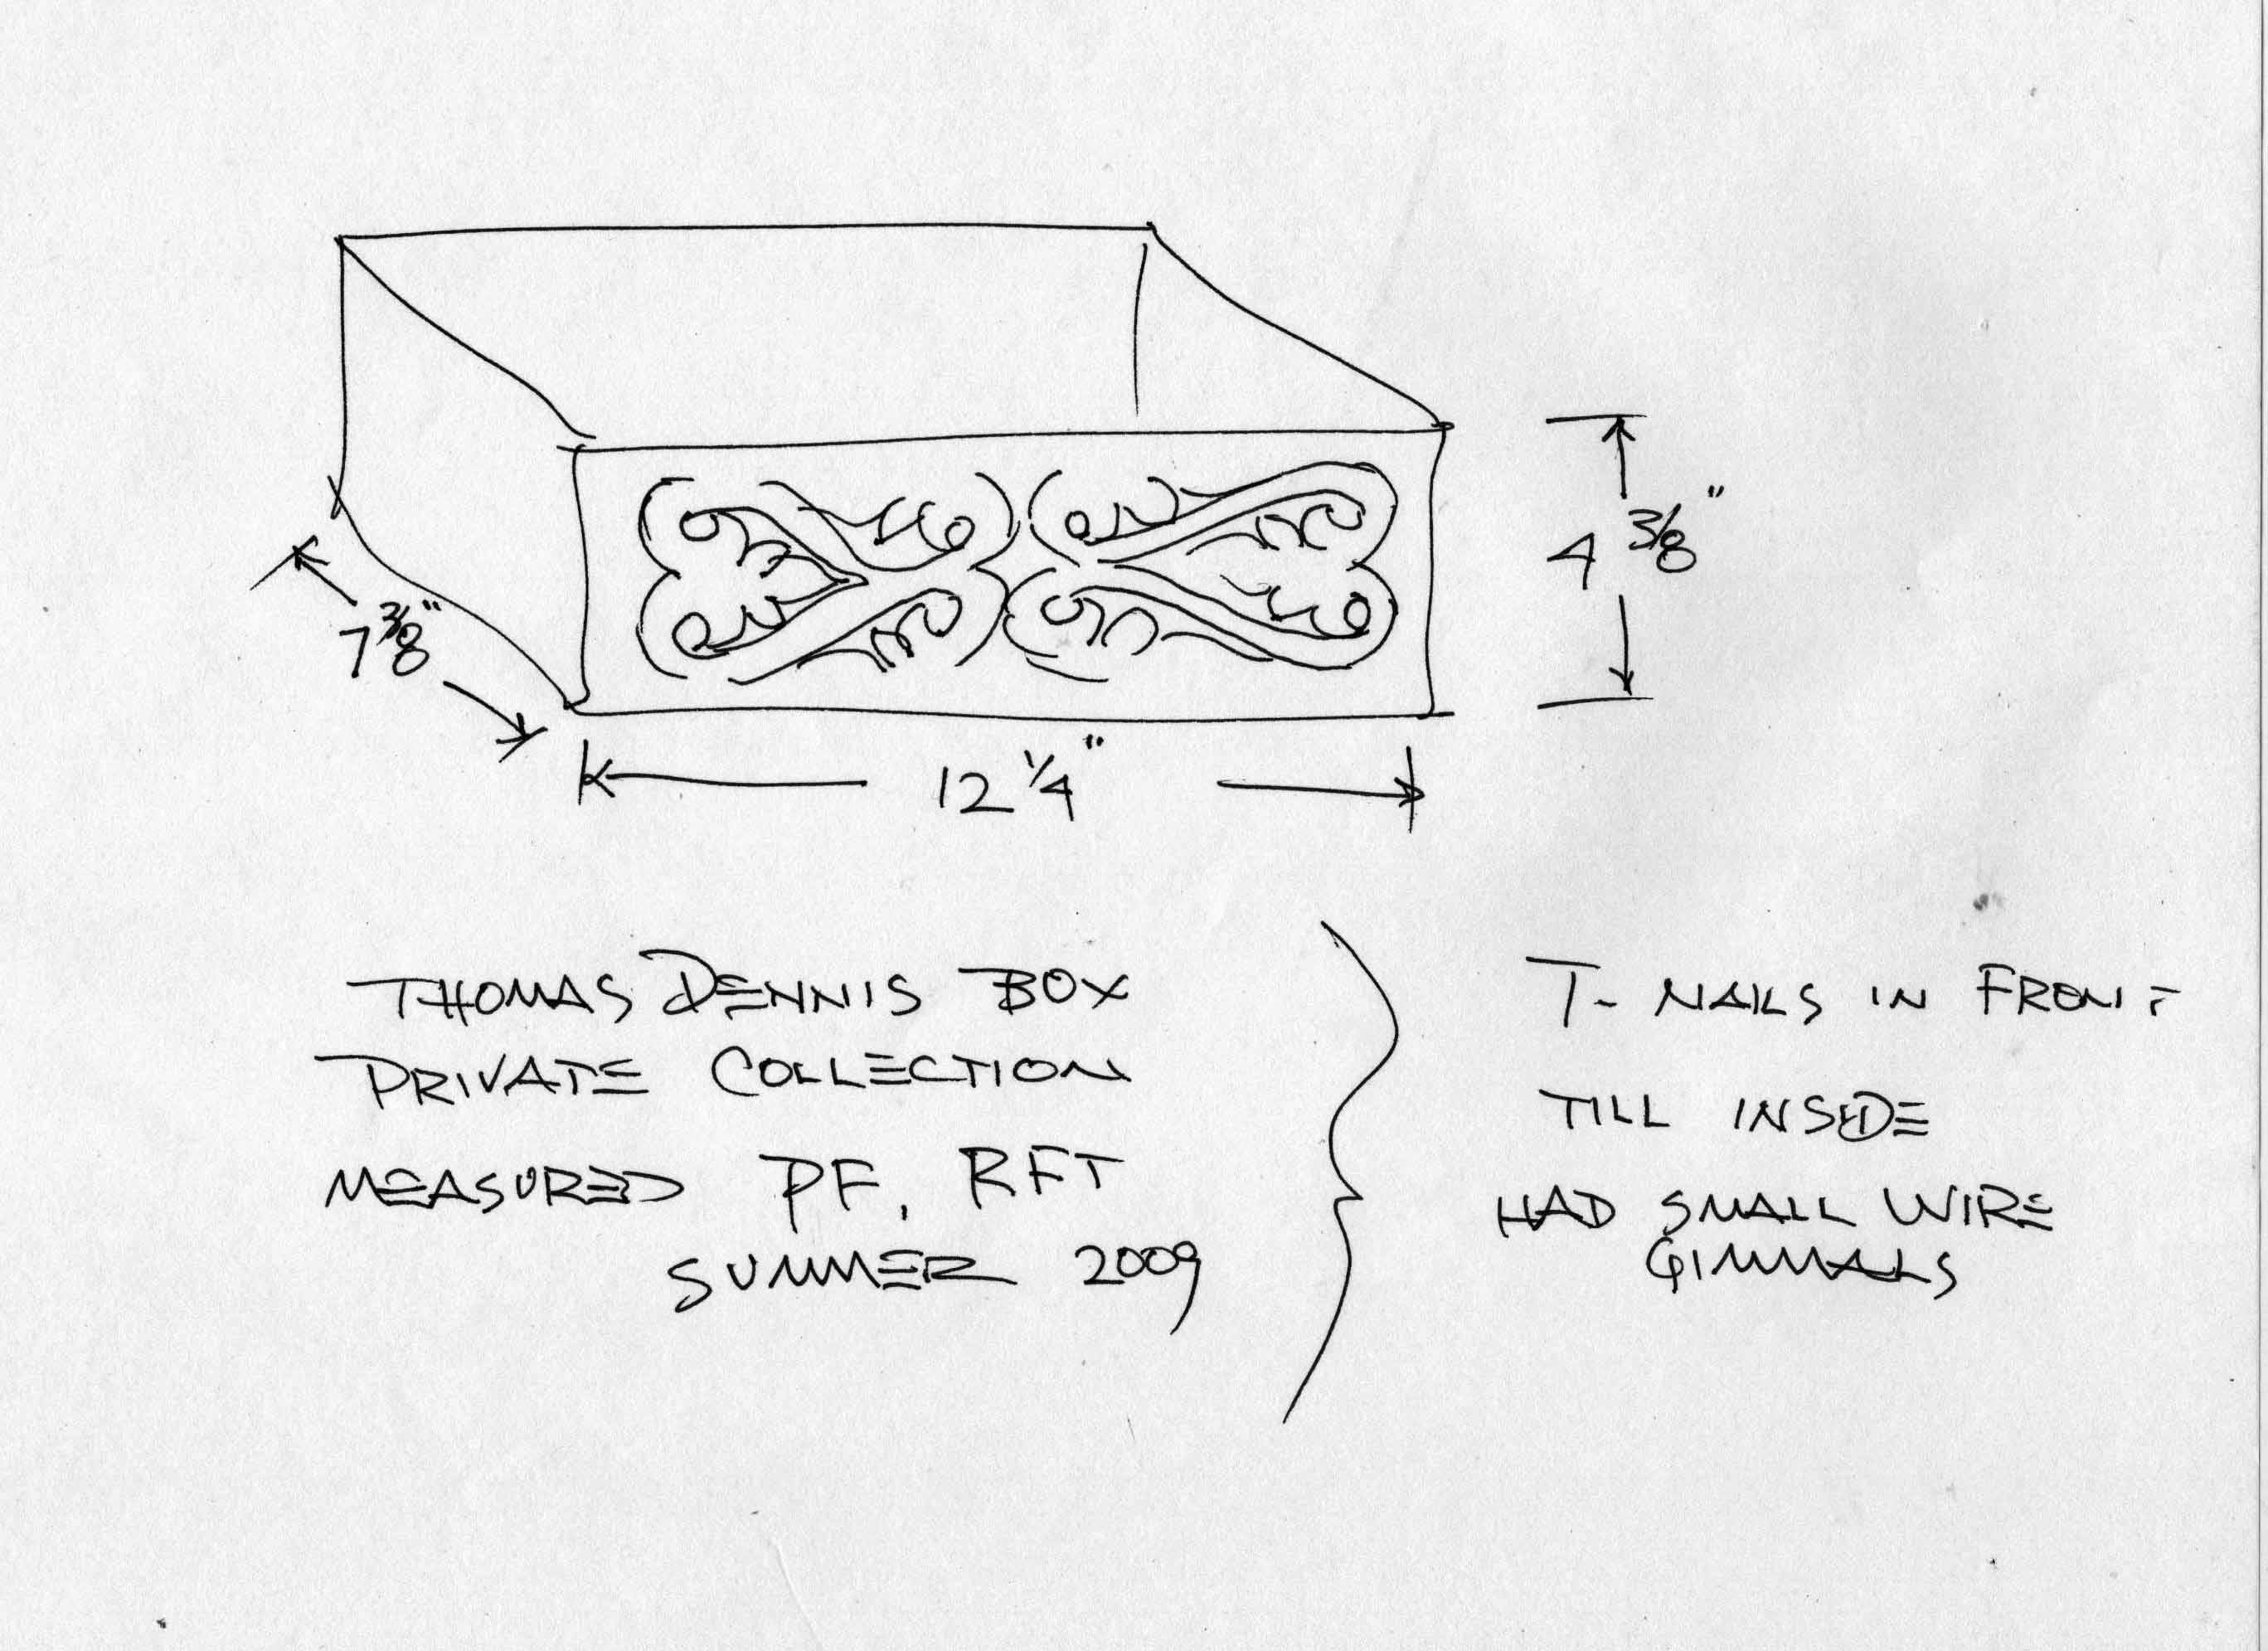
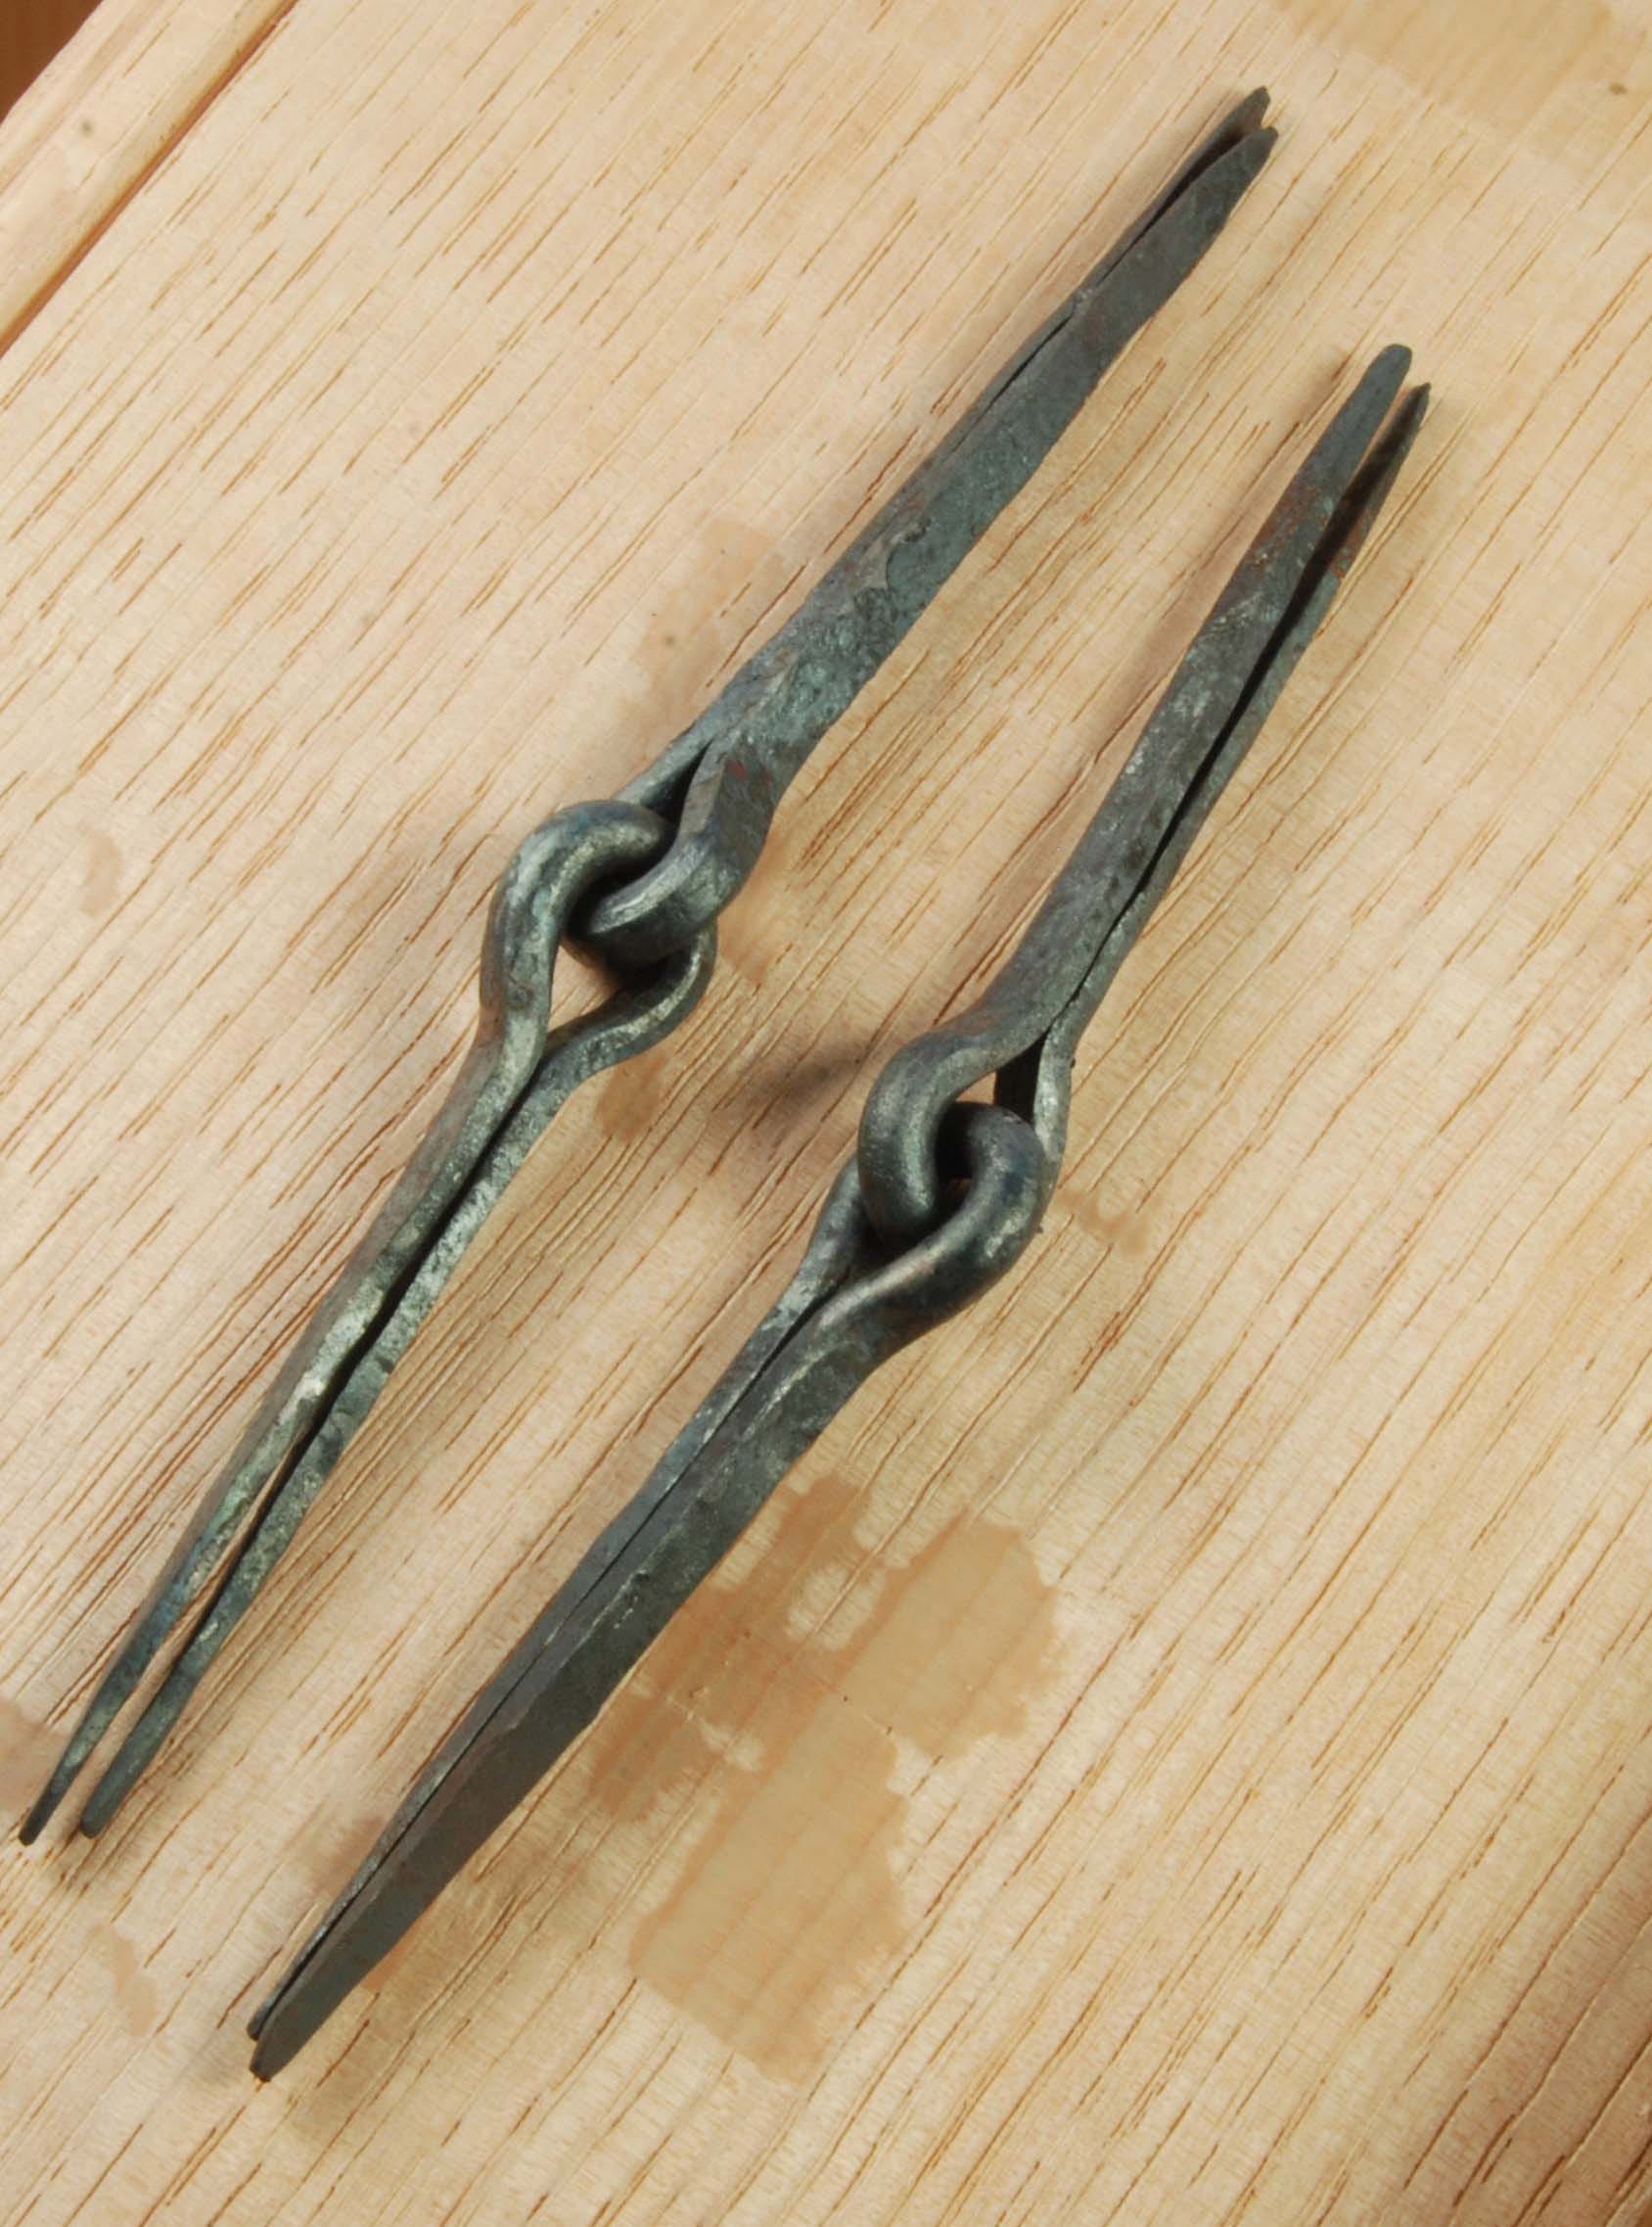
Those notes were made in a hurry, they amount to just a sketch with some overall specs for the box - not the lid/bottom. The note about having “gimmals” - means what these days are called “snipebill” hinges, or snipes. Gimmals, jimmowes, etc are 17th century terms for the same things. Like these made by a blacksmith I’ve worked with for years & years:
The hinges I used on this little box I got from Horton Brasses - I had read about them & decided to try them. The website says they’re forged, I see no reason to doubt it. The smaller ones (1 1/2” size) worked fine for this box - I made the box lid just over 1/2” thick. The back board was maybe 5/8” - https://www.horton-brasses.com/shop/hortons-forge/iron-hinges/h-62-wrought-iron-snipe-hinge/
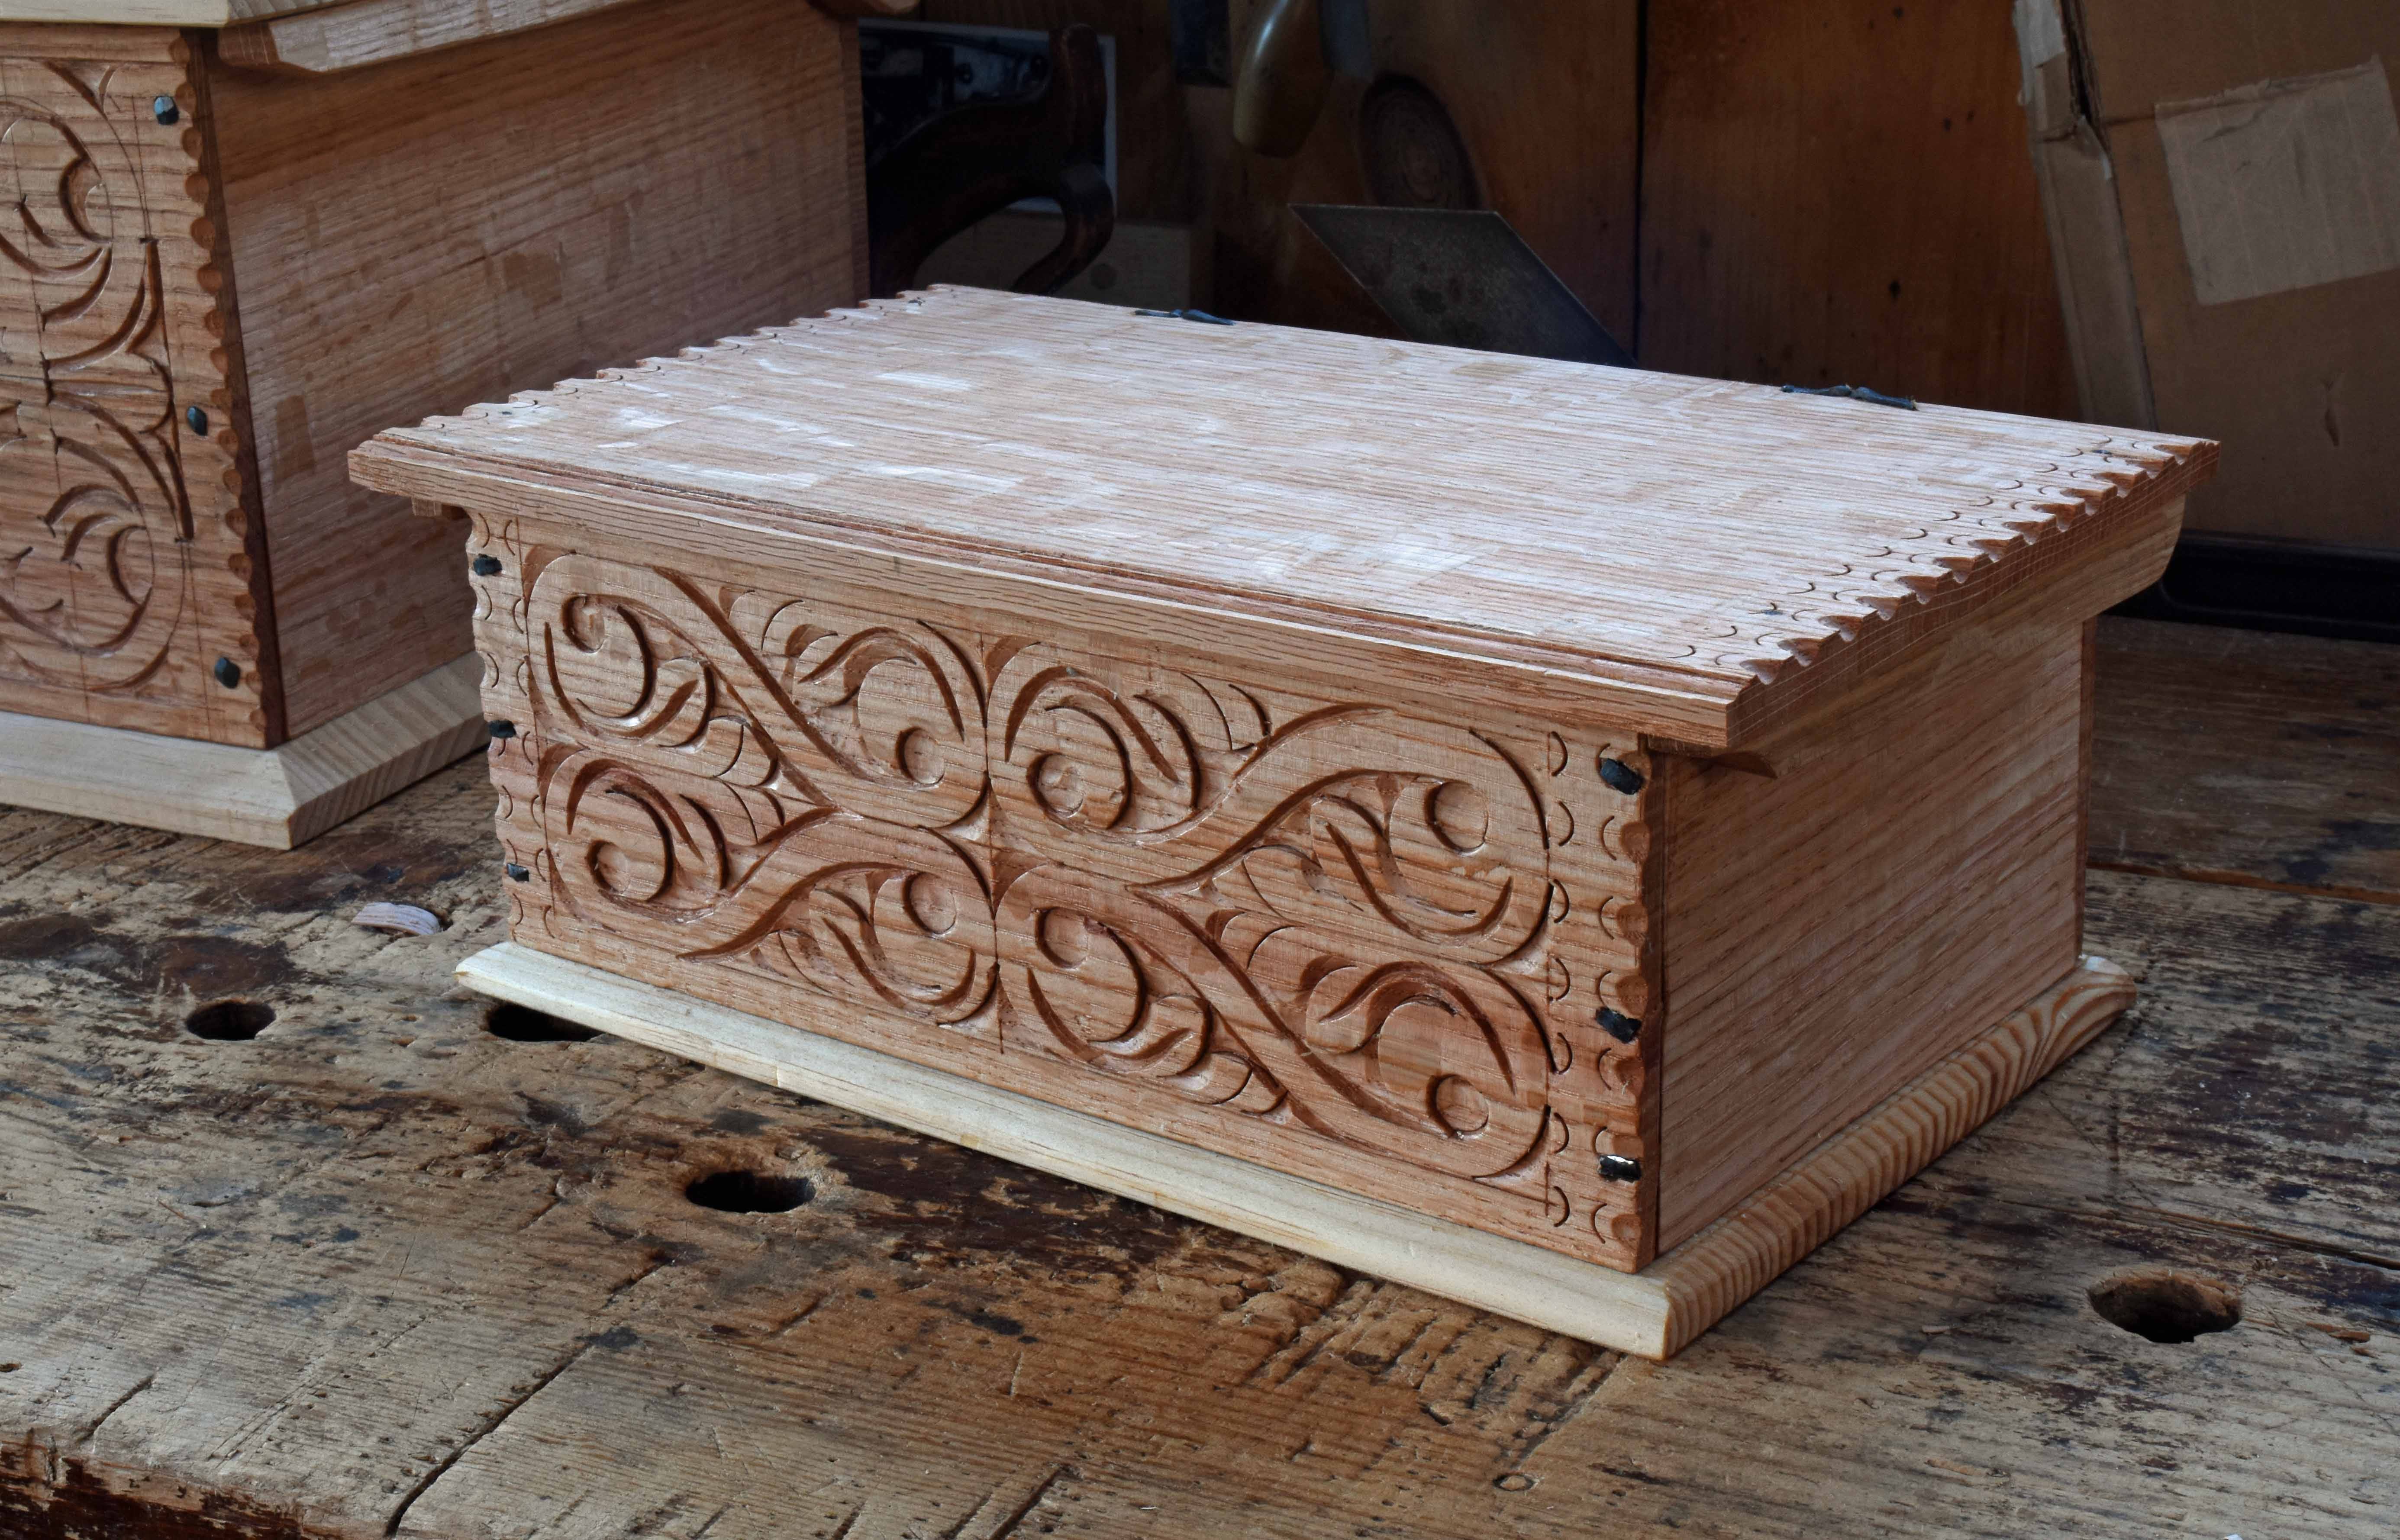
As it stands today the box is missing the lid’s cleats. Otherwise, it’s all there. I dug out some oak I planed up 2 months ago, re-planed it to bring it down to about 5/8” thick, then cut it to width. My boards were over 20” long - so I could get a long and short piece from each board.
I laid out the front board & carved it - I skipped photos of that process, but shot the next one a day later. (another post to come about making a related box) But the first carving is the easiest thing going. It really is the least amount of work just about, probably under 20 minutes to carve it. I used 6 tools, one of them just for the notched ends of that front board (see top photo for the notches).
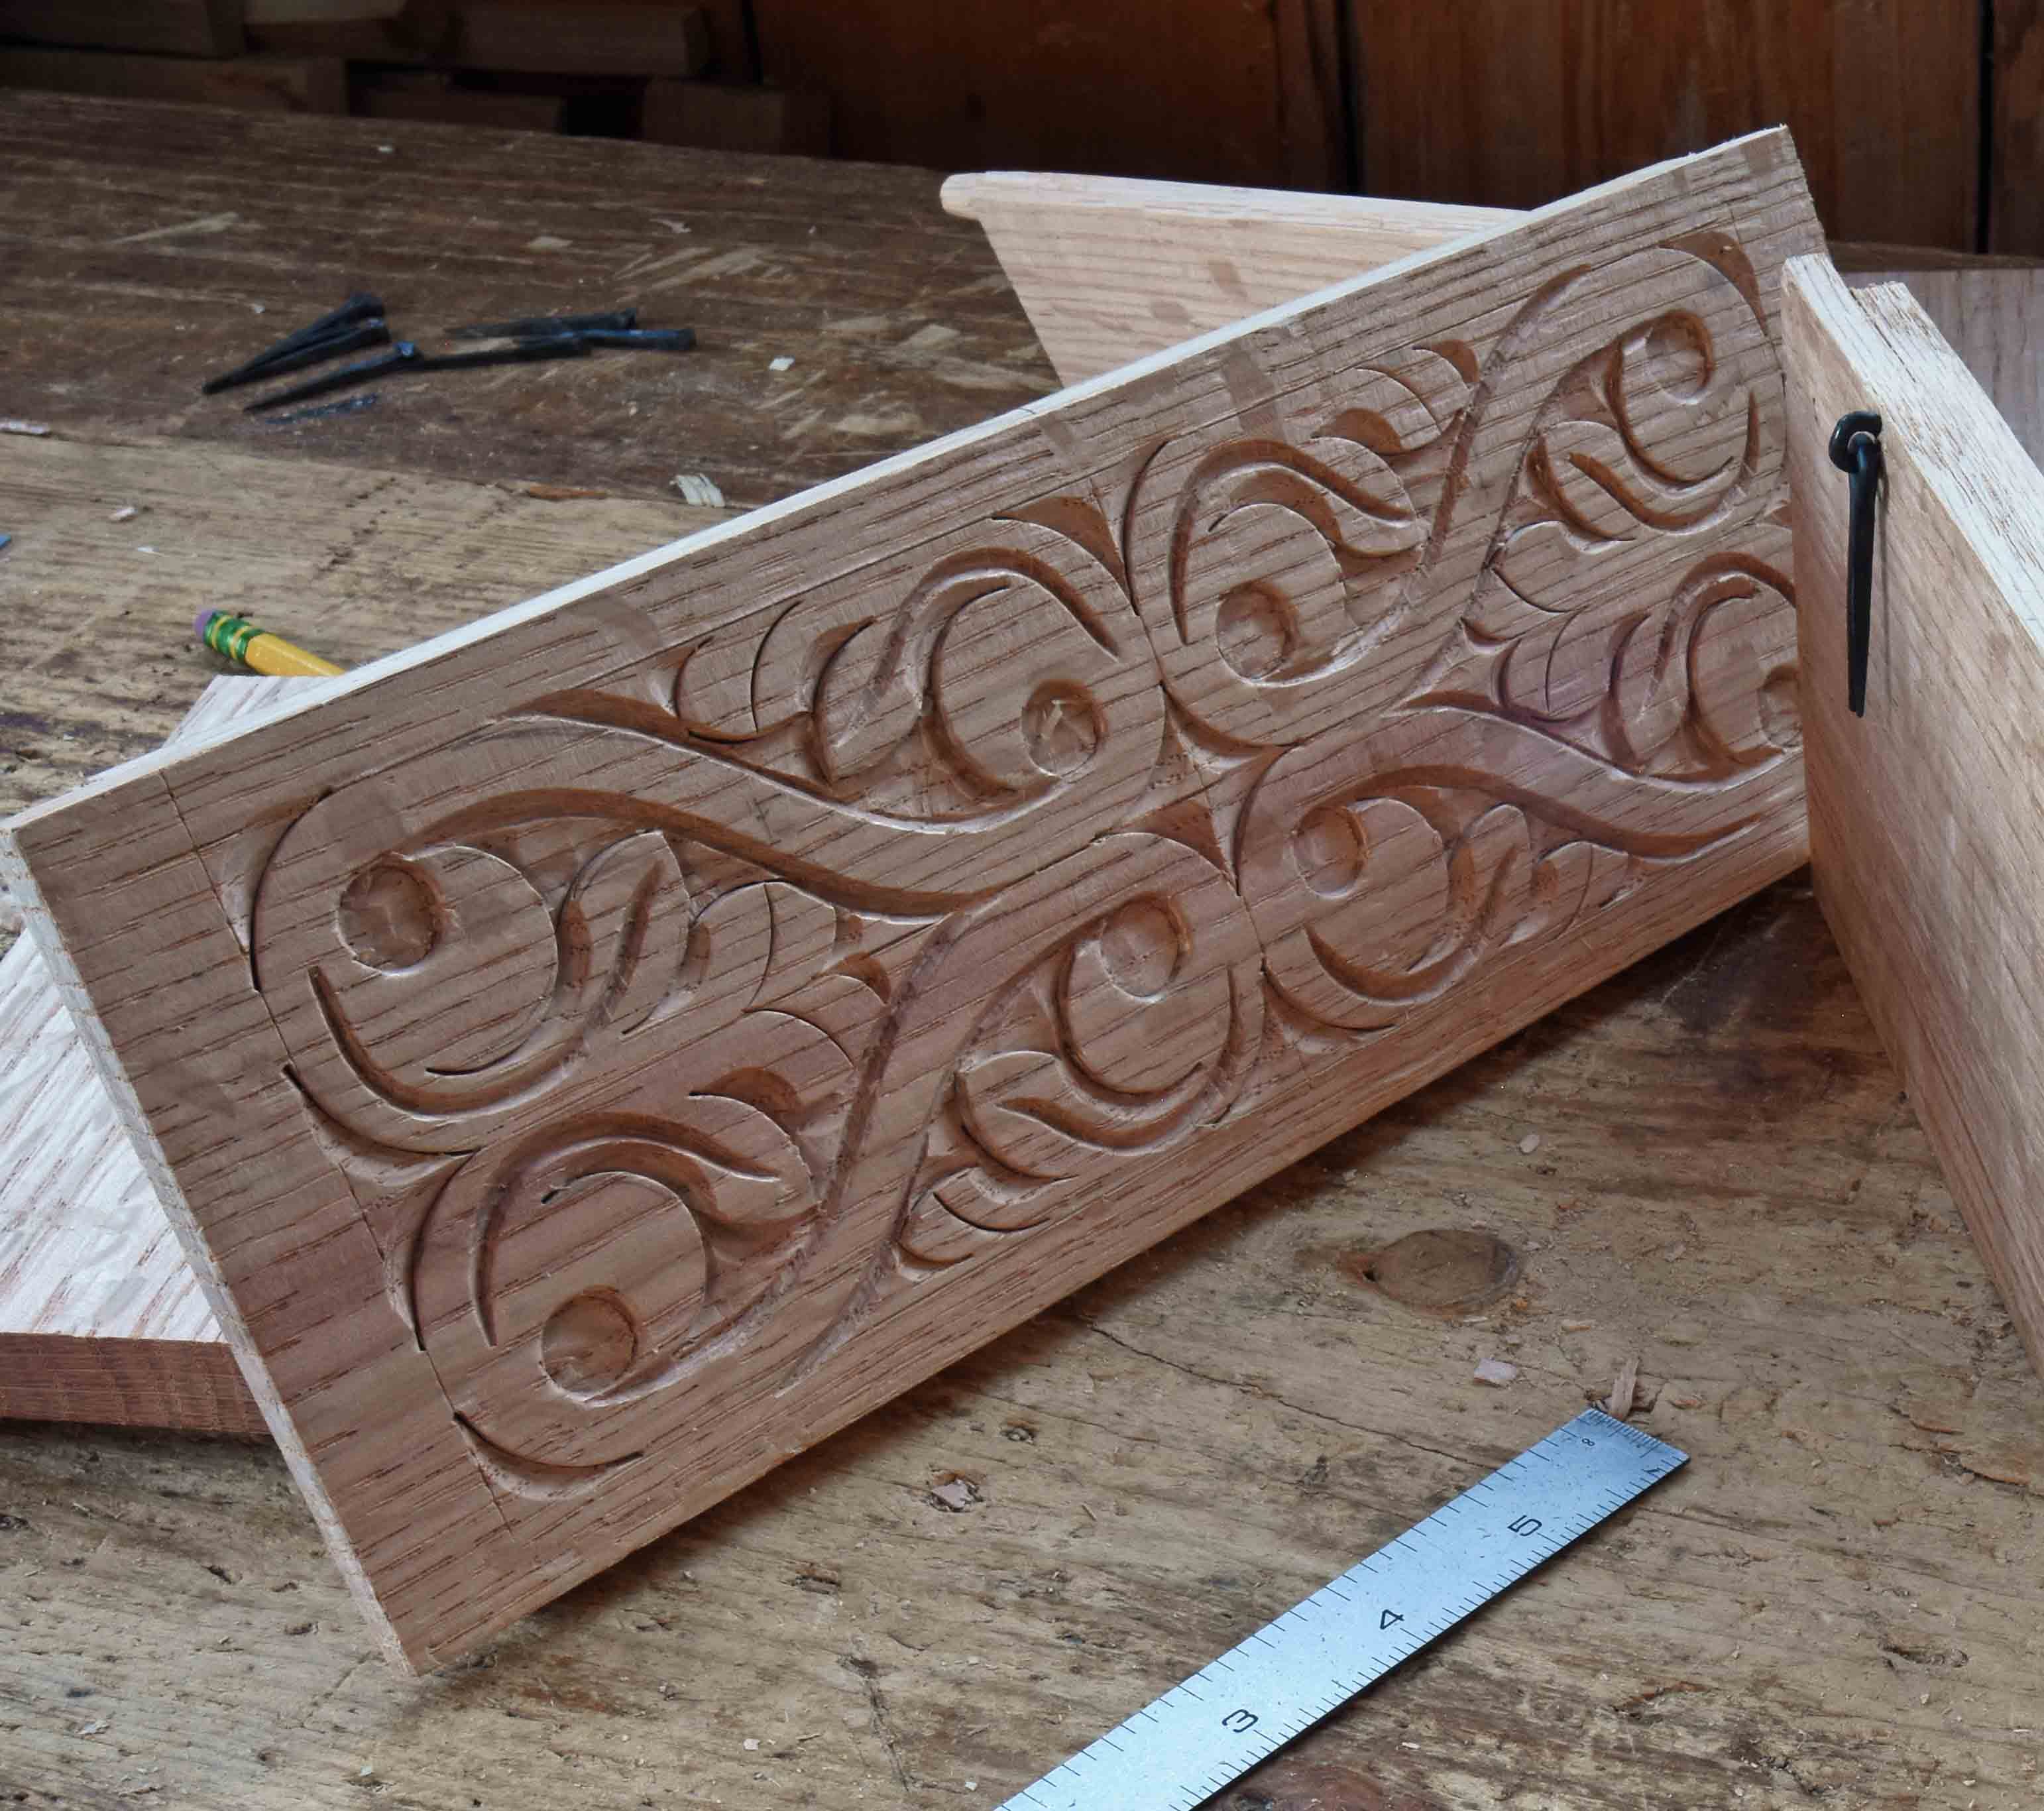
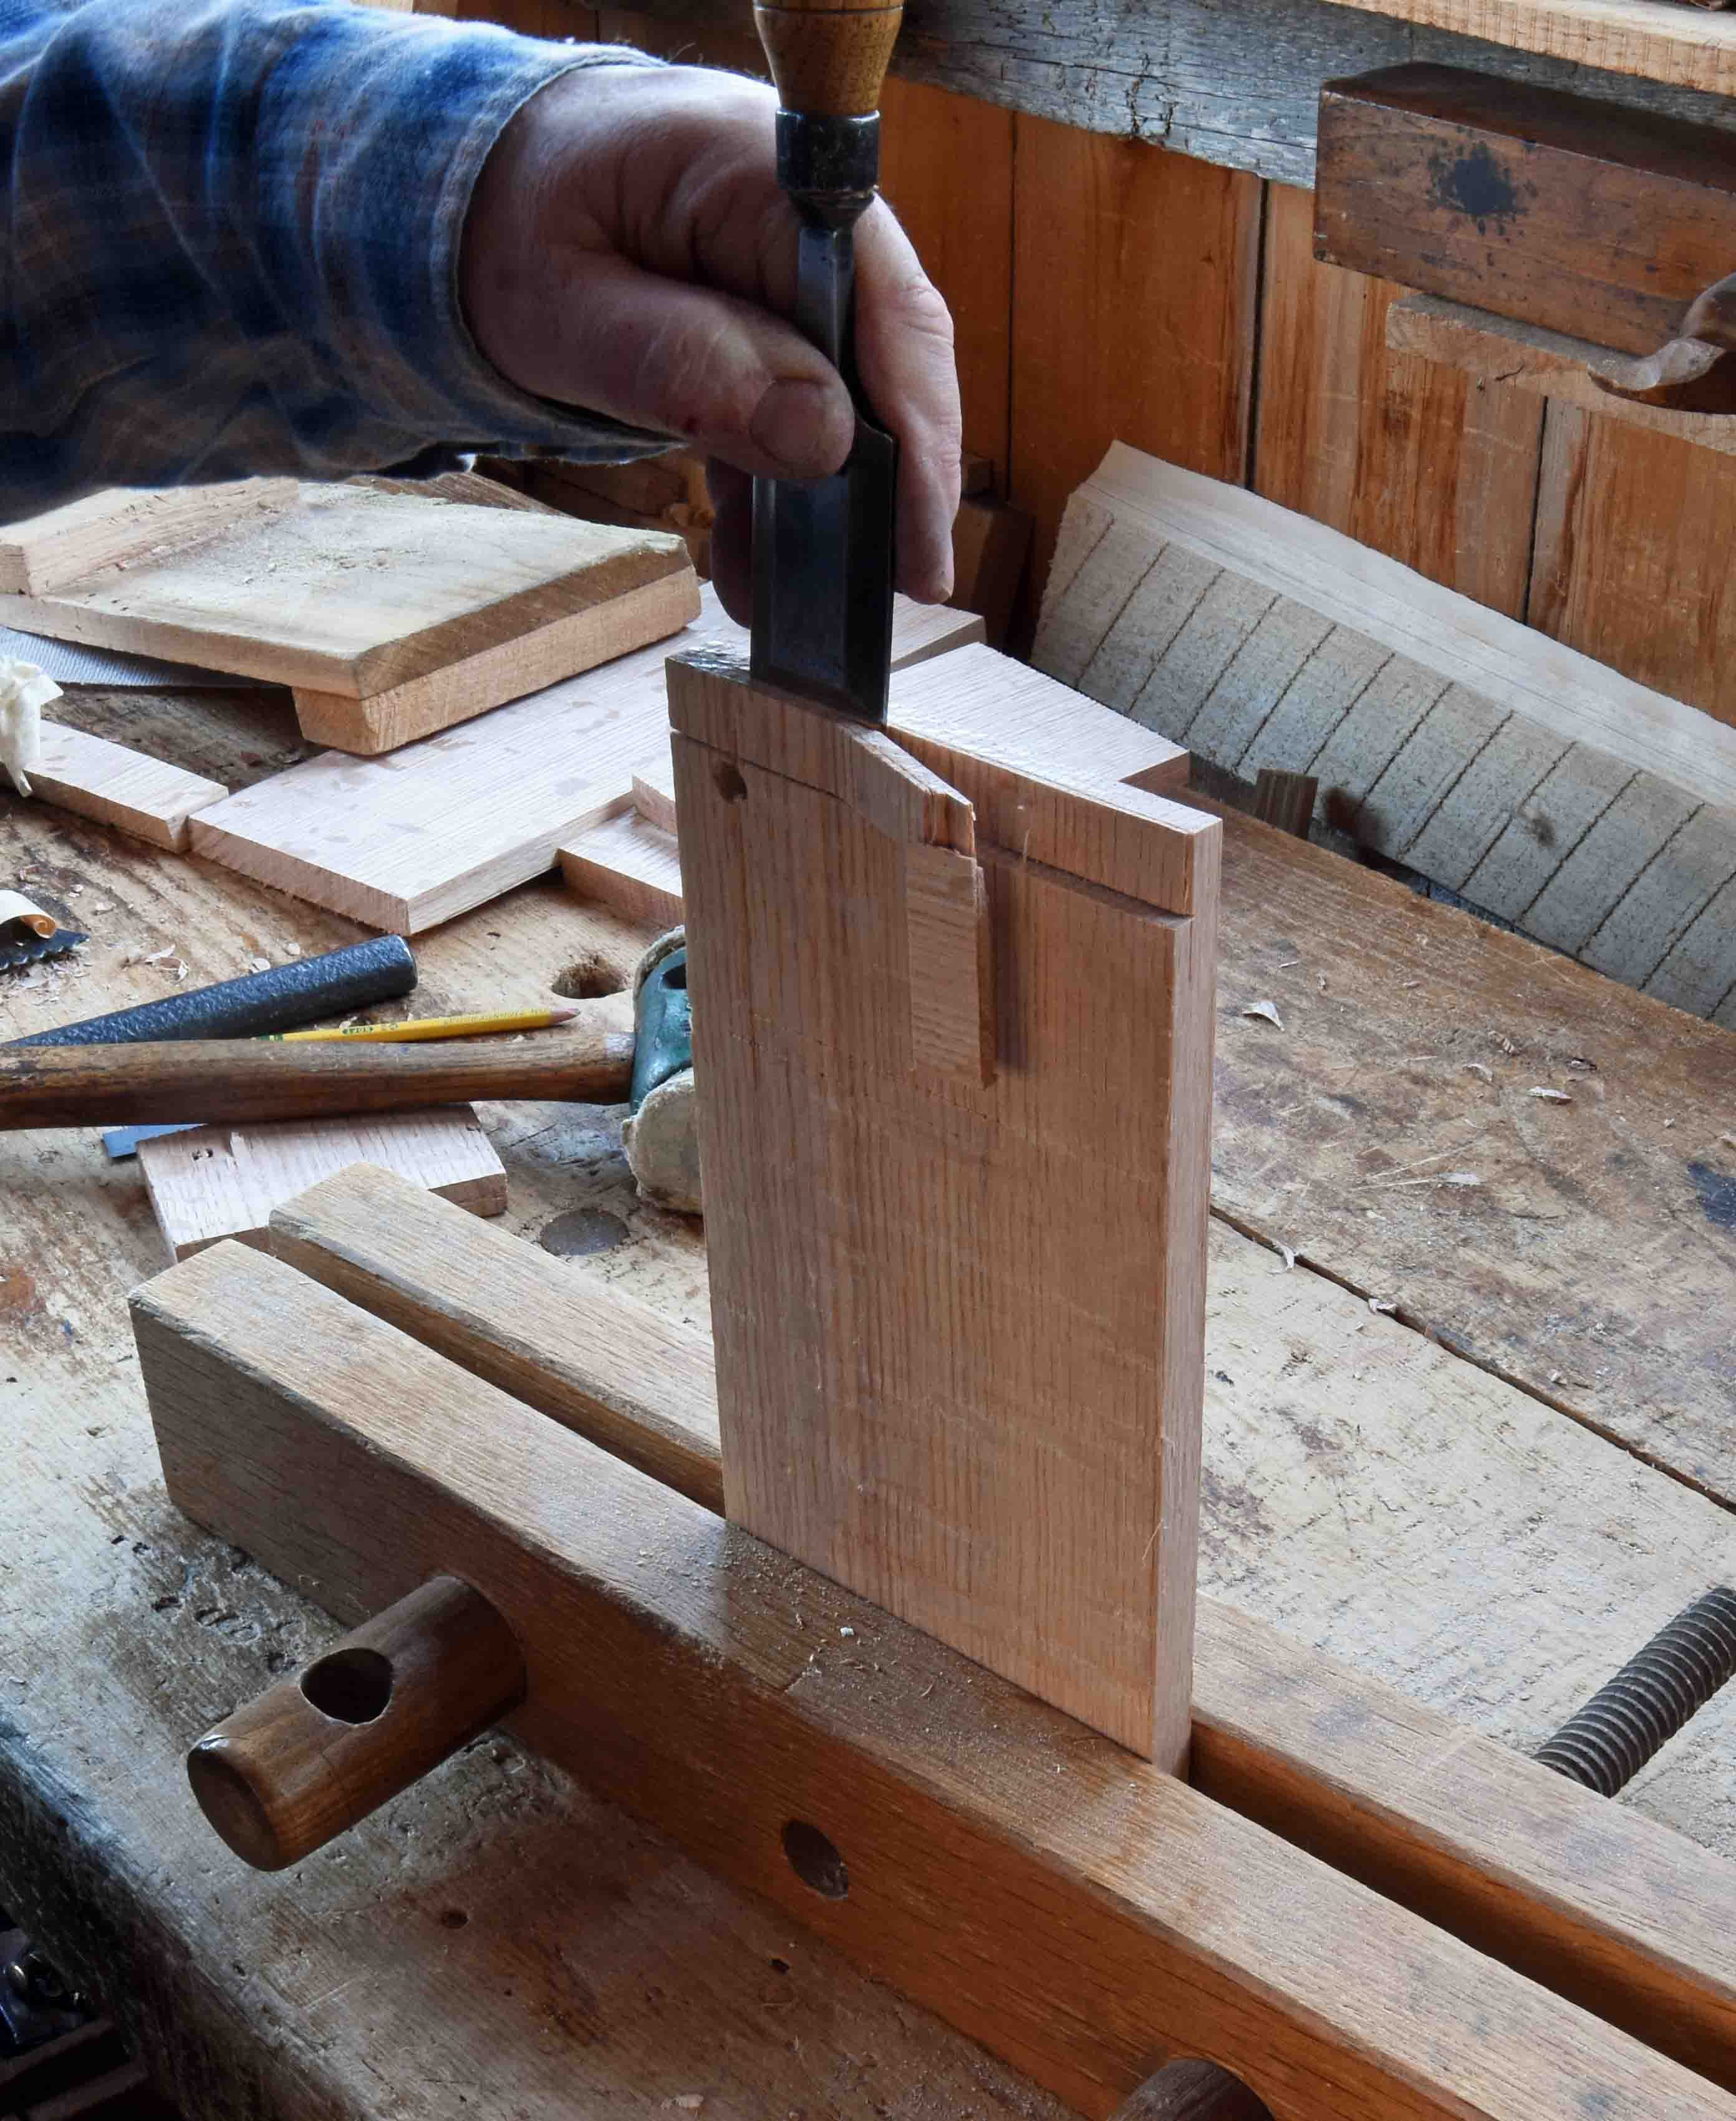
After the carving comes the rabbets. After sawing the shoulders the next step is splitting off the waste with a chisel & mallet.
Keep reading with a 7-day free trial
Subscribe to Follansbee's Substack to keep reading this post and get 7 days of free access to the full post archives.