


cutting the mitered table end cap

[a free post following up on yesterday’s about 17th century tables]
well, I couldn’t get that mitered tabletop end cap/cleat off my mind. I’ll back up a minute and show the overall of the Dutch draw table. I’m focused right now on the top - but just as an intro for any who are unfamiliar with draw tables - see how there’s two layers of top boards?
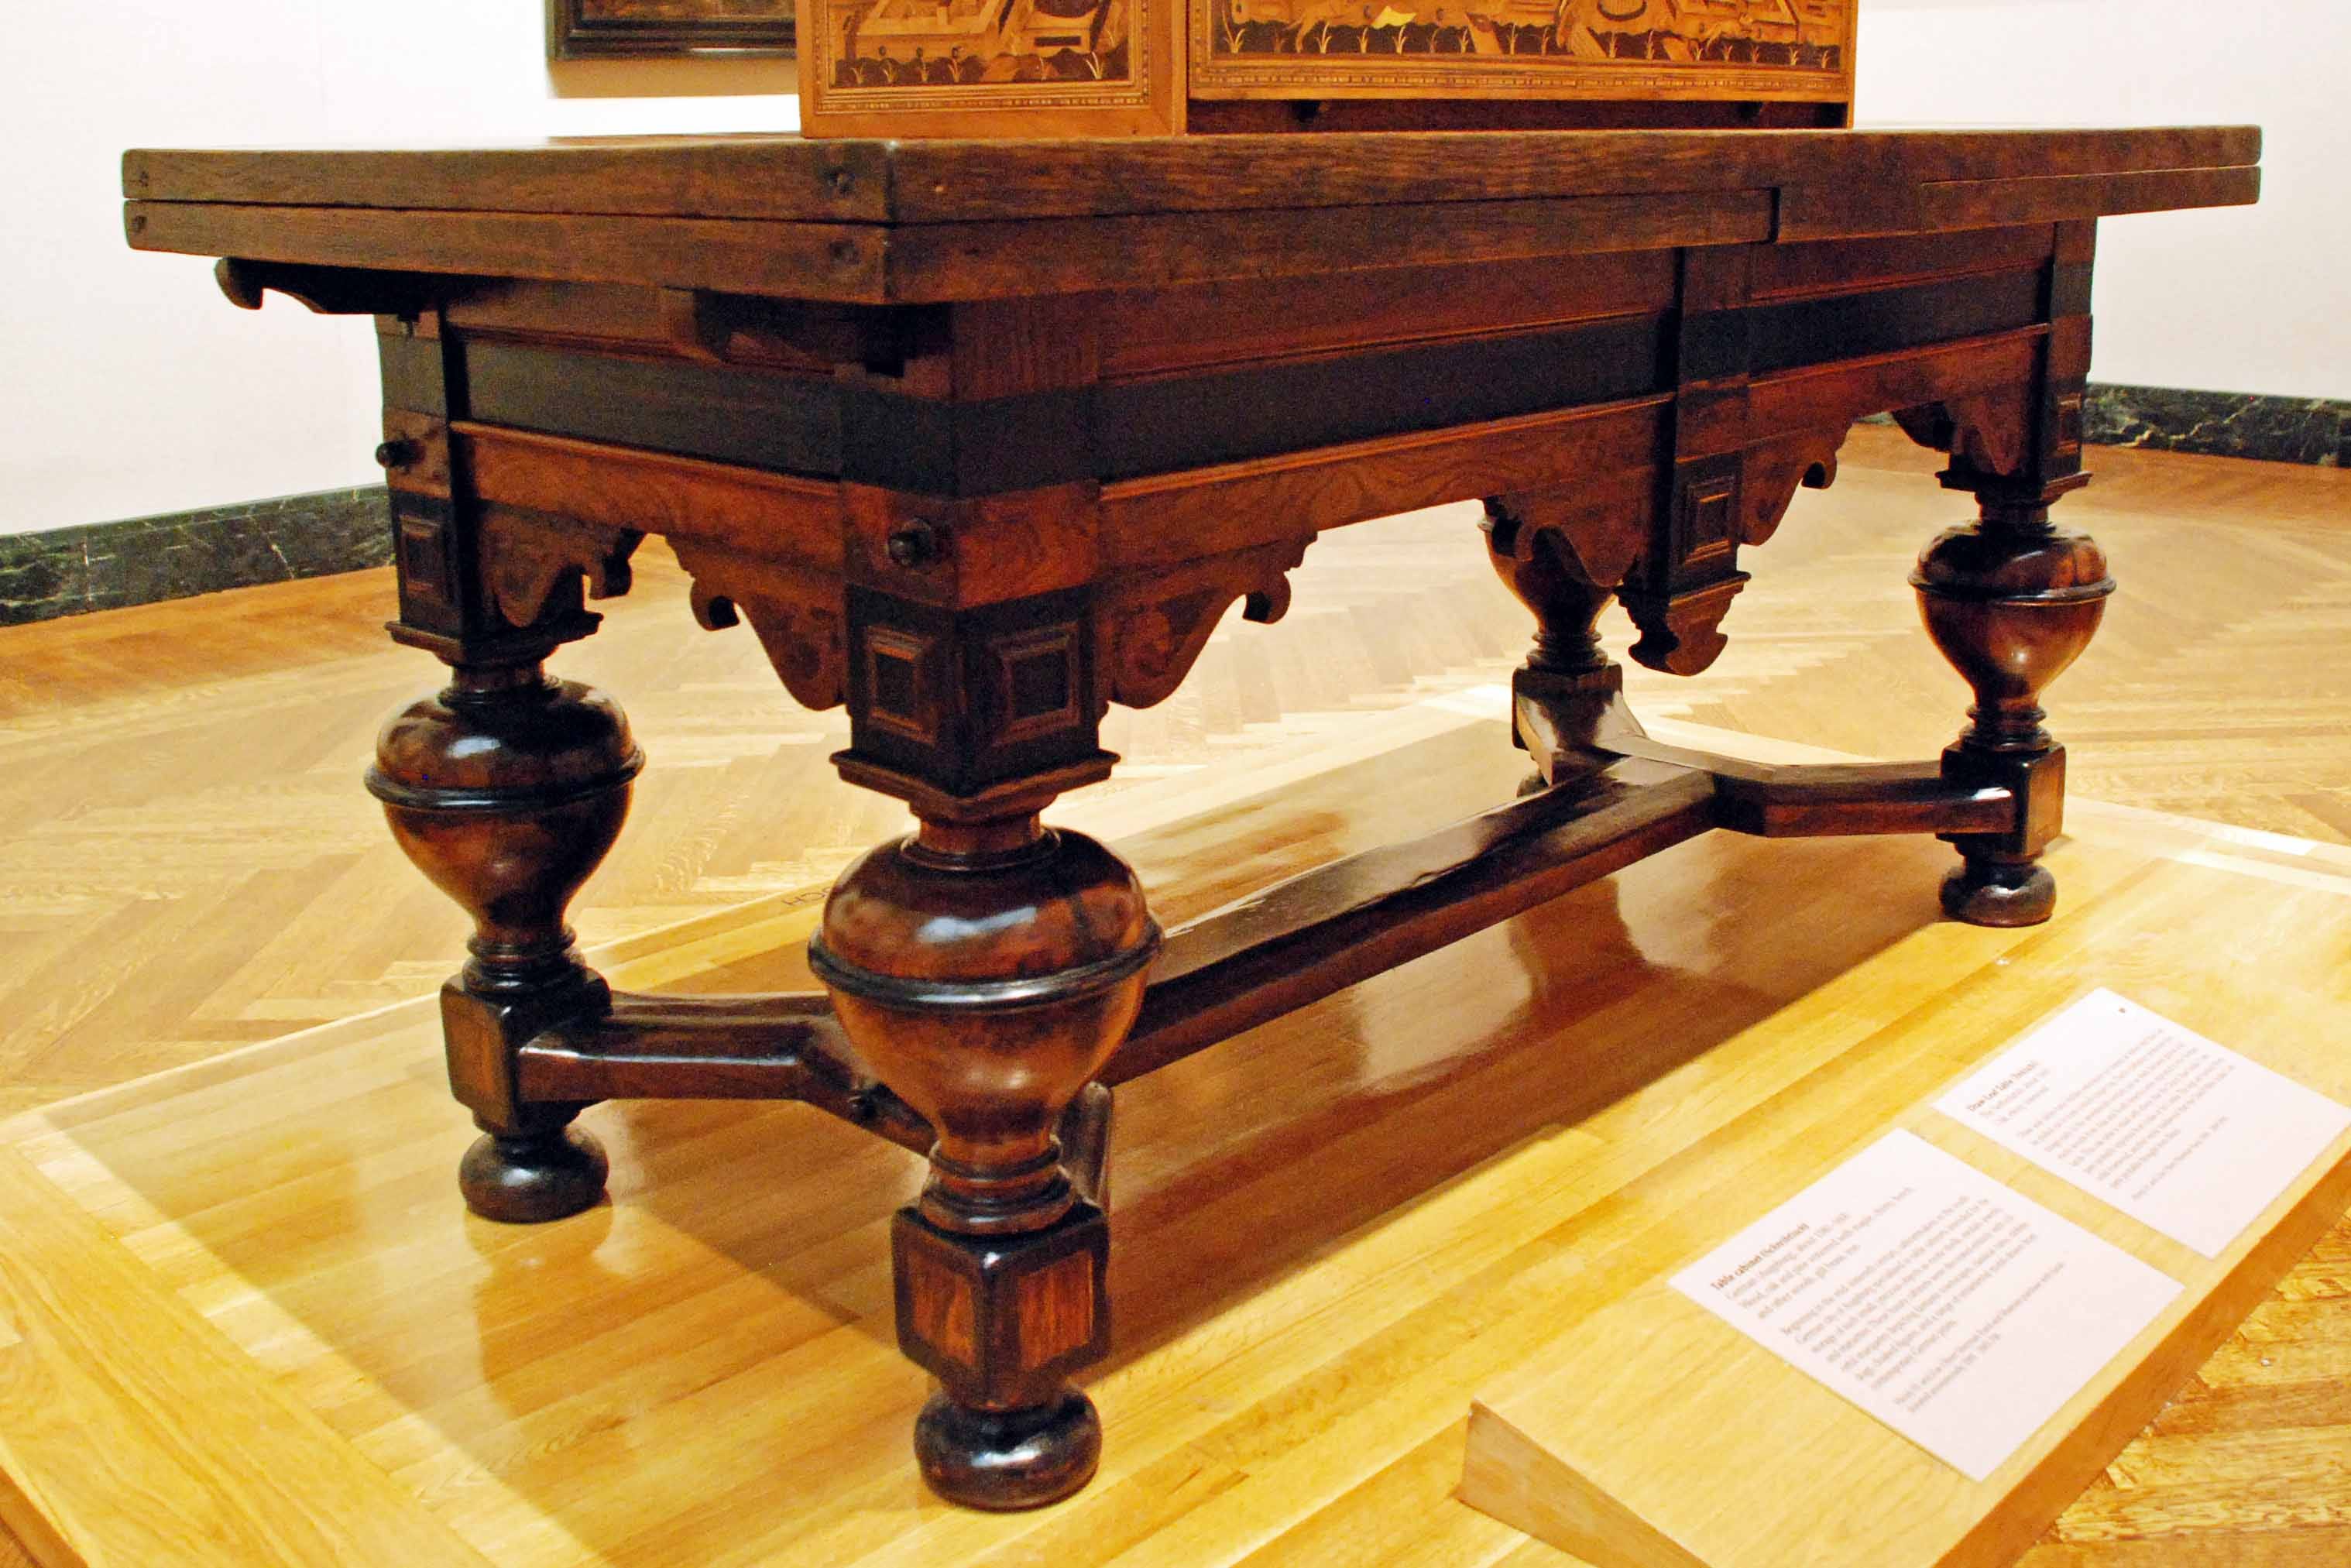
Those underneath get pulled out the ends (drawn out…) and then the middle section drops down and you’ve got a very long table. Now, back to the joints on the top (the leaves are probably framed the same way.)
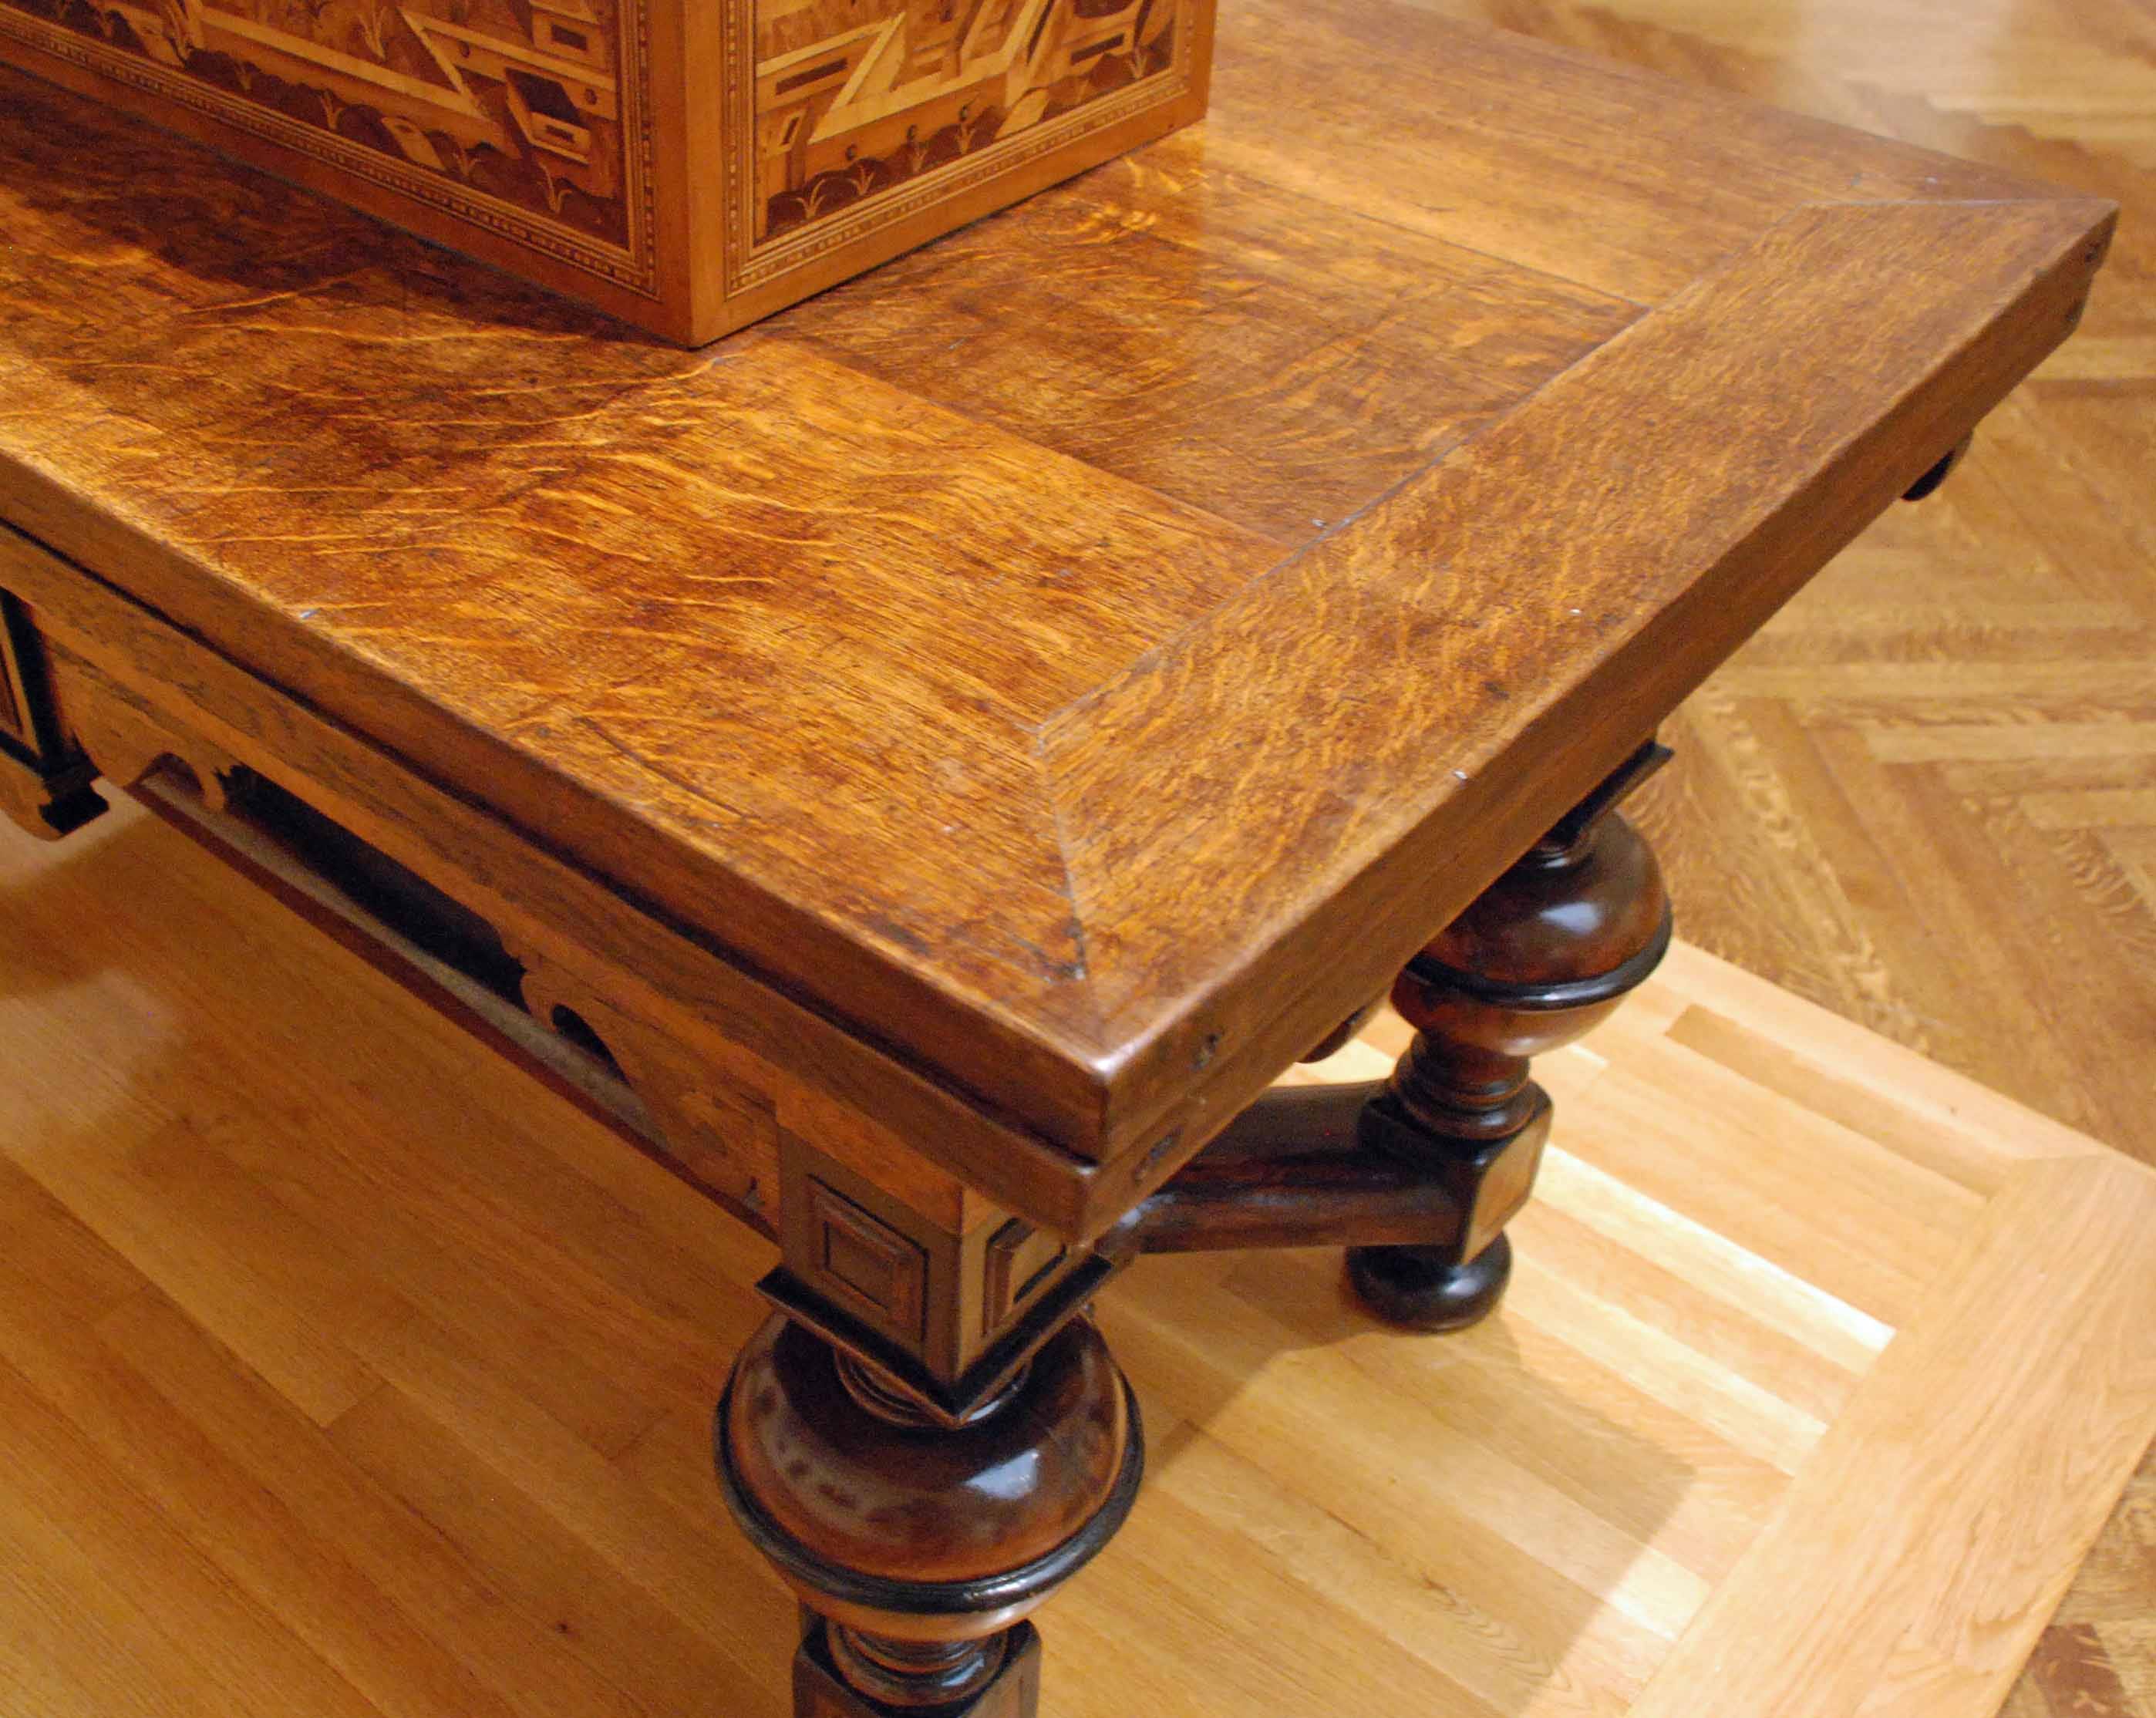
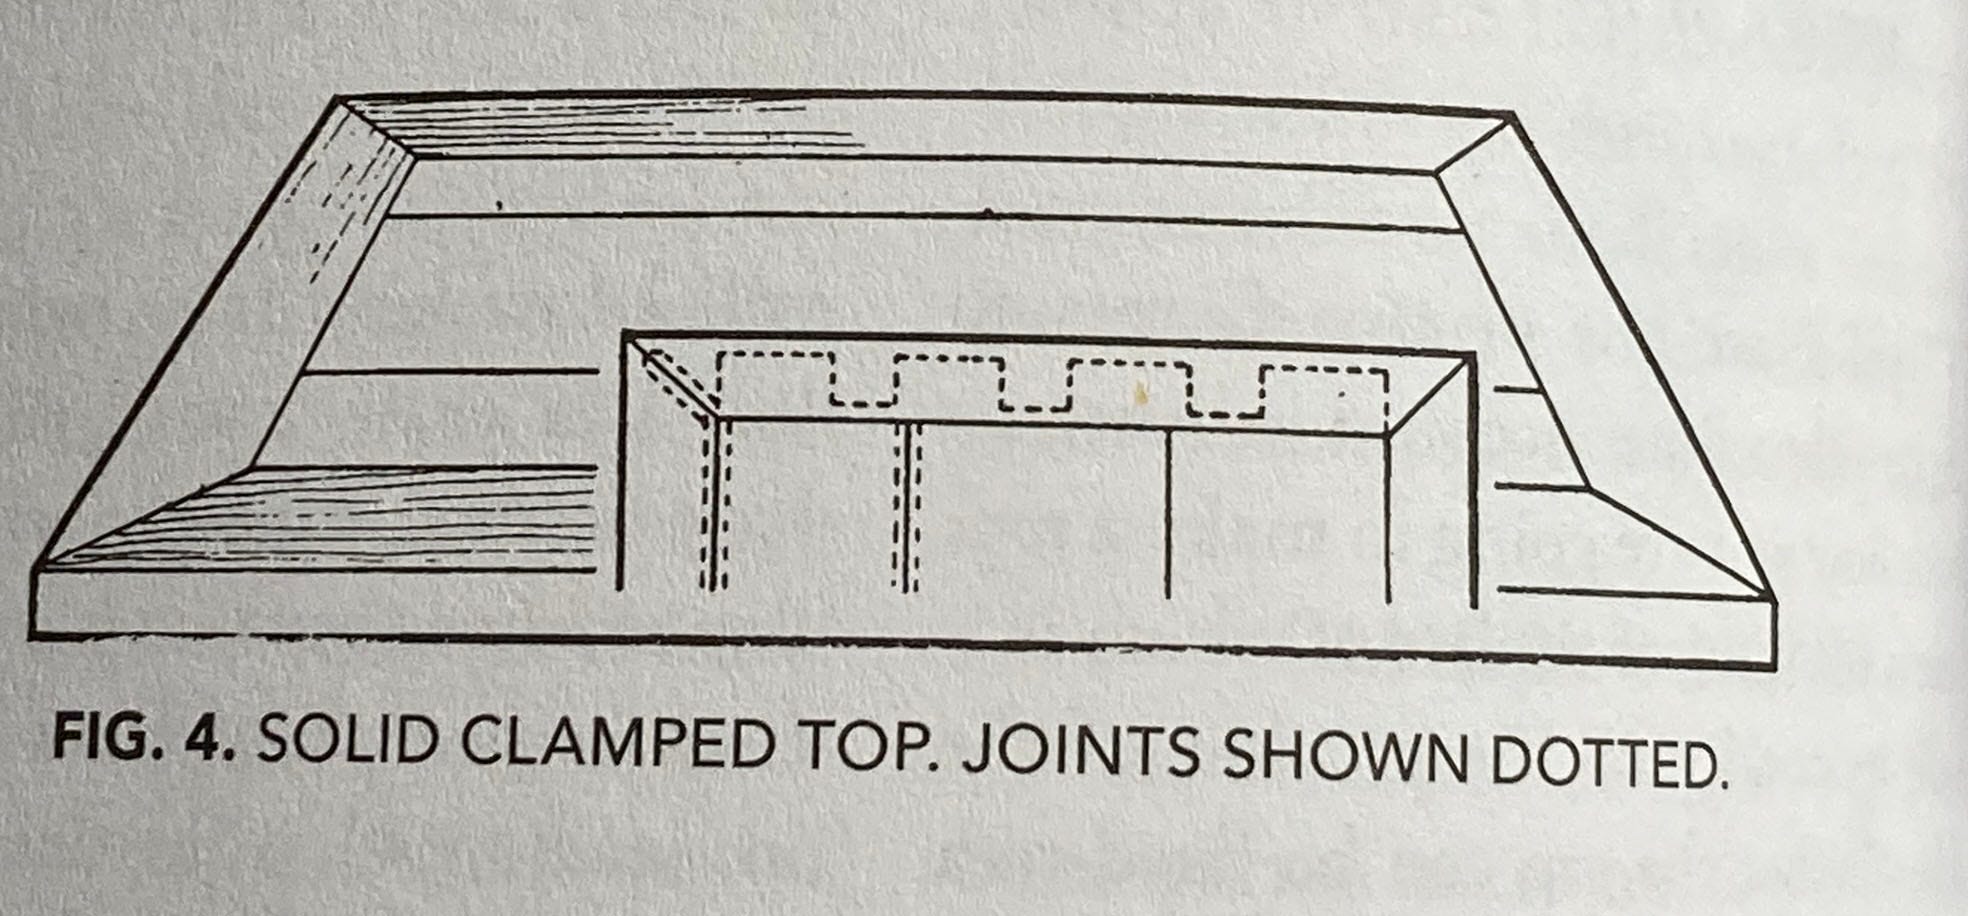
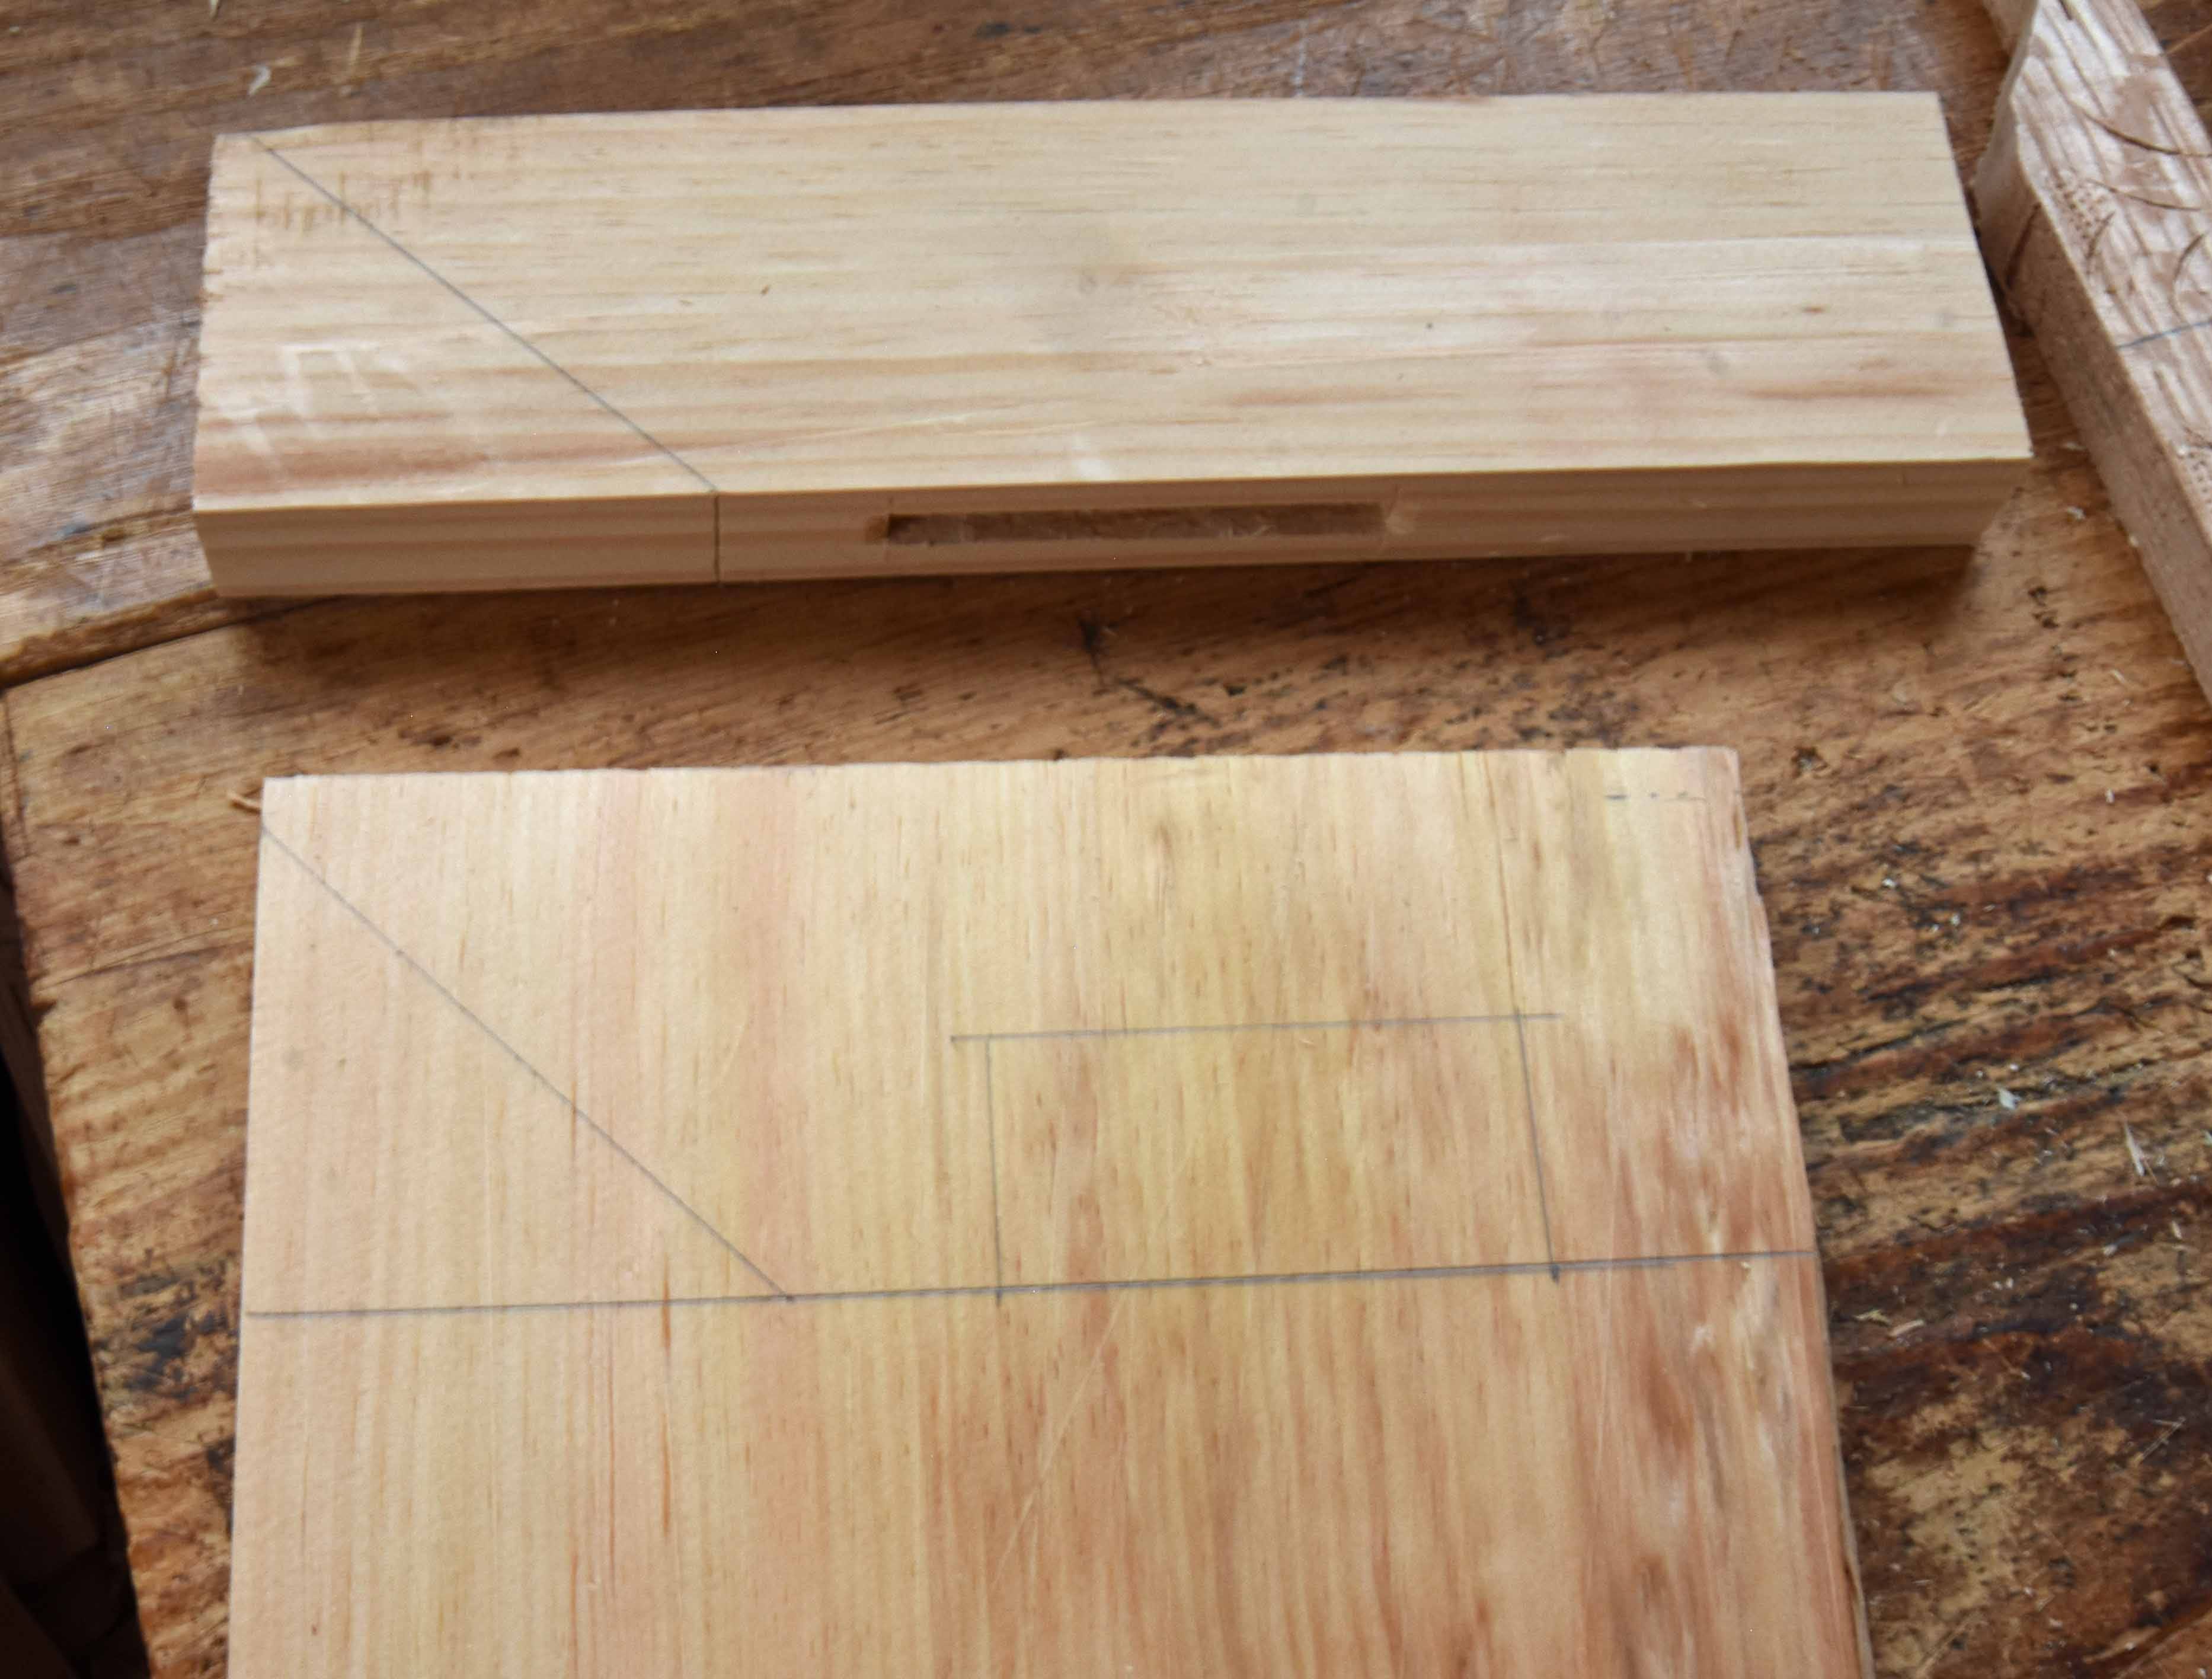
Note that the oak is perfectly straight and radially oriented. Either riven or sawn, I don’t know. I’ve never seen underneath this table, nor seen it with its leaves drawn out. One thing that’s odd about it to my modern eyes is that the two pieces mitered together there are different widths. Not what you usually see in mitered joints. When I found the Charles Hayward drawing of it, what he called a “clamped top” - he drew the mitered frame with equal-width parts. (I see he’s also got tongue & grooves between the boards and in line with the mortises…I wonder if those are worth the trouble…)
The other one I have pictures of is from New England, taken off the website of the Wadsworth Atheneum:
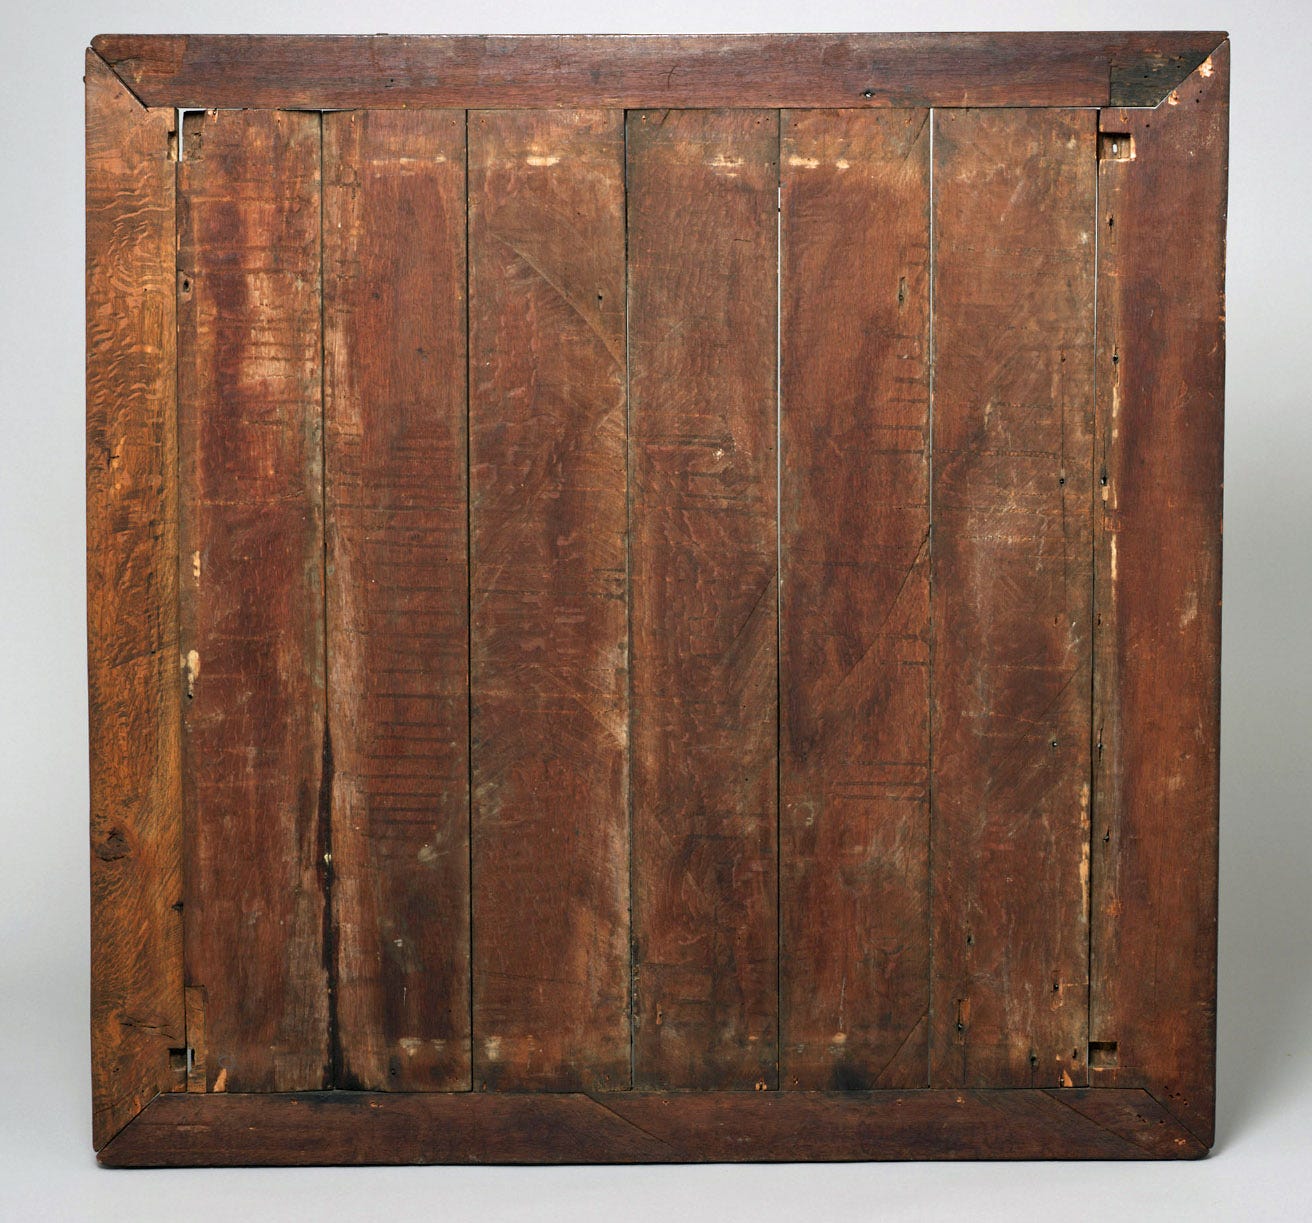
When you zoom in on that photo, you see that the strip on our right is wider than the strip on our left. Means nothing, other than maybe they kept the stock whatever width they could get out of it - no need to bring them down to an equal width. What you can’t tell from this photo is whether there are joints between the ends of the middle boards and the end cap - there seems to be a gap in some places with no visible joint.
So I set out to cut a sample joint that’s part-Hayward, part-these two examples. Mostly to see what it entails. Once you wrap your head around the layout, it’s just cutting and paring to some lines. Once I had the lines drawn, I chopped a 5/16” mortise, keeping it a little away from the miter. Maybe next time I’d move it over even more.
I cut the miter on the tenoned piece first - then cut away excess wood to isolate where the tenon would fall. Then cutting out the material between the tenon & miter is just chisel work, like chopping dovetails.
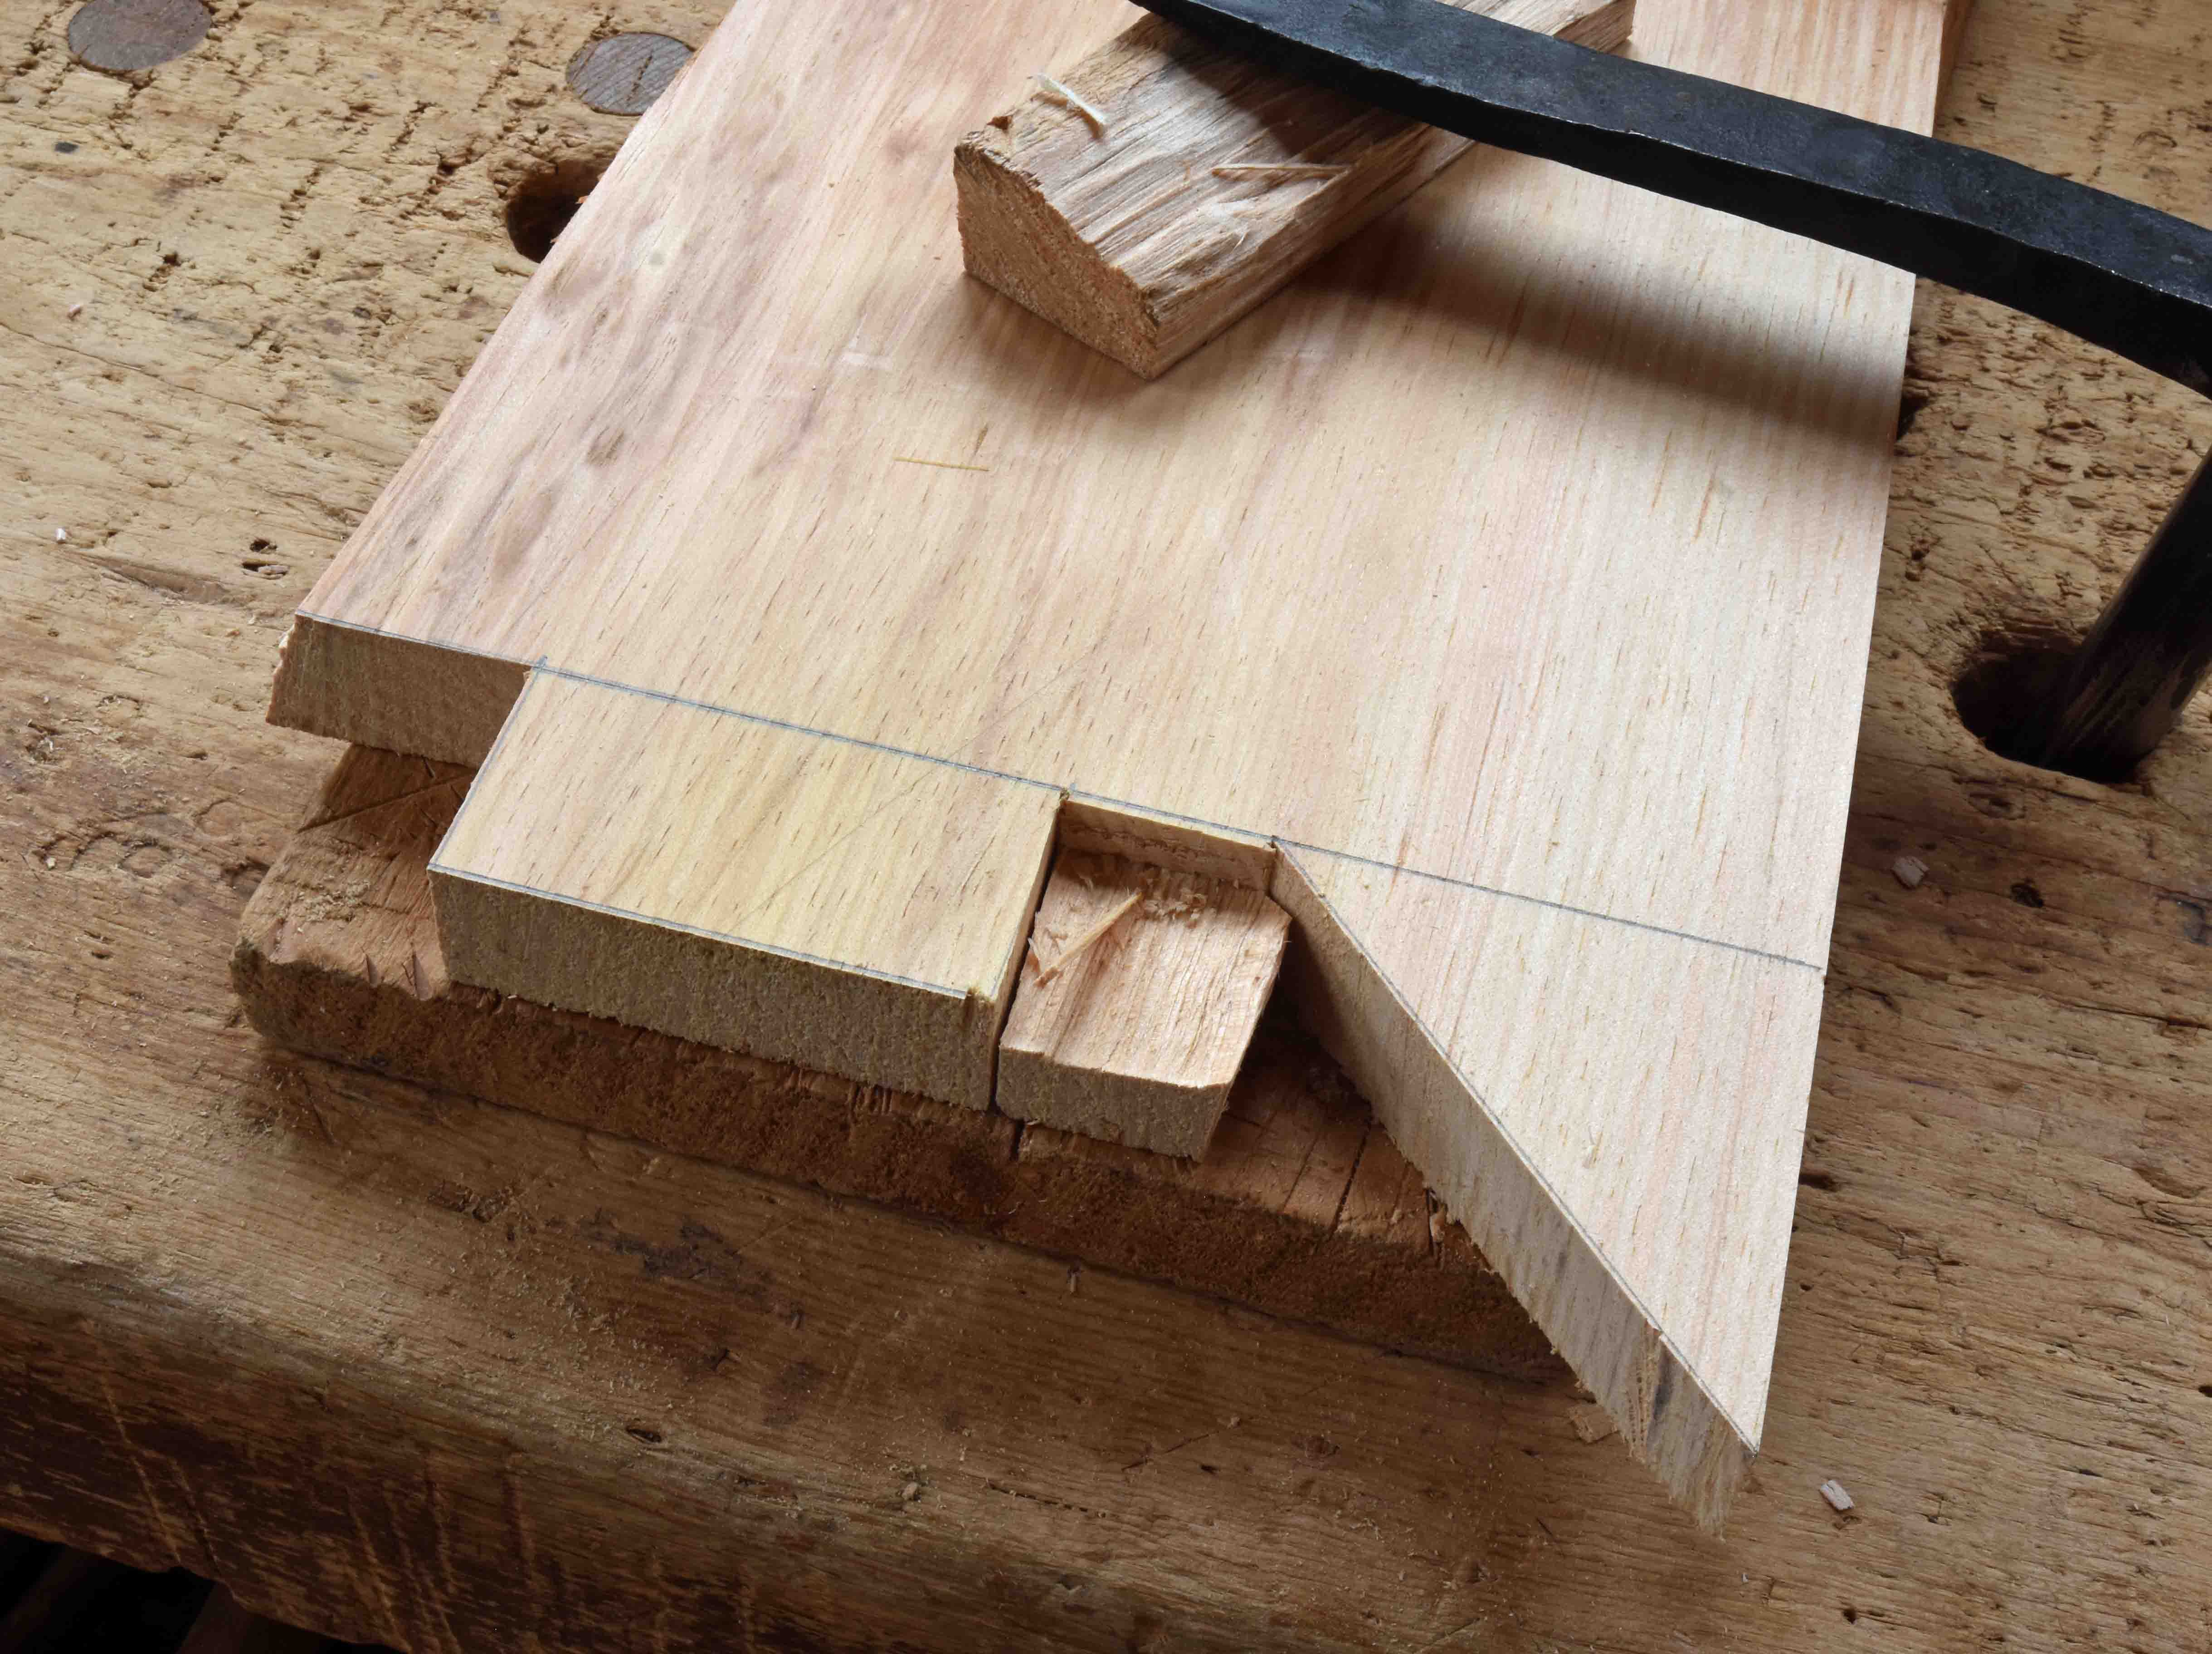
Then I laid out the tenon thickness. Sawing the shoulders was a bit awkward, a very short stroke for the saw. You don’t want to hit the miter.
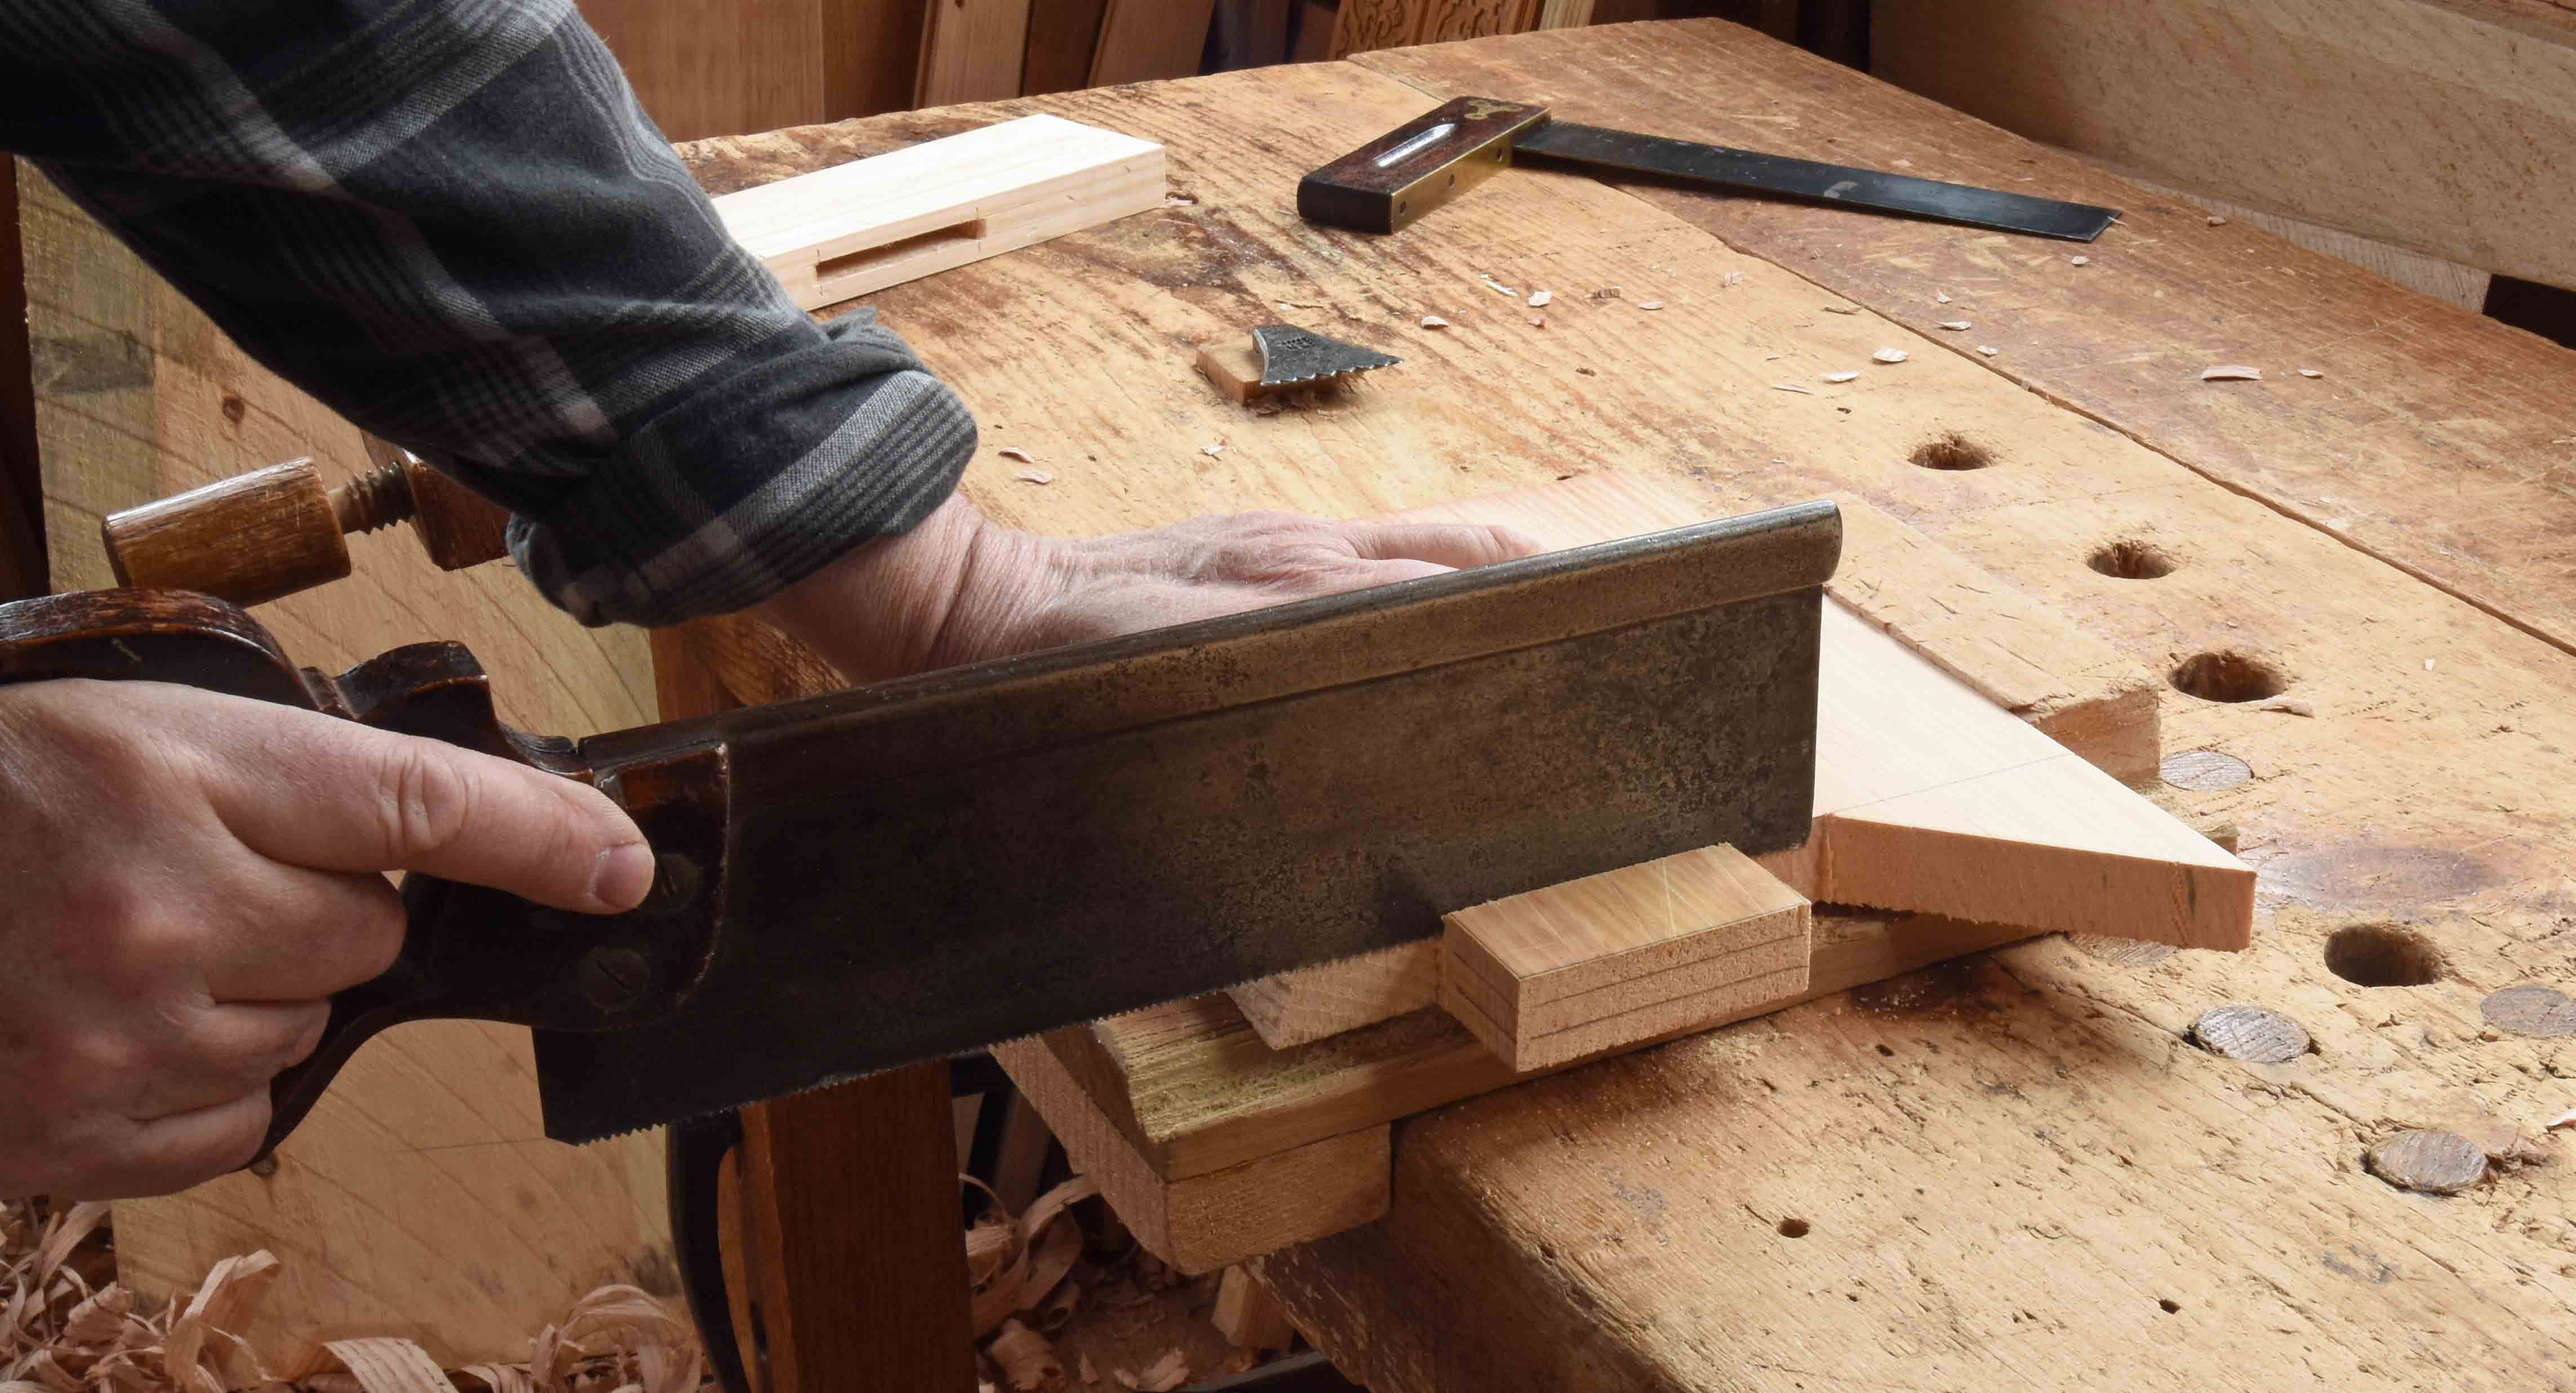
From there, it’s all paring and fitting. I moved pretty quickly, so taking more time & care would produce a better result. But this was well within reason for doping out how it goes.
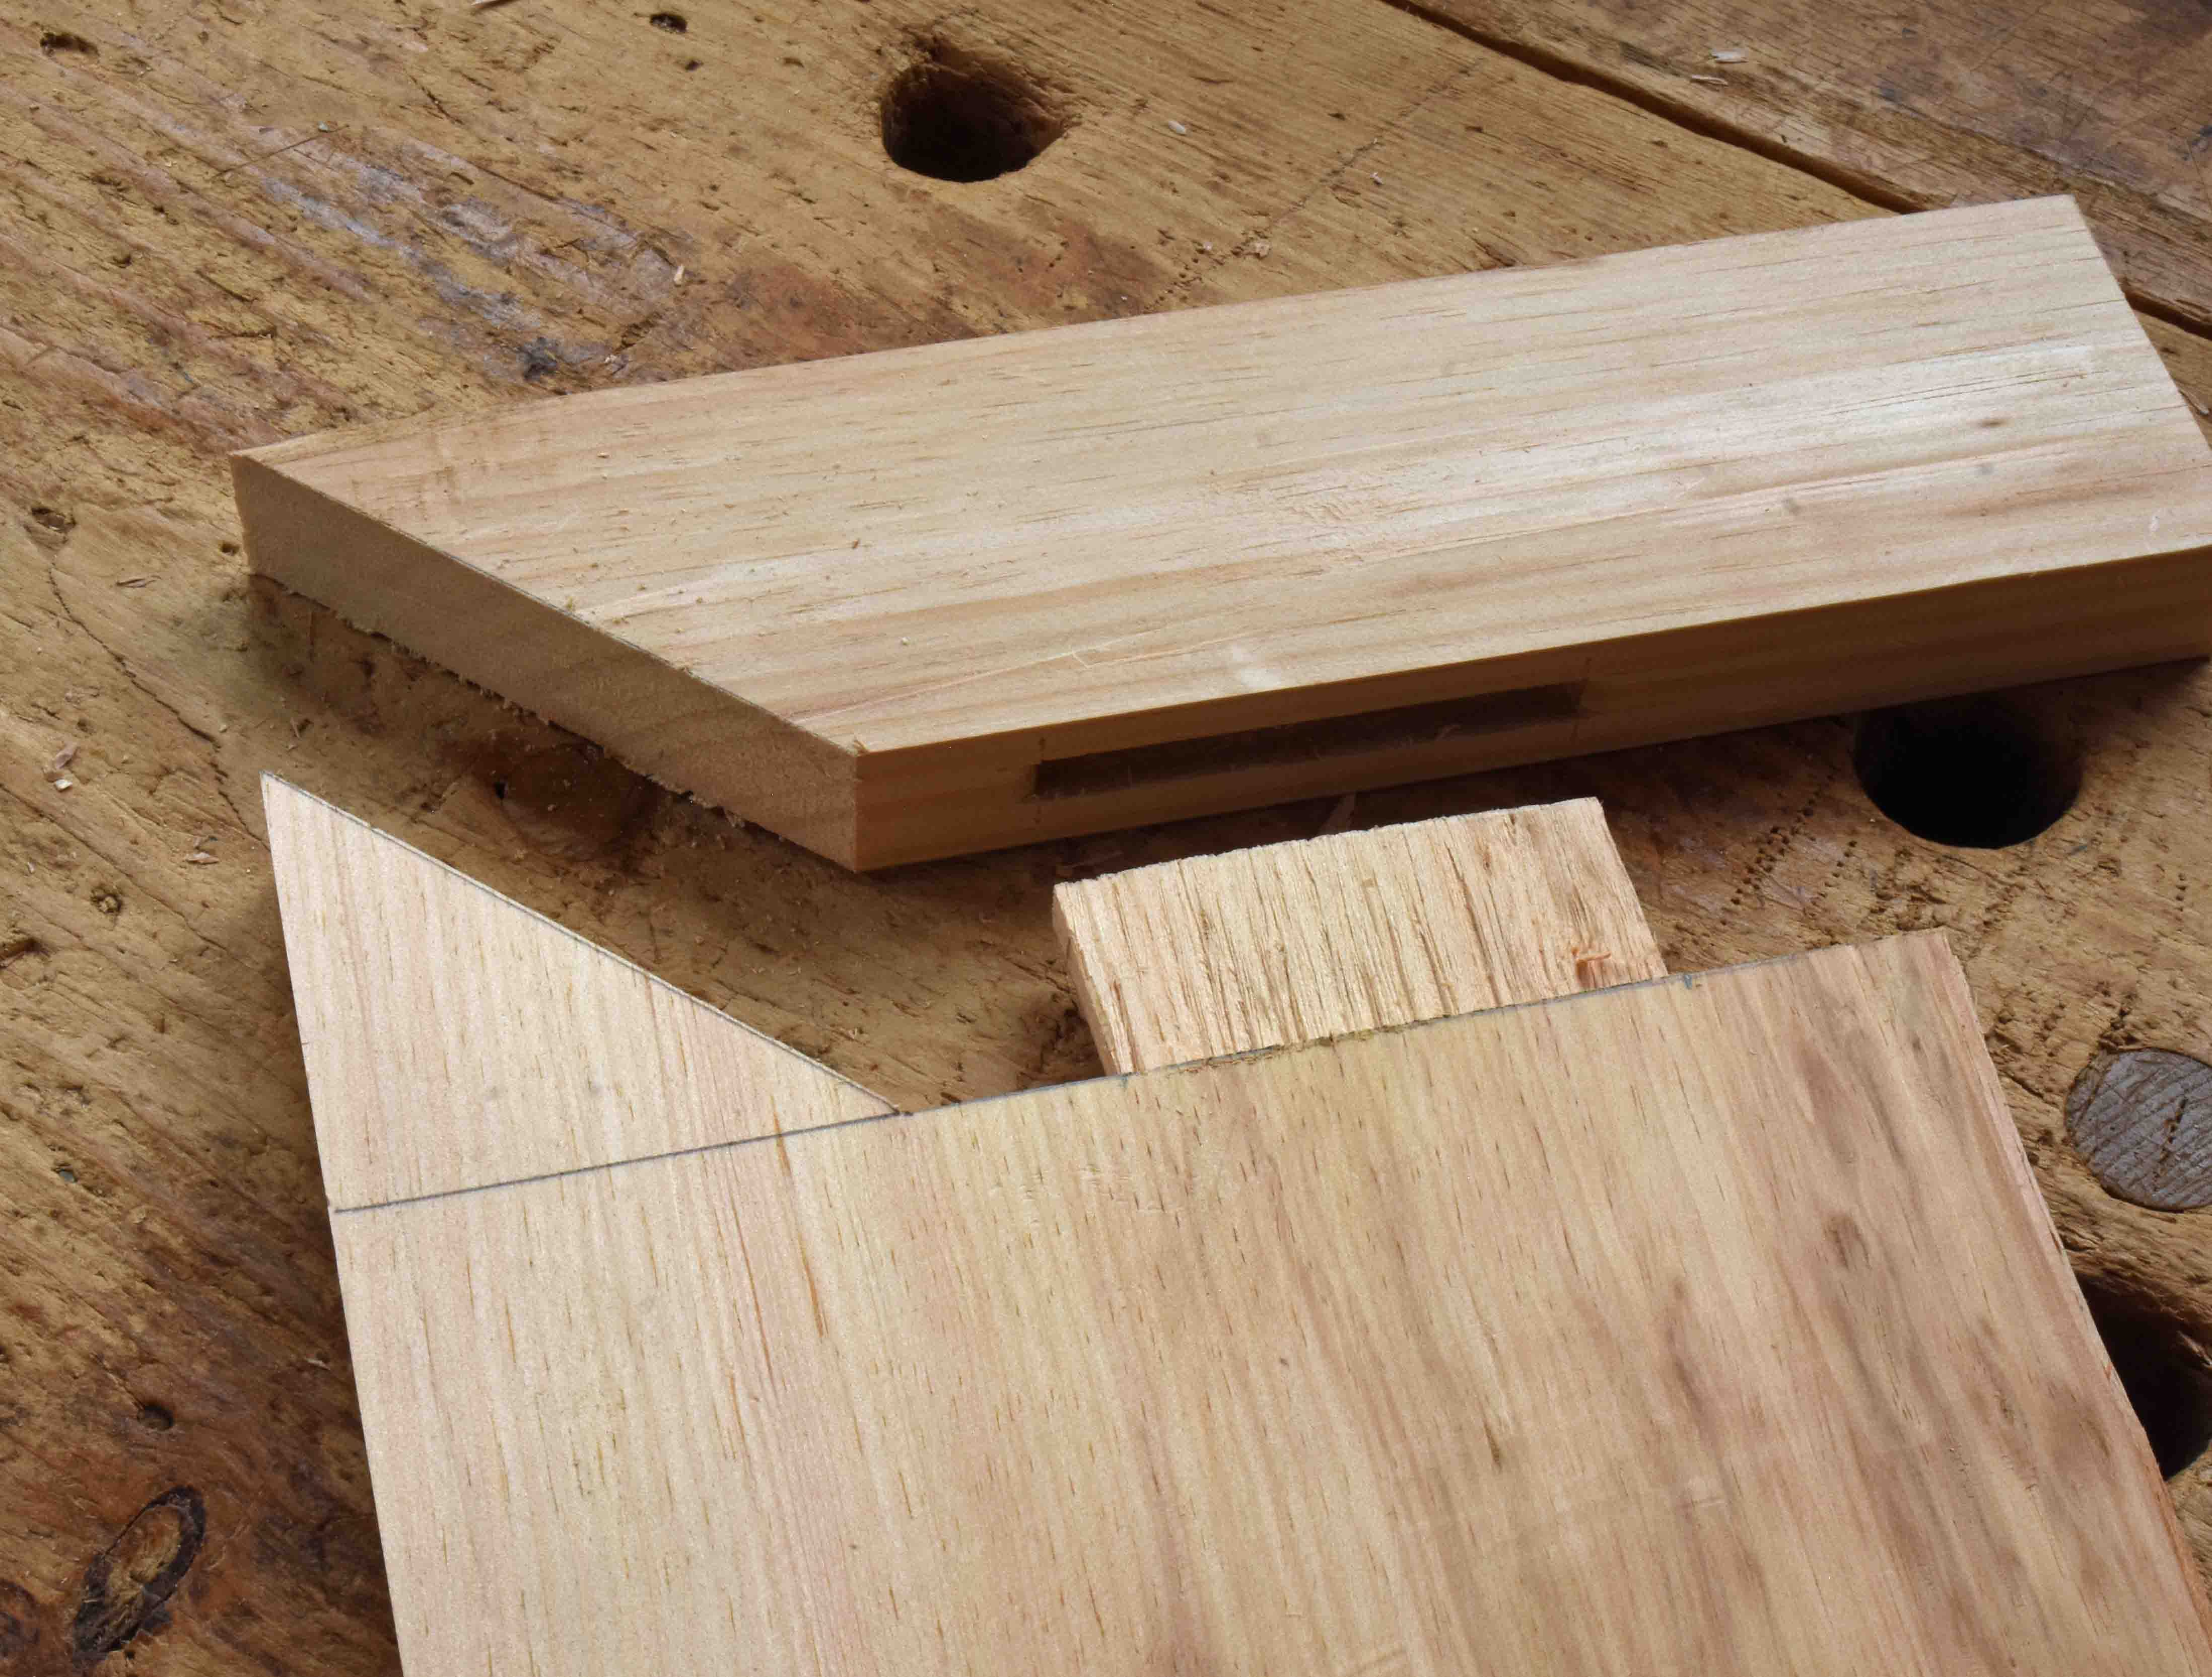
After some paring here & there, I got it to close up pretty well. Now - how was/is it fastened? There’s a peg through the edges of miters on the MFA tabletop - I assume the rest of the thing is glued…but that’s an assumption. I want to drawbore the mortise & tenon joint - but there’s no pin visible in the two tops I’ve seen thus far.

Now - will I tackle this on the wide pine boards for the table I’m making…hmm. Could go either way right now, but I’ll probably lean towards trying it. When am I going to get my next chance at building a table?
Your mark-out and sample joint surprised me... I had been thinking there would be a stopped haunch or diagonal tenon tyeing the outer board to the end board. Would that have been overkill, or too difficult to execute to justify the extra work?
It's a fascinating table. Thanks for sharing.
Thanks for sharing your method. I like the peg in the end to help hold the miter together. I have done the spline shown in Haywards drawing and that works pretty well. The peg would be quicker and easier.