


Carved drawer front

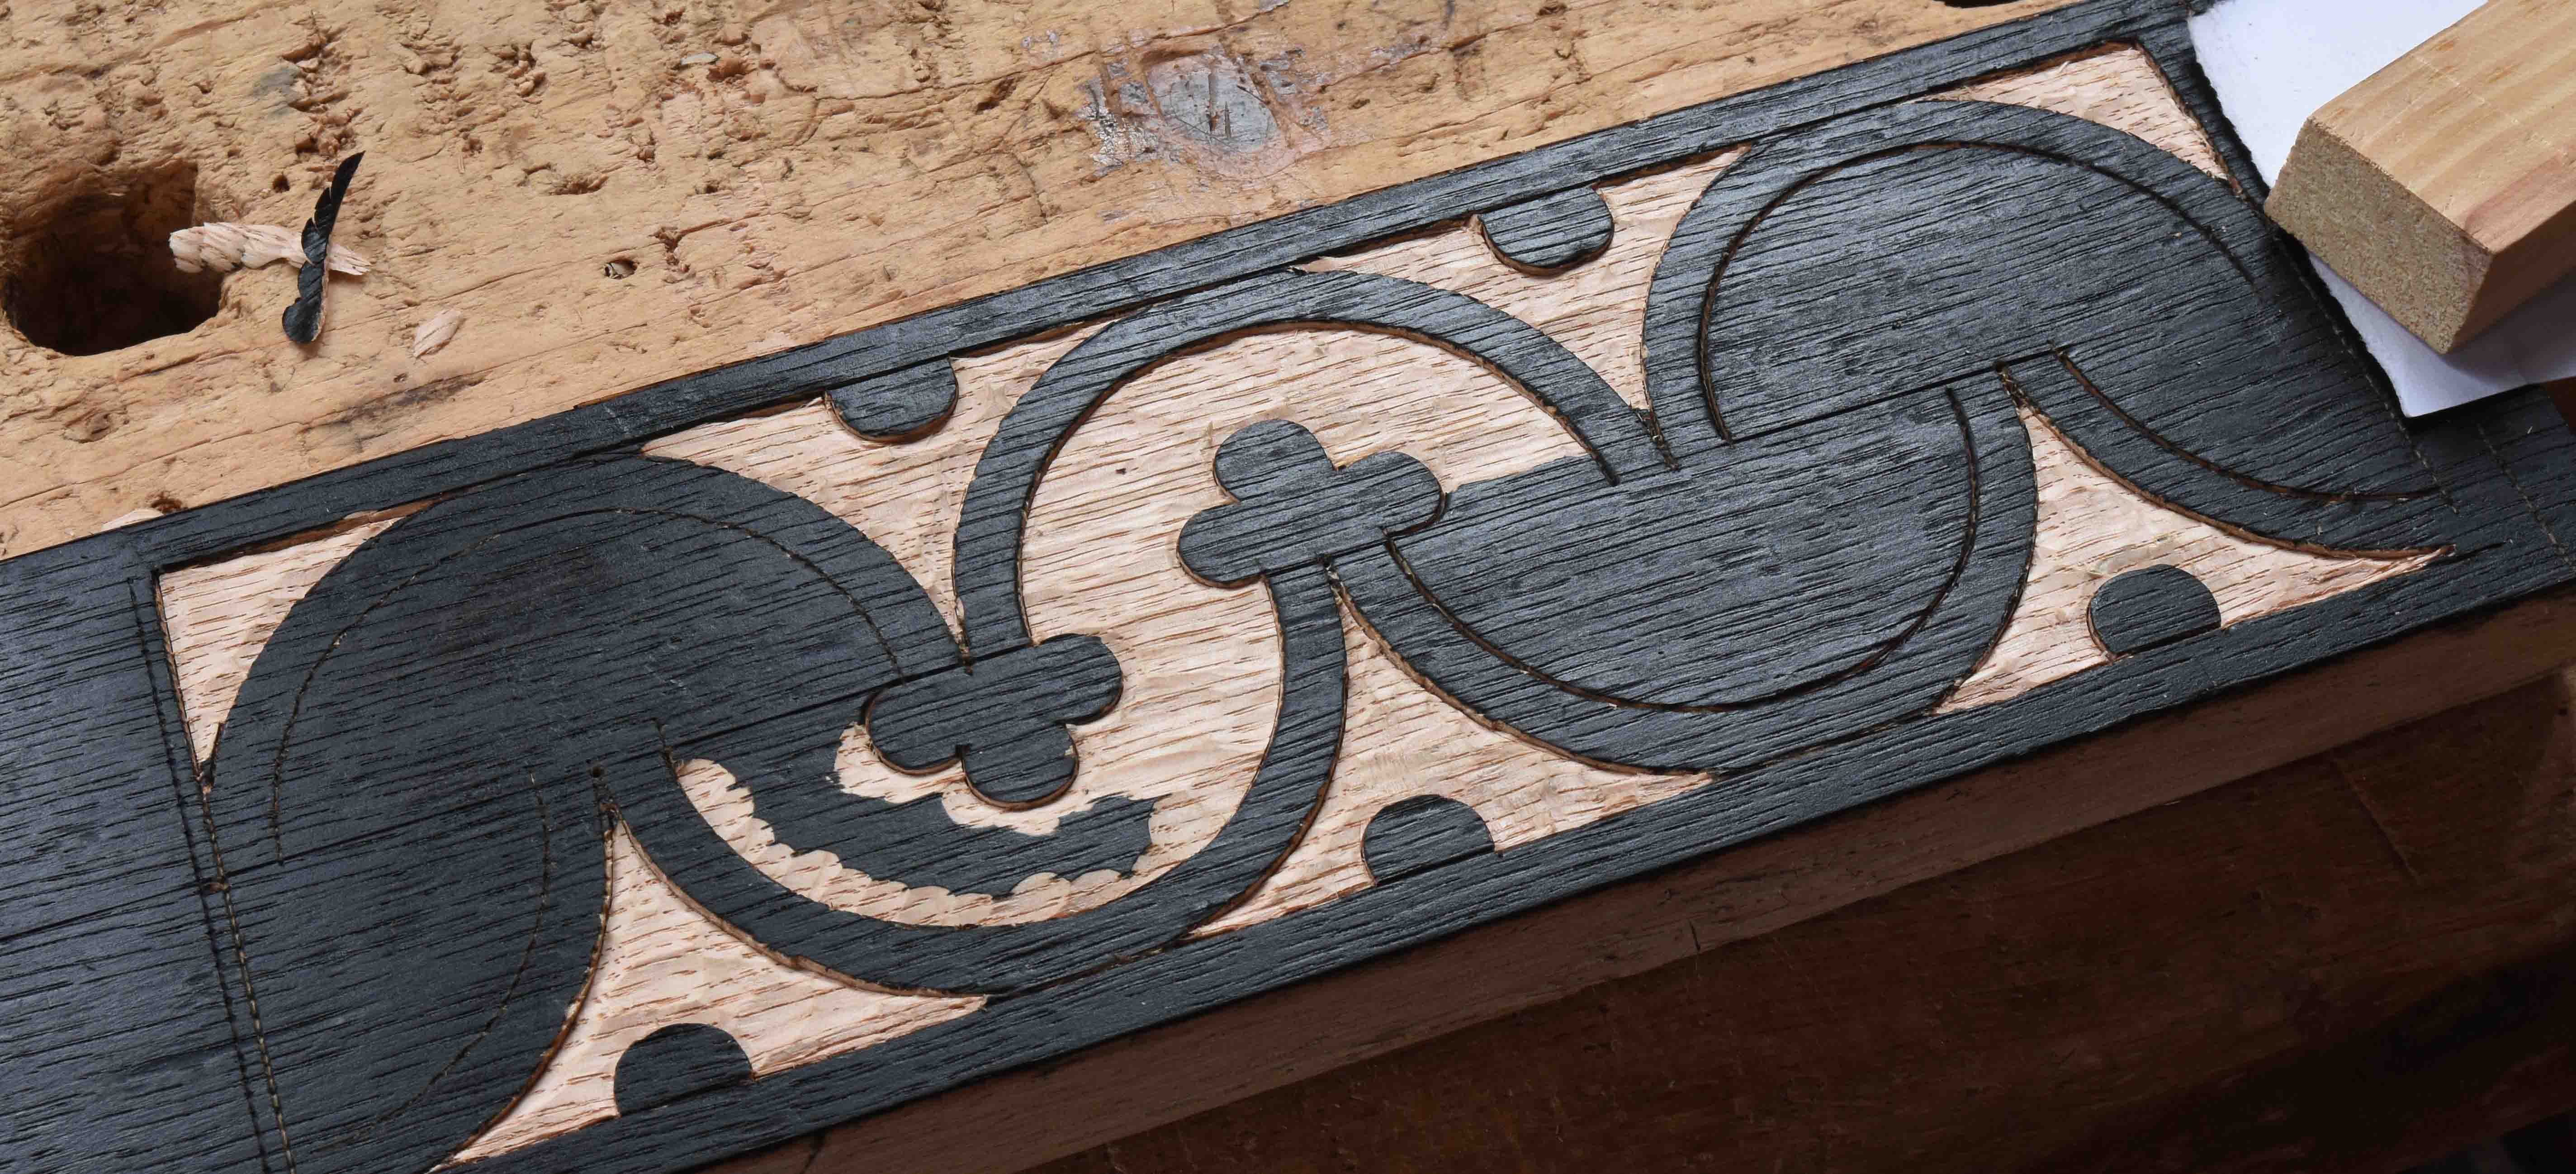
My carving tools have sat idle for a good long time while I worked away at the 2nd-in-a-row version of the 1680s cupboard. Here’s a look back at carving the drawer front. The joiners who made this cupboard and its relatives only occasionally included carving in their decoration. Of the 12 cupboards only a few of them have any carving other than incised dates. Same for the chests of drawers from this shop.
And the carving that does show up is a bit shallower than most New England carvings of the period. On this cupboard, there’s three sections of what I call “opposing lunettes” carved across the 2nd drawer front. The layout has some basic geometry behind it - the top rows of each section consist of three full-half-circles. (if you can have a full-half-circle). And the bottom row is a quarter-circle, two half-circles then a quarter circle.
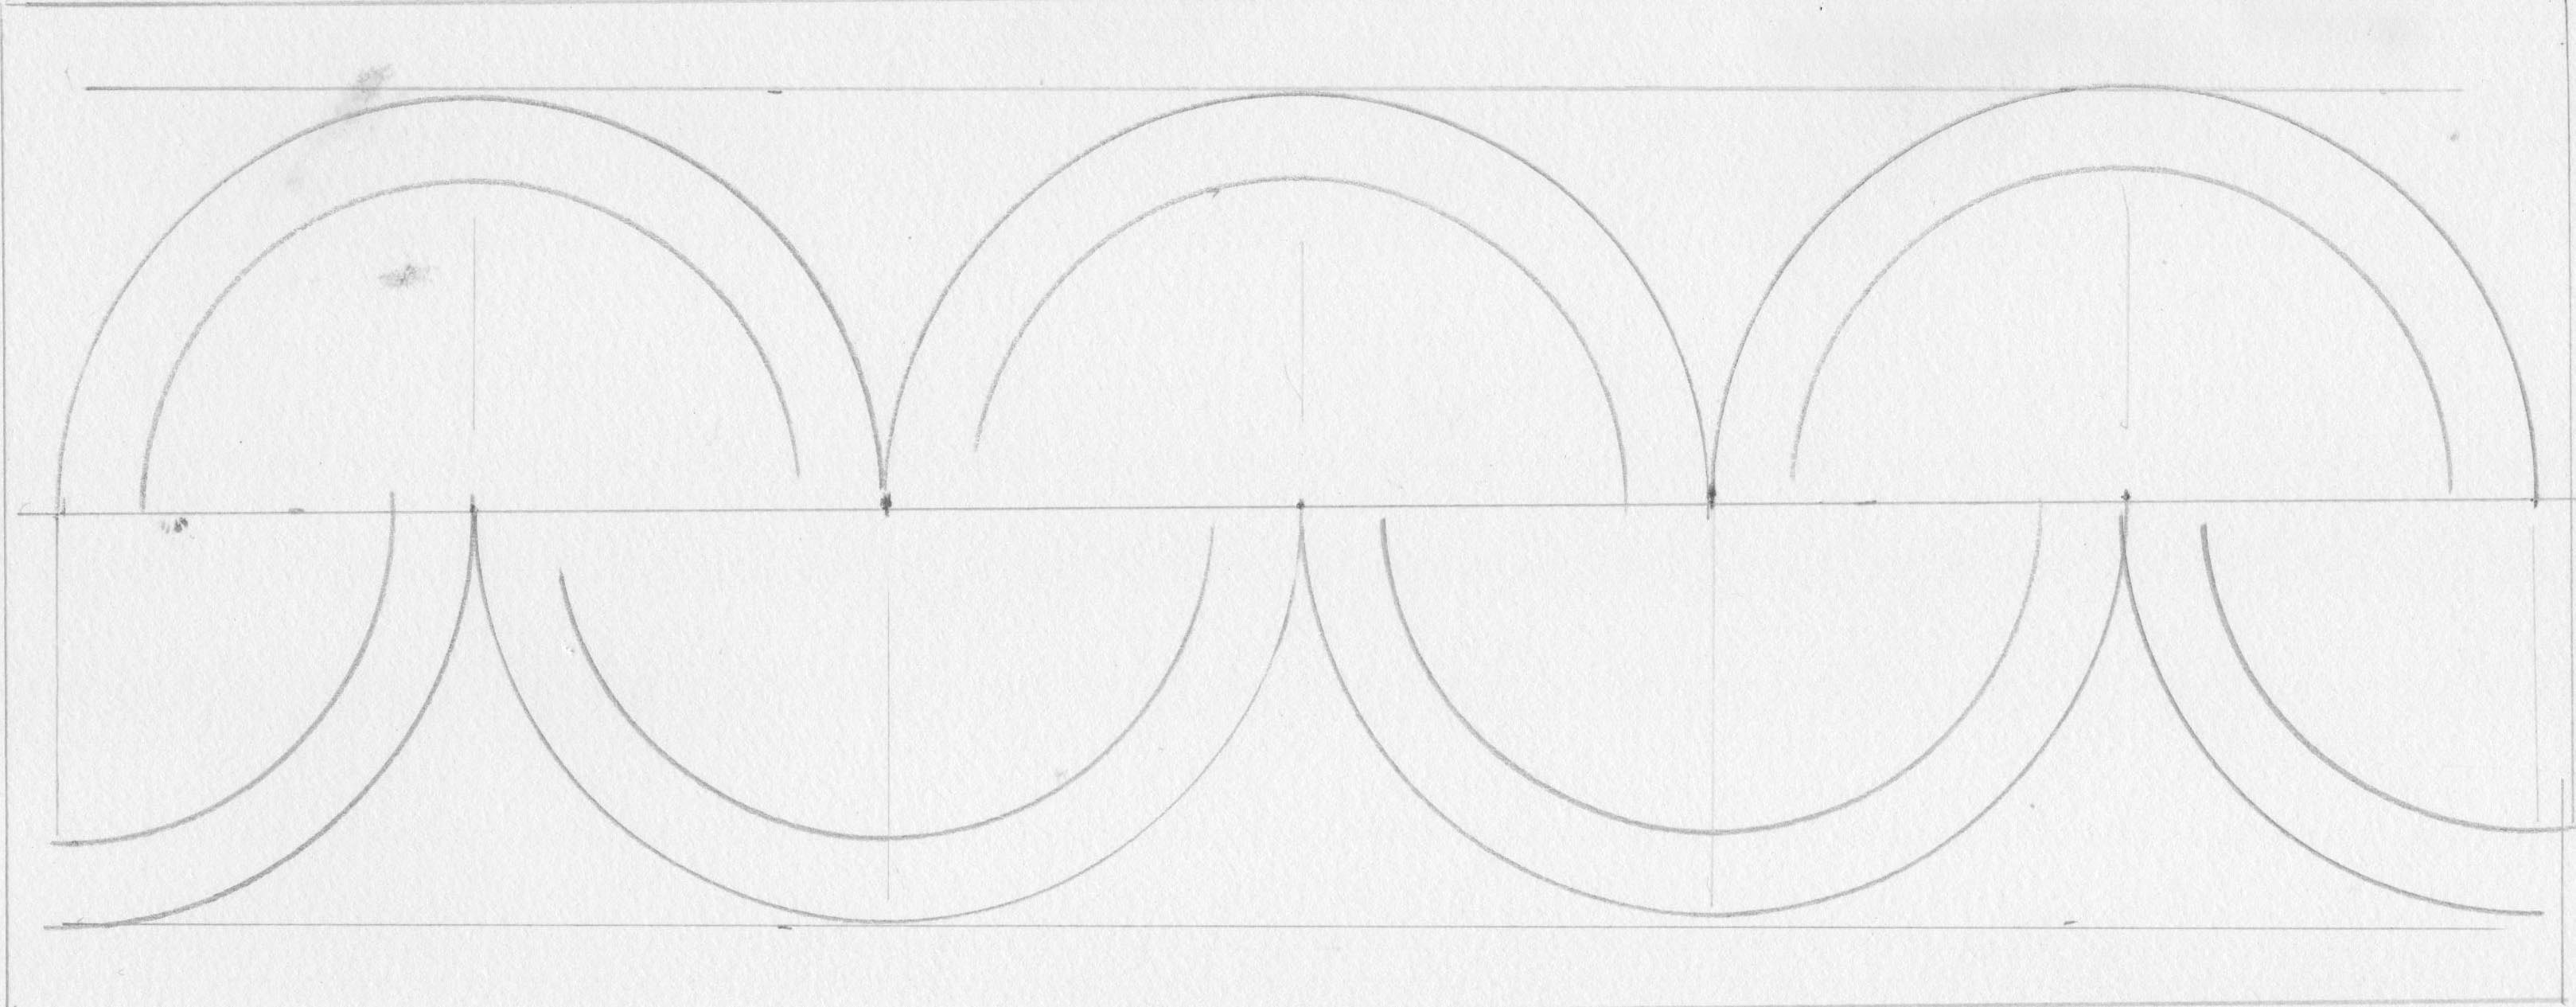
You can get this spacing a lot of different ways. There’s a relationship between the height of the drawer front and the width of each section. If you’re starting from scratch making this pattern, its length will depend on the width/height of your stock. In my case, I was re-creating a given size so I had measurements to start with. Other times I’ve carved similar designs and had to work out the spacing from scratch. If you do it on paper, you might save some frustration - on wood, the plane is the eraser. The concept is the same regardless of the size. This layout (above) is close to what I carved - 4 1/4” high x 10 3/4” wide/long. The top & bottom margins and the “bands” of the lunettes are 3/8” wide. The side margins are narrower.
Keep reading with a 7-day free trial
Subscribe to Follansbee's Substack to keep reading this post and get 7 days of free access to the full post archives.