

[First off - thanks to all of you who support my work here, I do appreciate it. I’m putting most of my writing efforts into this blog now, knowing people have committed to supporting it. Today’s post is about changes in how I bore the Jennie Alexander chair posts. I’m making this post available to all subscribers - free & paid - it seemed a cheap trick to chop it in half & put the balance behind a paywall. There’s a description of the jig, then a more detailed video of it in use. If you like it, please consider subscribing - $5.00 per month/$60 per year. There’s more where this came from…]
This week I’ve been working on a Jennie Alexander-style ladderback chair. I have a class coming up at Pete Galbert’s - Joel Paul https://www.instagram.com/13starsfarm/?hl=en & I will take a group of students through all the paces to make the chair from green wood to a finished chair....but I have to have the model and I don’t have a recent one for show & tell.
I started teaching this class at Pete’s shortly after the Lost Art Press edition of Jennie’s book came out. I knew that showing Galbert and his then-assistant Charlie Ryland how I learned to make the chair would result in them tweaking the steps. Pete is infectious that way. Charlie cooked up this new jig, first he & I, then Joel Paul and I - all with input from Galbert - have been using it for the last three classes or so. How I go about boring mortises in my shop is now very different from what JA outlined in the book (and in the classes she taught, - same goes for Drew Langsner’s book & classes.) Both methods work just fine. I adopted the new boring jig because it seems like fewer steps to me and might make me more accurate. Drew Langsner pointed out that the method he & Alexander used is simpler to set up, easier jig to make, and maybe more adaptable this this present setup. But if, like me, you’re going to make the same chair over and over - I think it’s worth a look.

The new jig is one of JA’s V-blocks - now glued and screwed to a flat base, rather than pinched with a mating V-block in a vise.
Across from, and parallel to, the V-block is a ledger strip/support strip that the bit extender rests on when you’re boring the post.
The height of this ledger strip is just below the middle of the V-notch in the block. The amount it is dropped from that height is half the thickness of the bit extender.
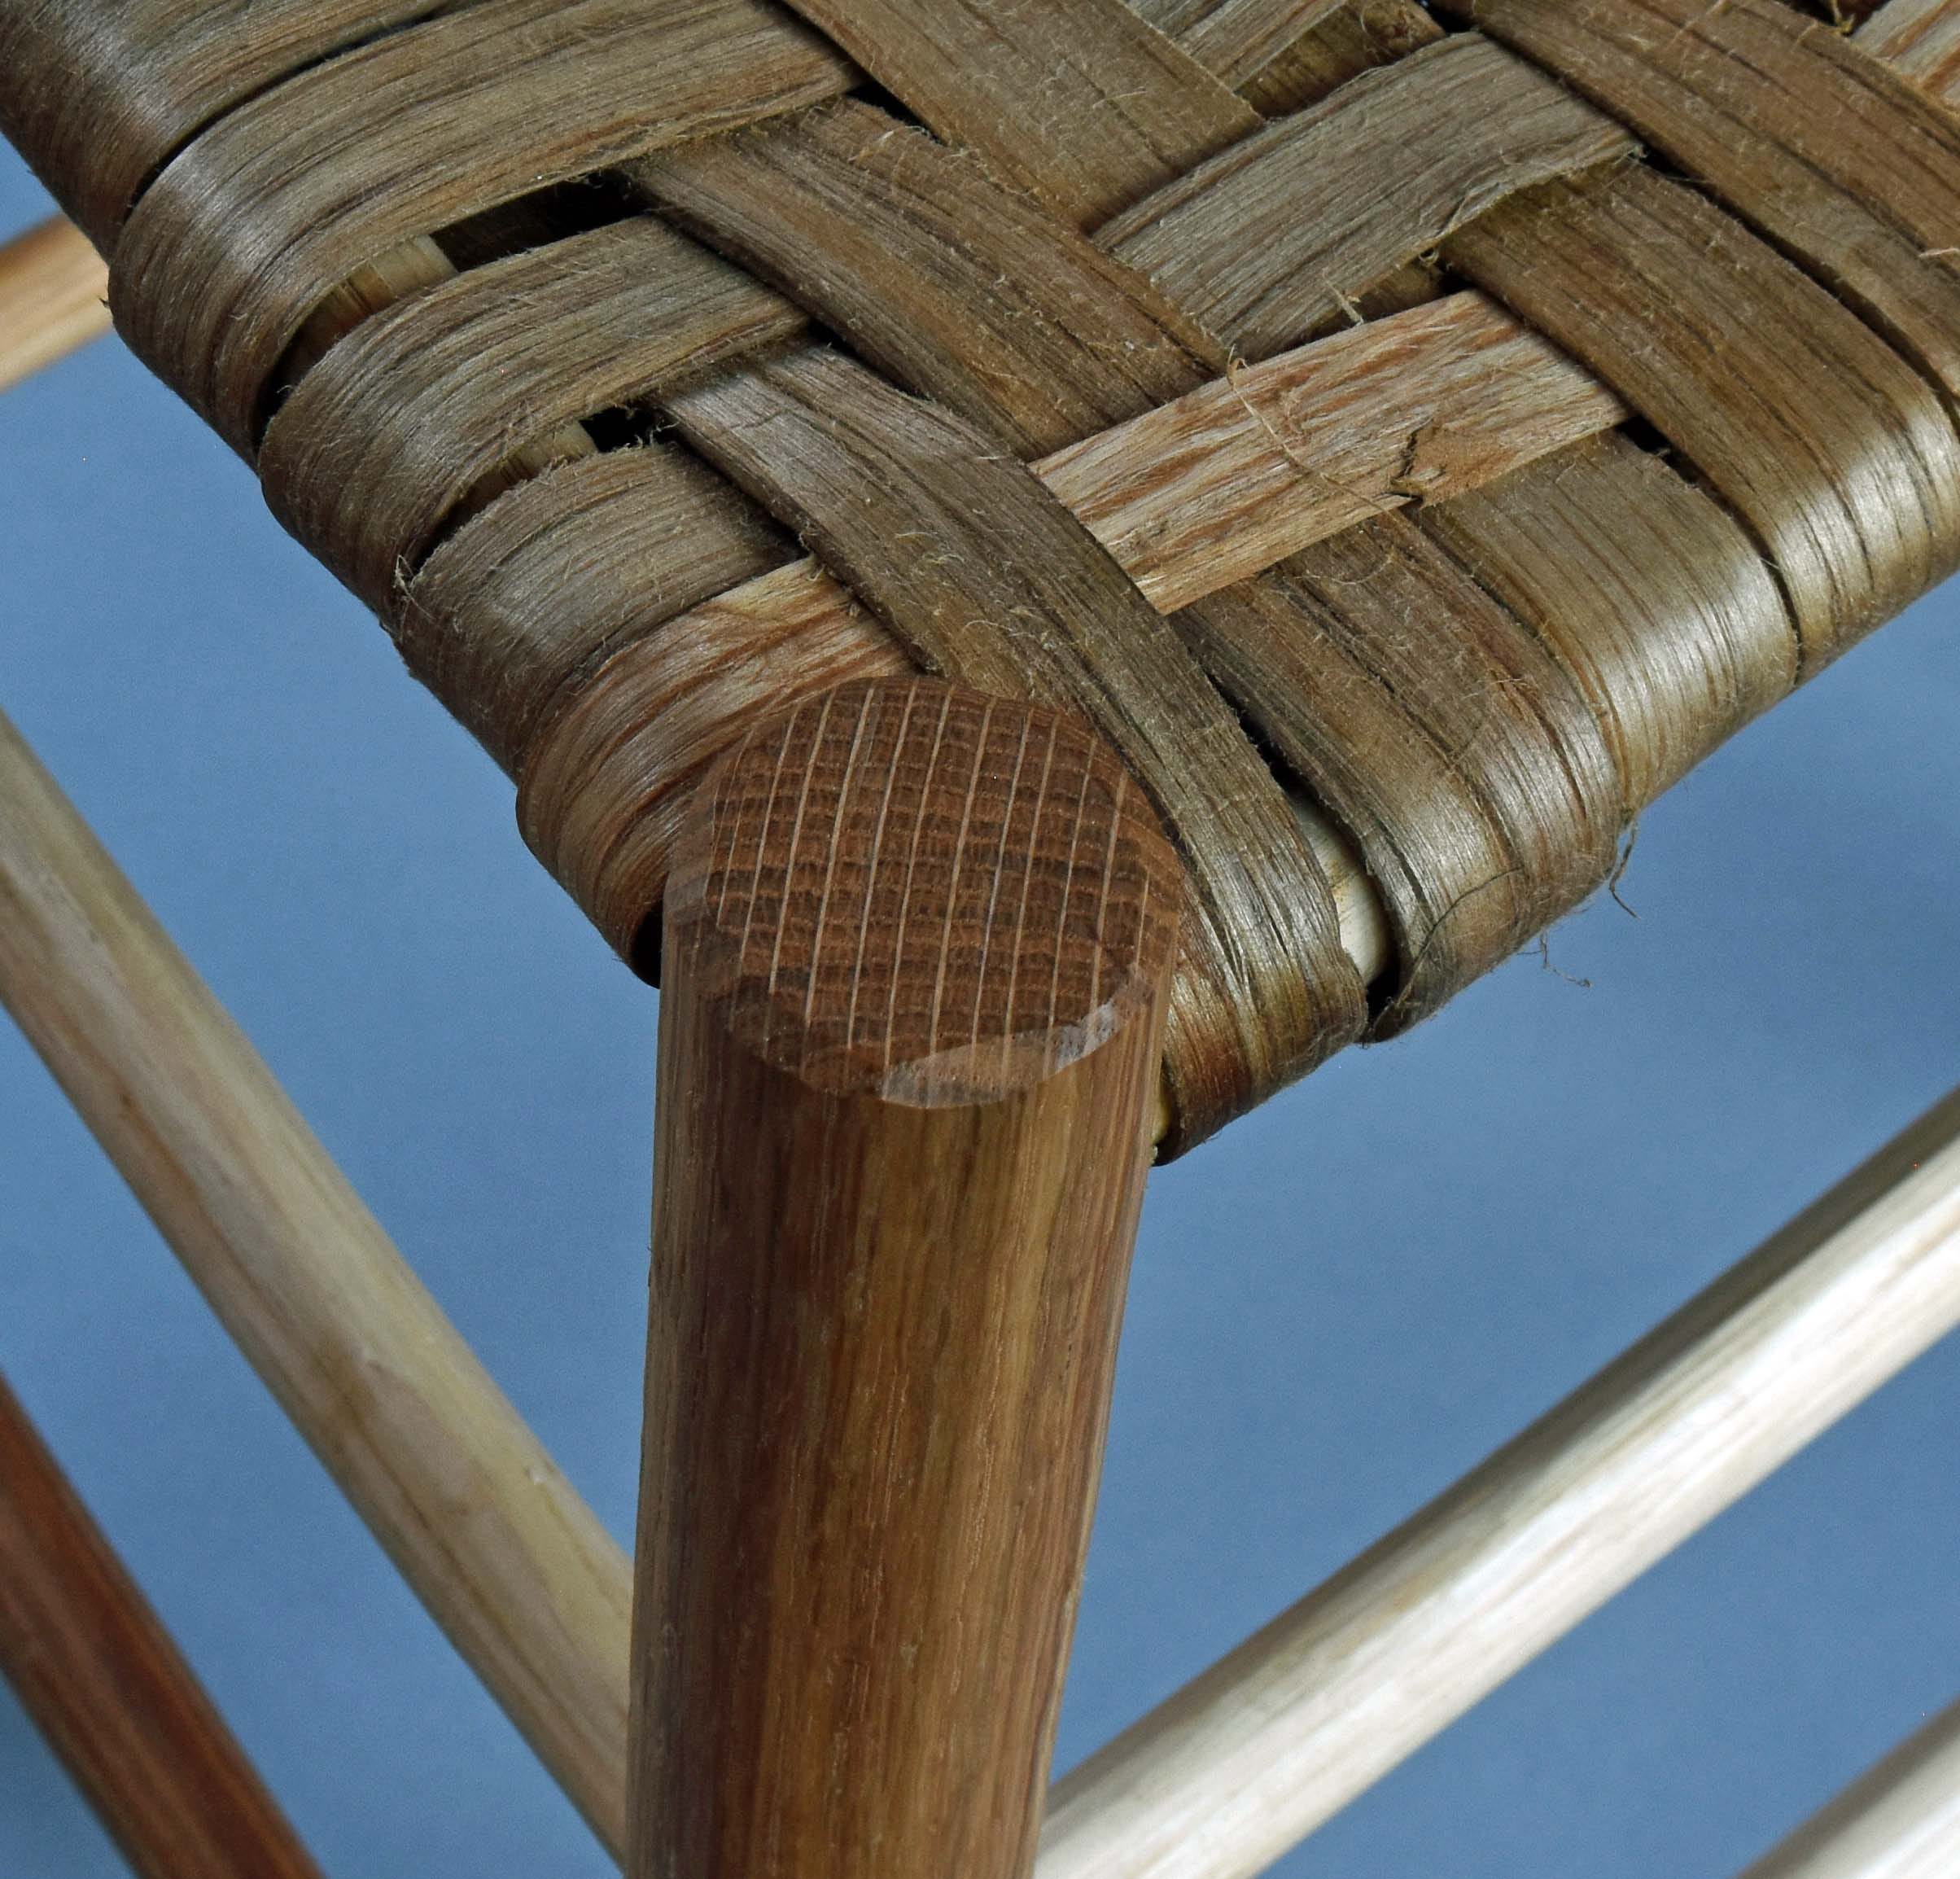
That’s how the jig works, how you line up the posts for the proper orientation depends on whether it’s a front post or a rear post. Remember that the JA chair assembles the side “panels” first - maybe unique among ladderback/post & rung chairs. The reason for this assembly sequence is that Jennie used interlocking tenons - she’d bore the 2nd set of mortises (in her case, the front and rear mortises) so they just nicked into the tenons of the side rungs.

Traditional chairs often did this, but in the reverse order - the side rungs pinned the front and rear in place. Alexander felt that the most stress was fore-and-aft - thus wanted to pin those side rungs with the front and rear rungs. It’s all academic - the joints, when done right, don’t come loose. But still, many of us build them this way.
So - the front post. There’s another consideration - boring all of the mortises so that none of them are in the radial nor the tangential plane of the post. Reduces chances of splitting the post. In theory it also equalizes shrinkage of the post on each tenon - but I think that’s too theoretical. Says me. This orientation is another piece, like the interlocking tenons, that JA got from examining old chairs.
I draw a centerline across the top end of the post - in the radial plane (when you can see it, like in oak) or perpendicular to the growth rings (when the medullary rays are not visible, like in ash.) I set an adjustable bevel to 41° - half of the angle between the side and front rungs. Then align the post’s radial centerline according to that bevel. Then tighten the clamps and carry on. You need to strike a centerline along the post’s length - I just use a block cut to match the height of the mid-point of the V-notch in the jig and use it to mark the heights/centerline. (shown in the video at the end of this post.)
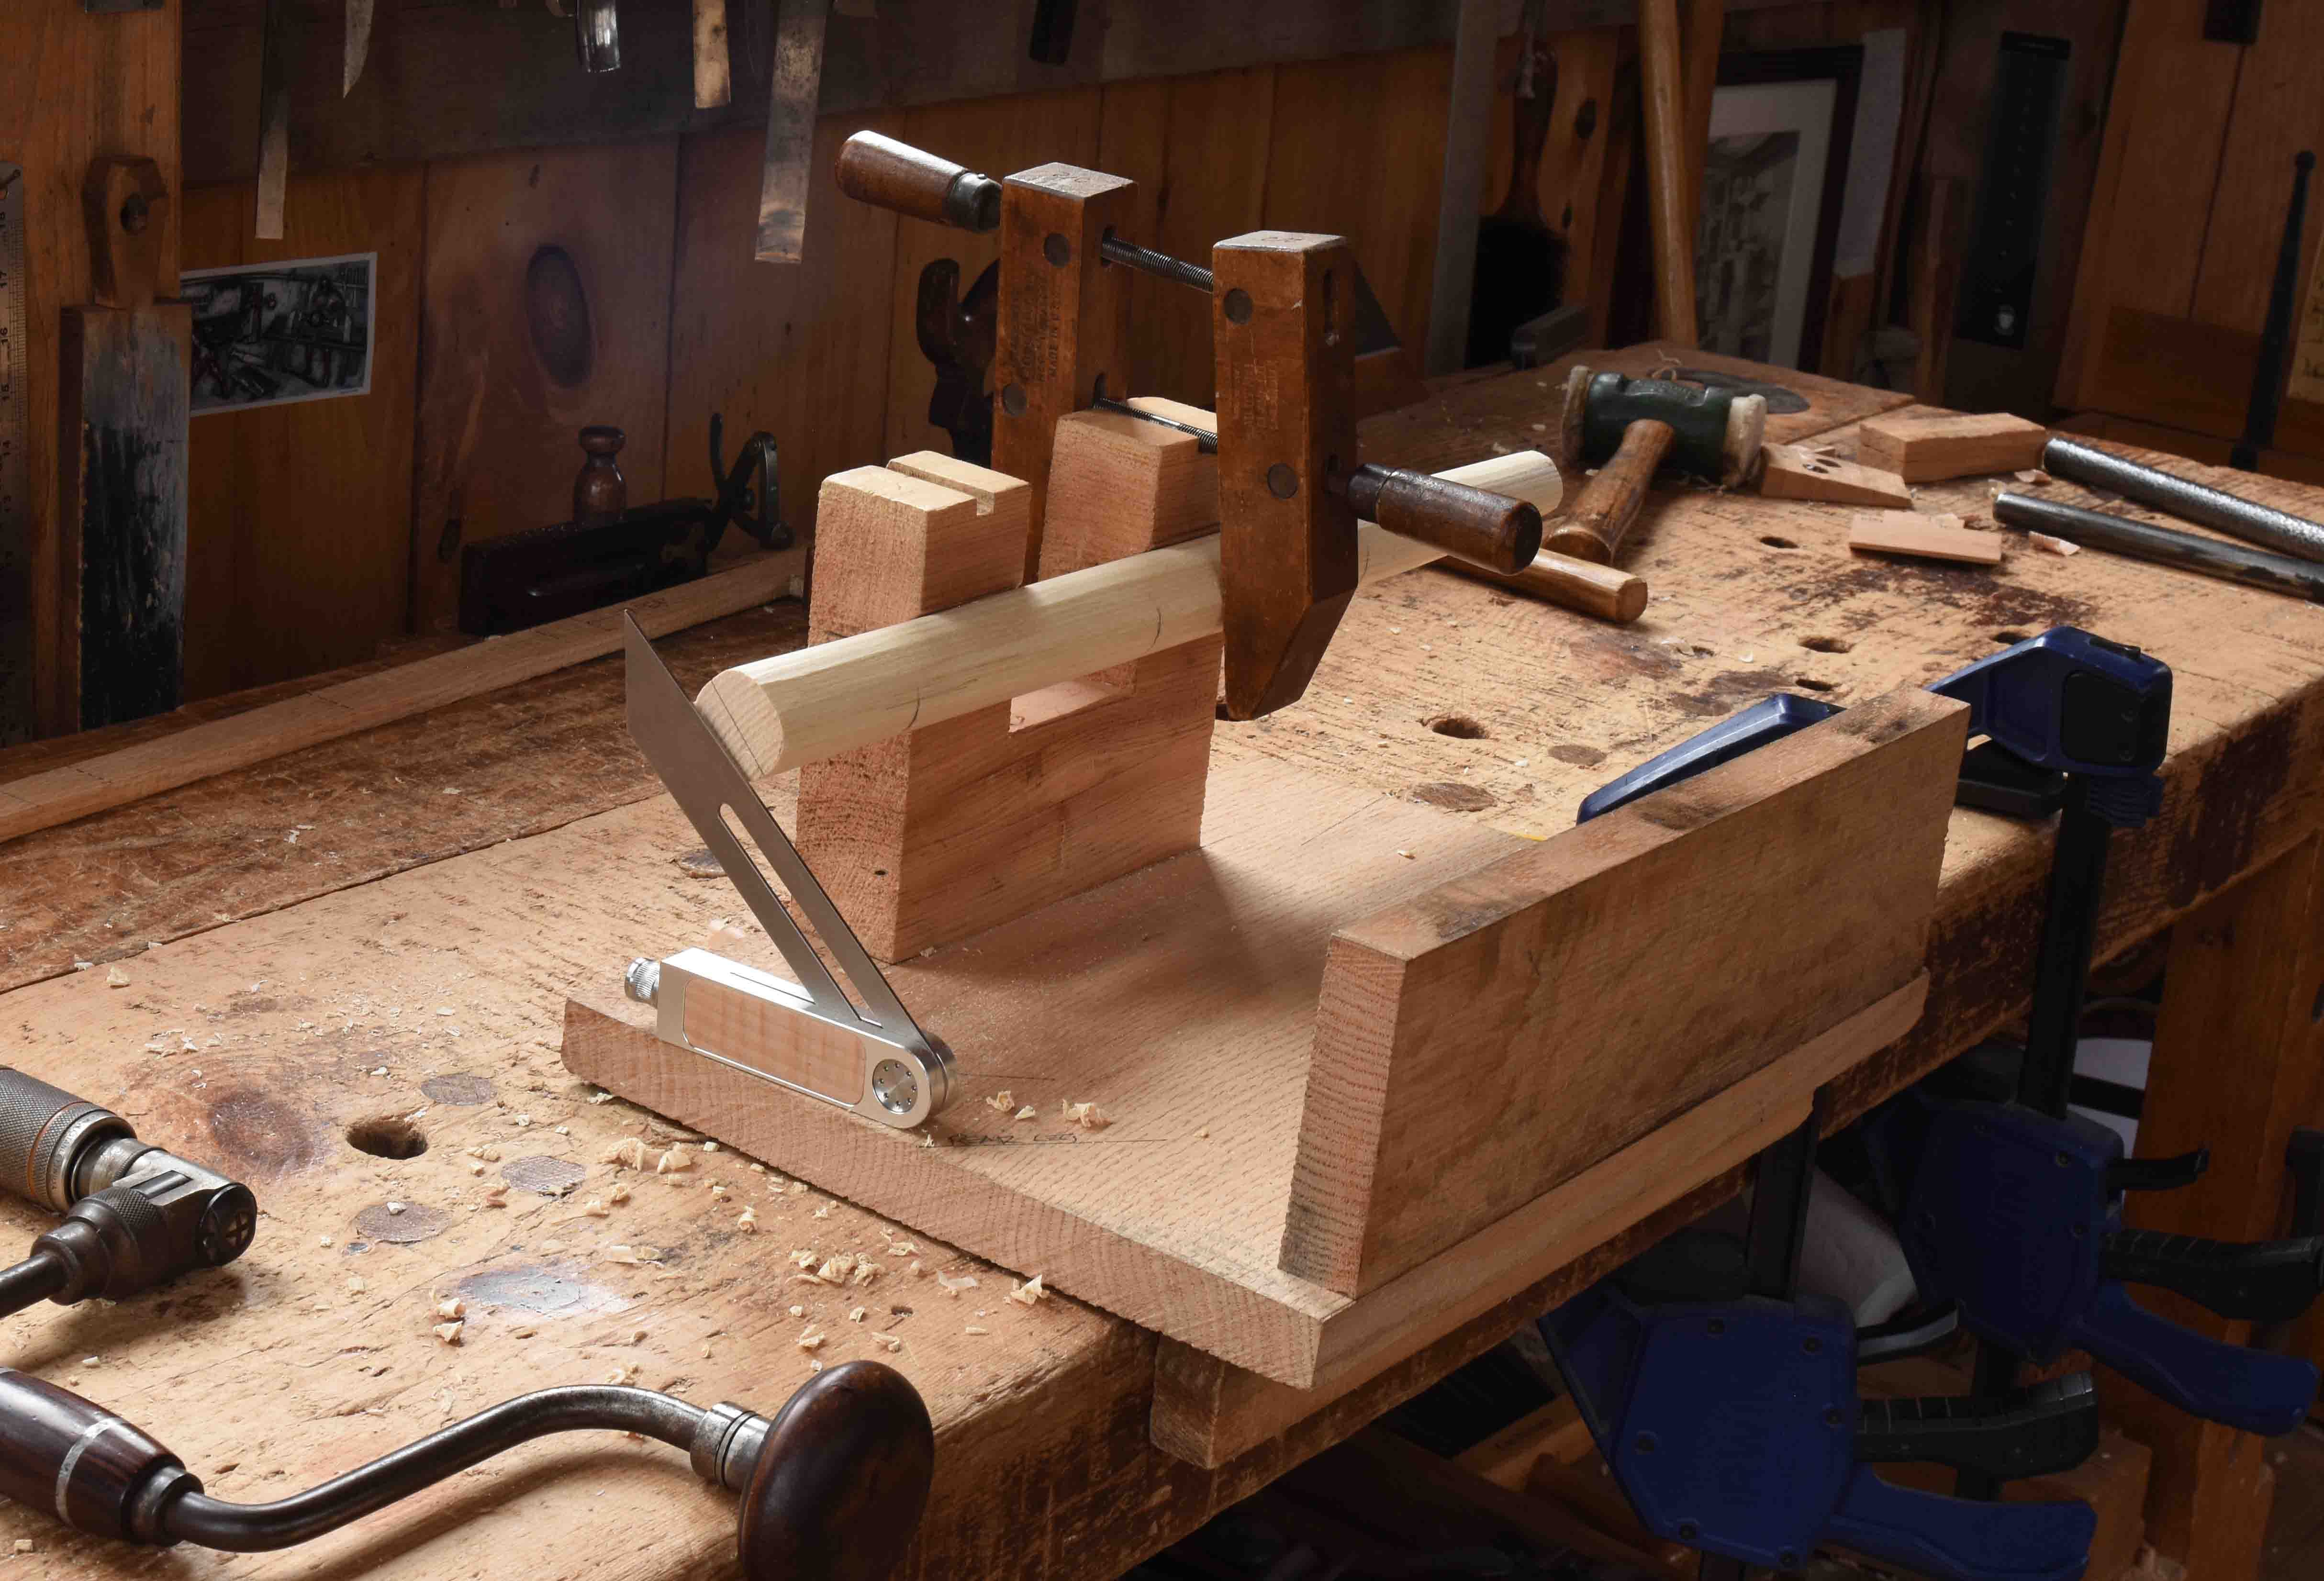
The rear post uses a different setting of the adjustable bevel. This time, the angle between the flat “relief” on the front of the rear post and the side rung. Mine’s 52°. I have scribed these two line on the base of my jig, so I don’t have to set the bevel with a protractor each time.
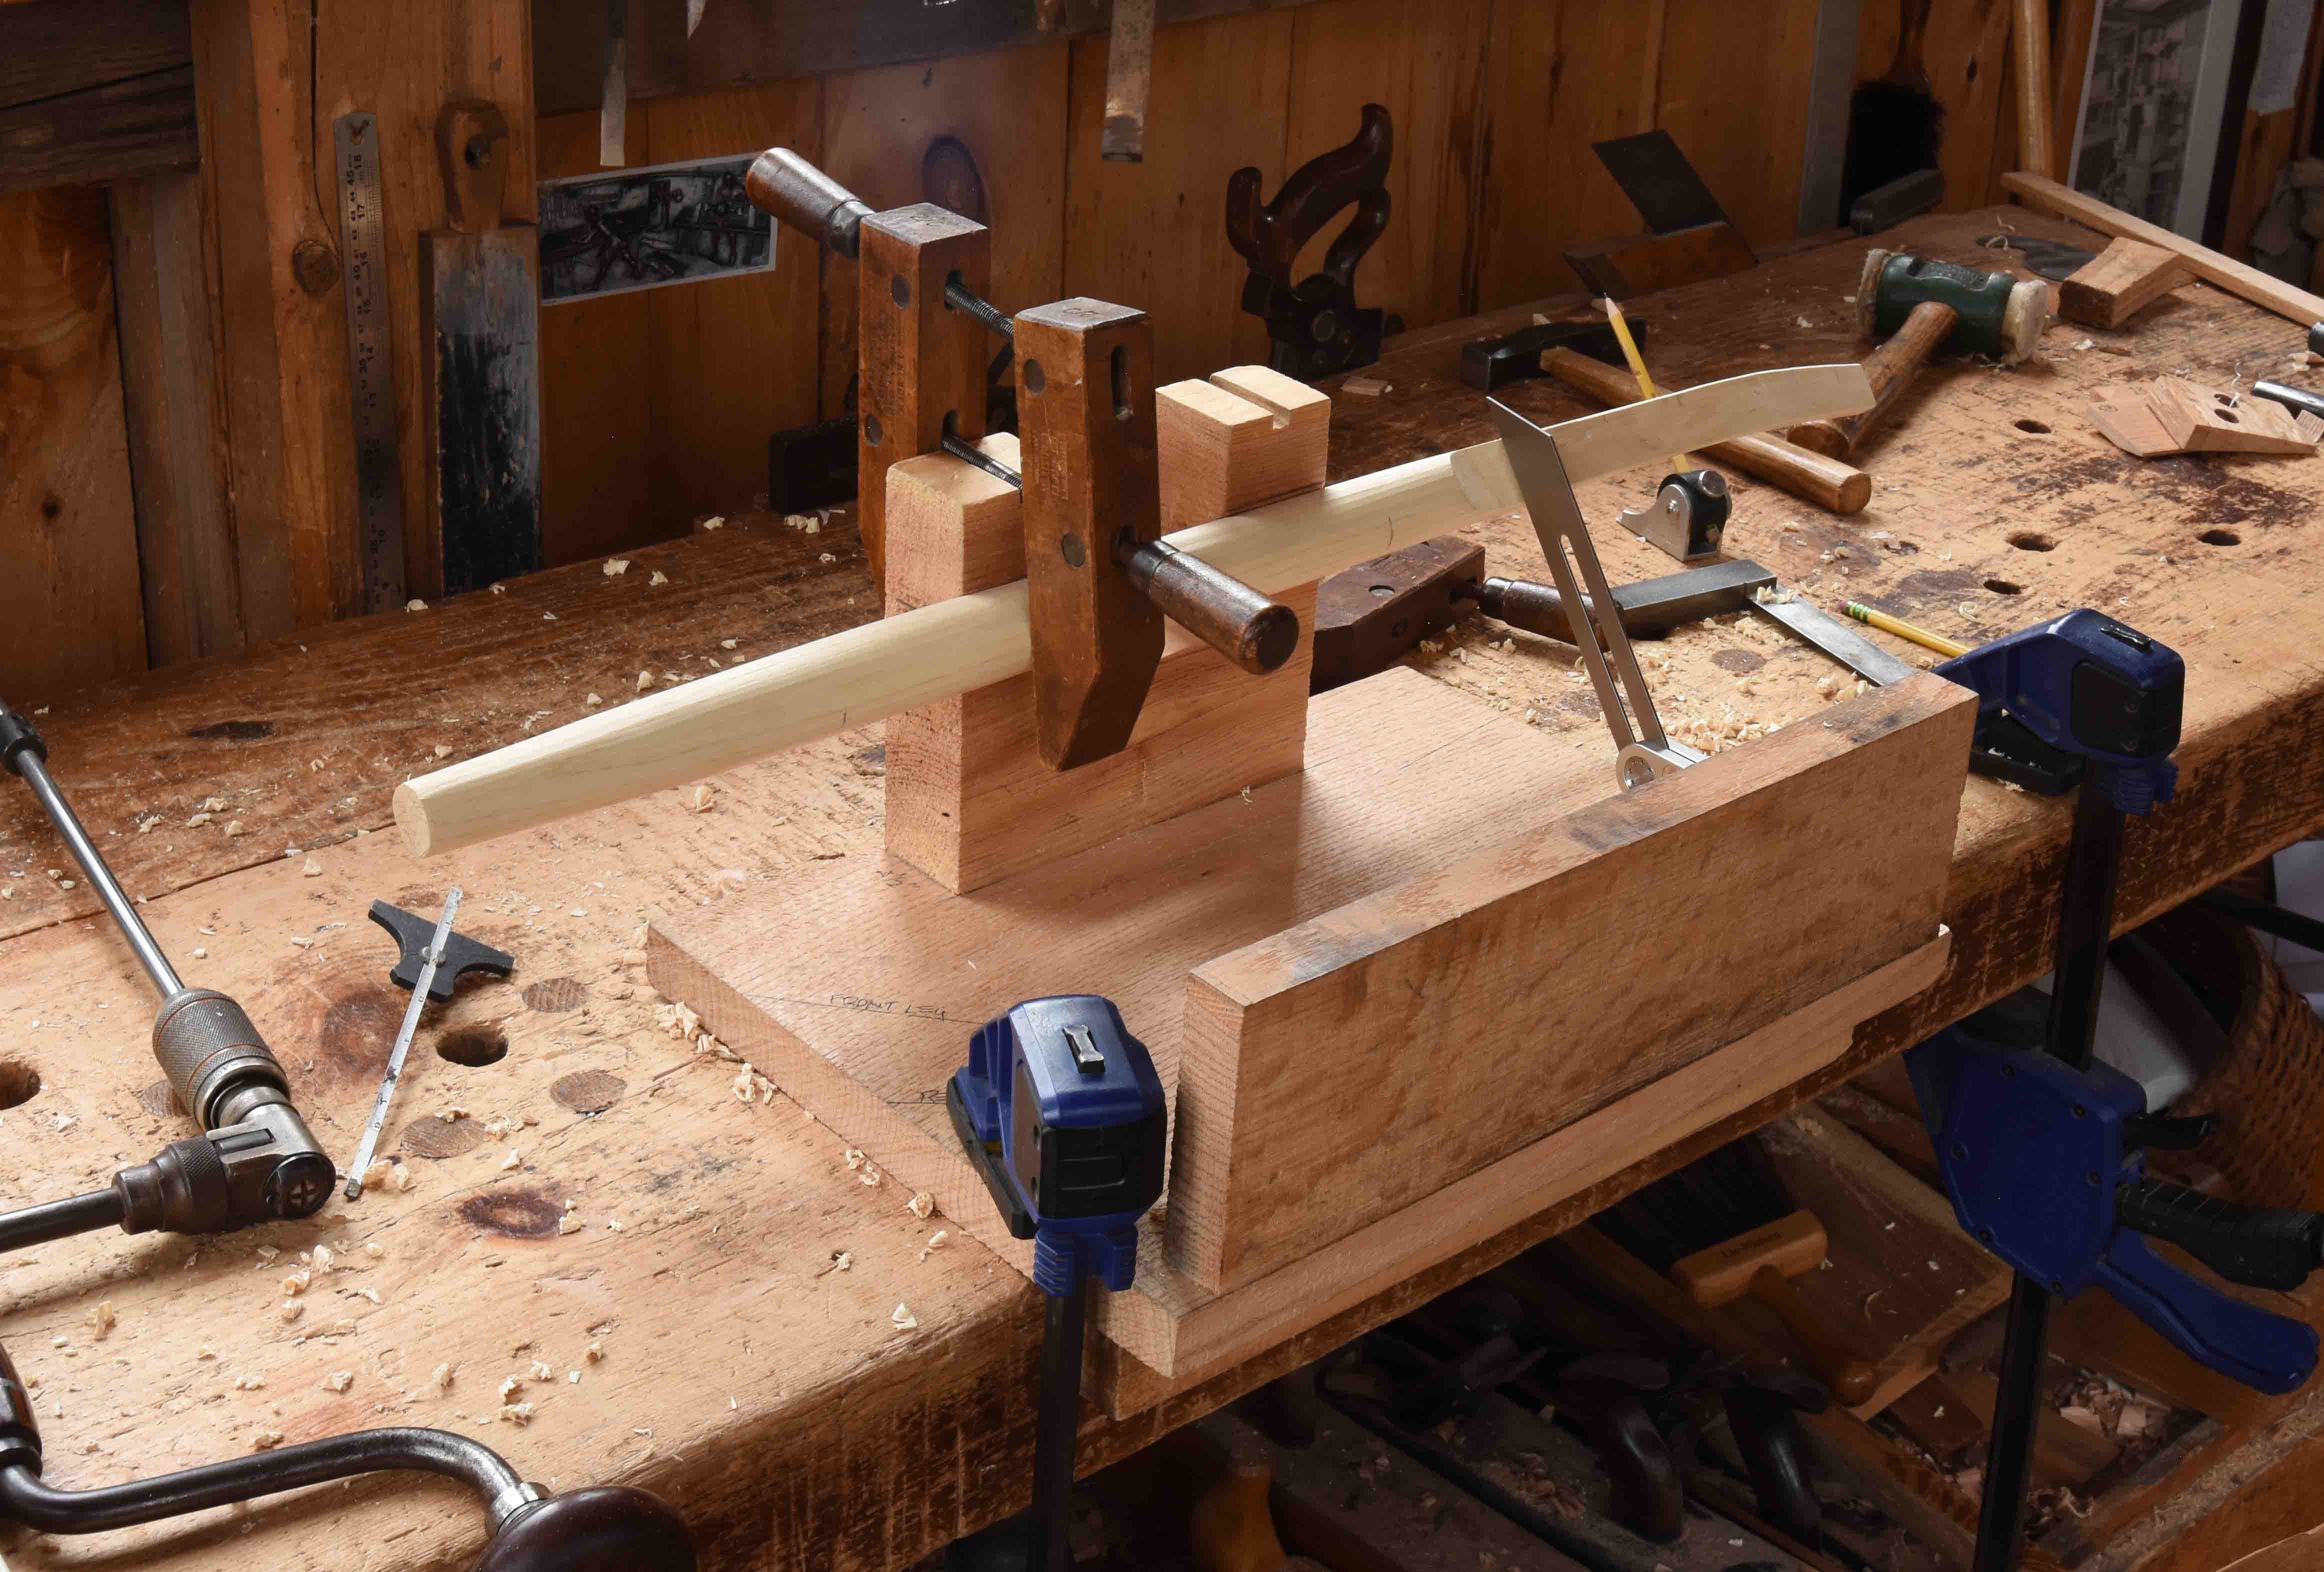
Different chairs will have different angles, but with some fiddling around you can find the angles you need. Determining factors would be seat size and shape and the amount of outward flare in the rear posts. To set the rear post in the jig you use the bevel to align against the flat relief. And then from there - both posts are the same. Strike your layout lines - heights and a centerline.
To setup for boring the sub-assemblies - Dave Fisher gave me this sketch. In the JA chair, the angles are 98°/82°
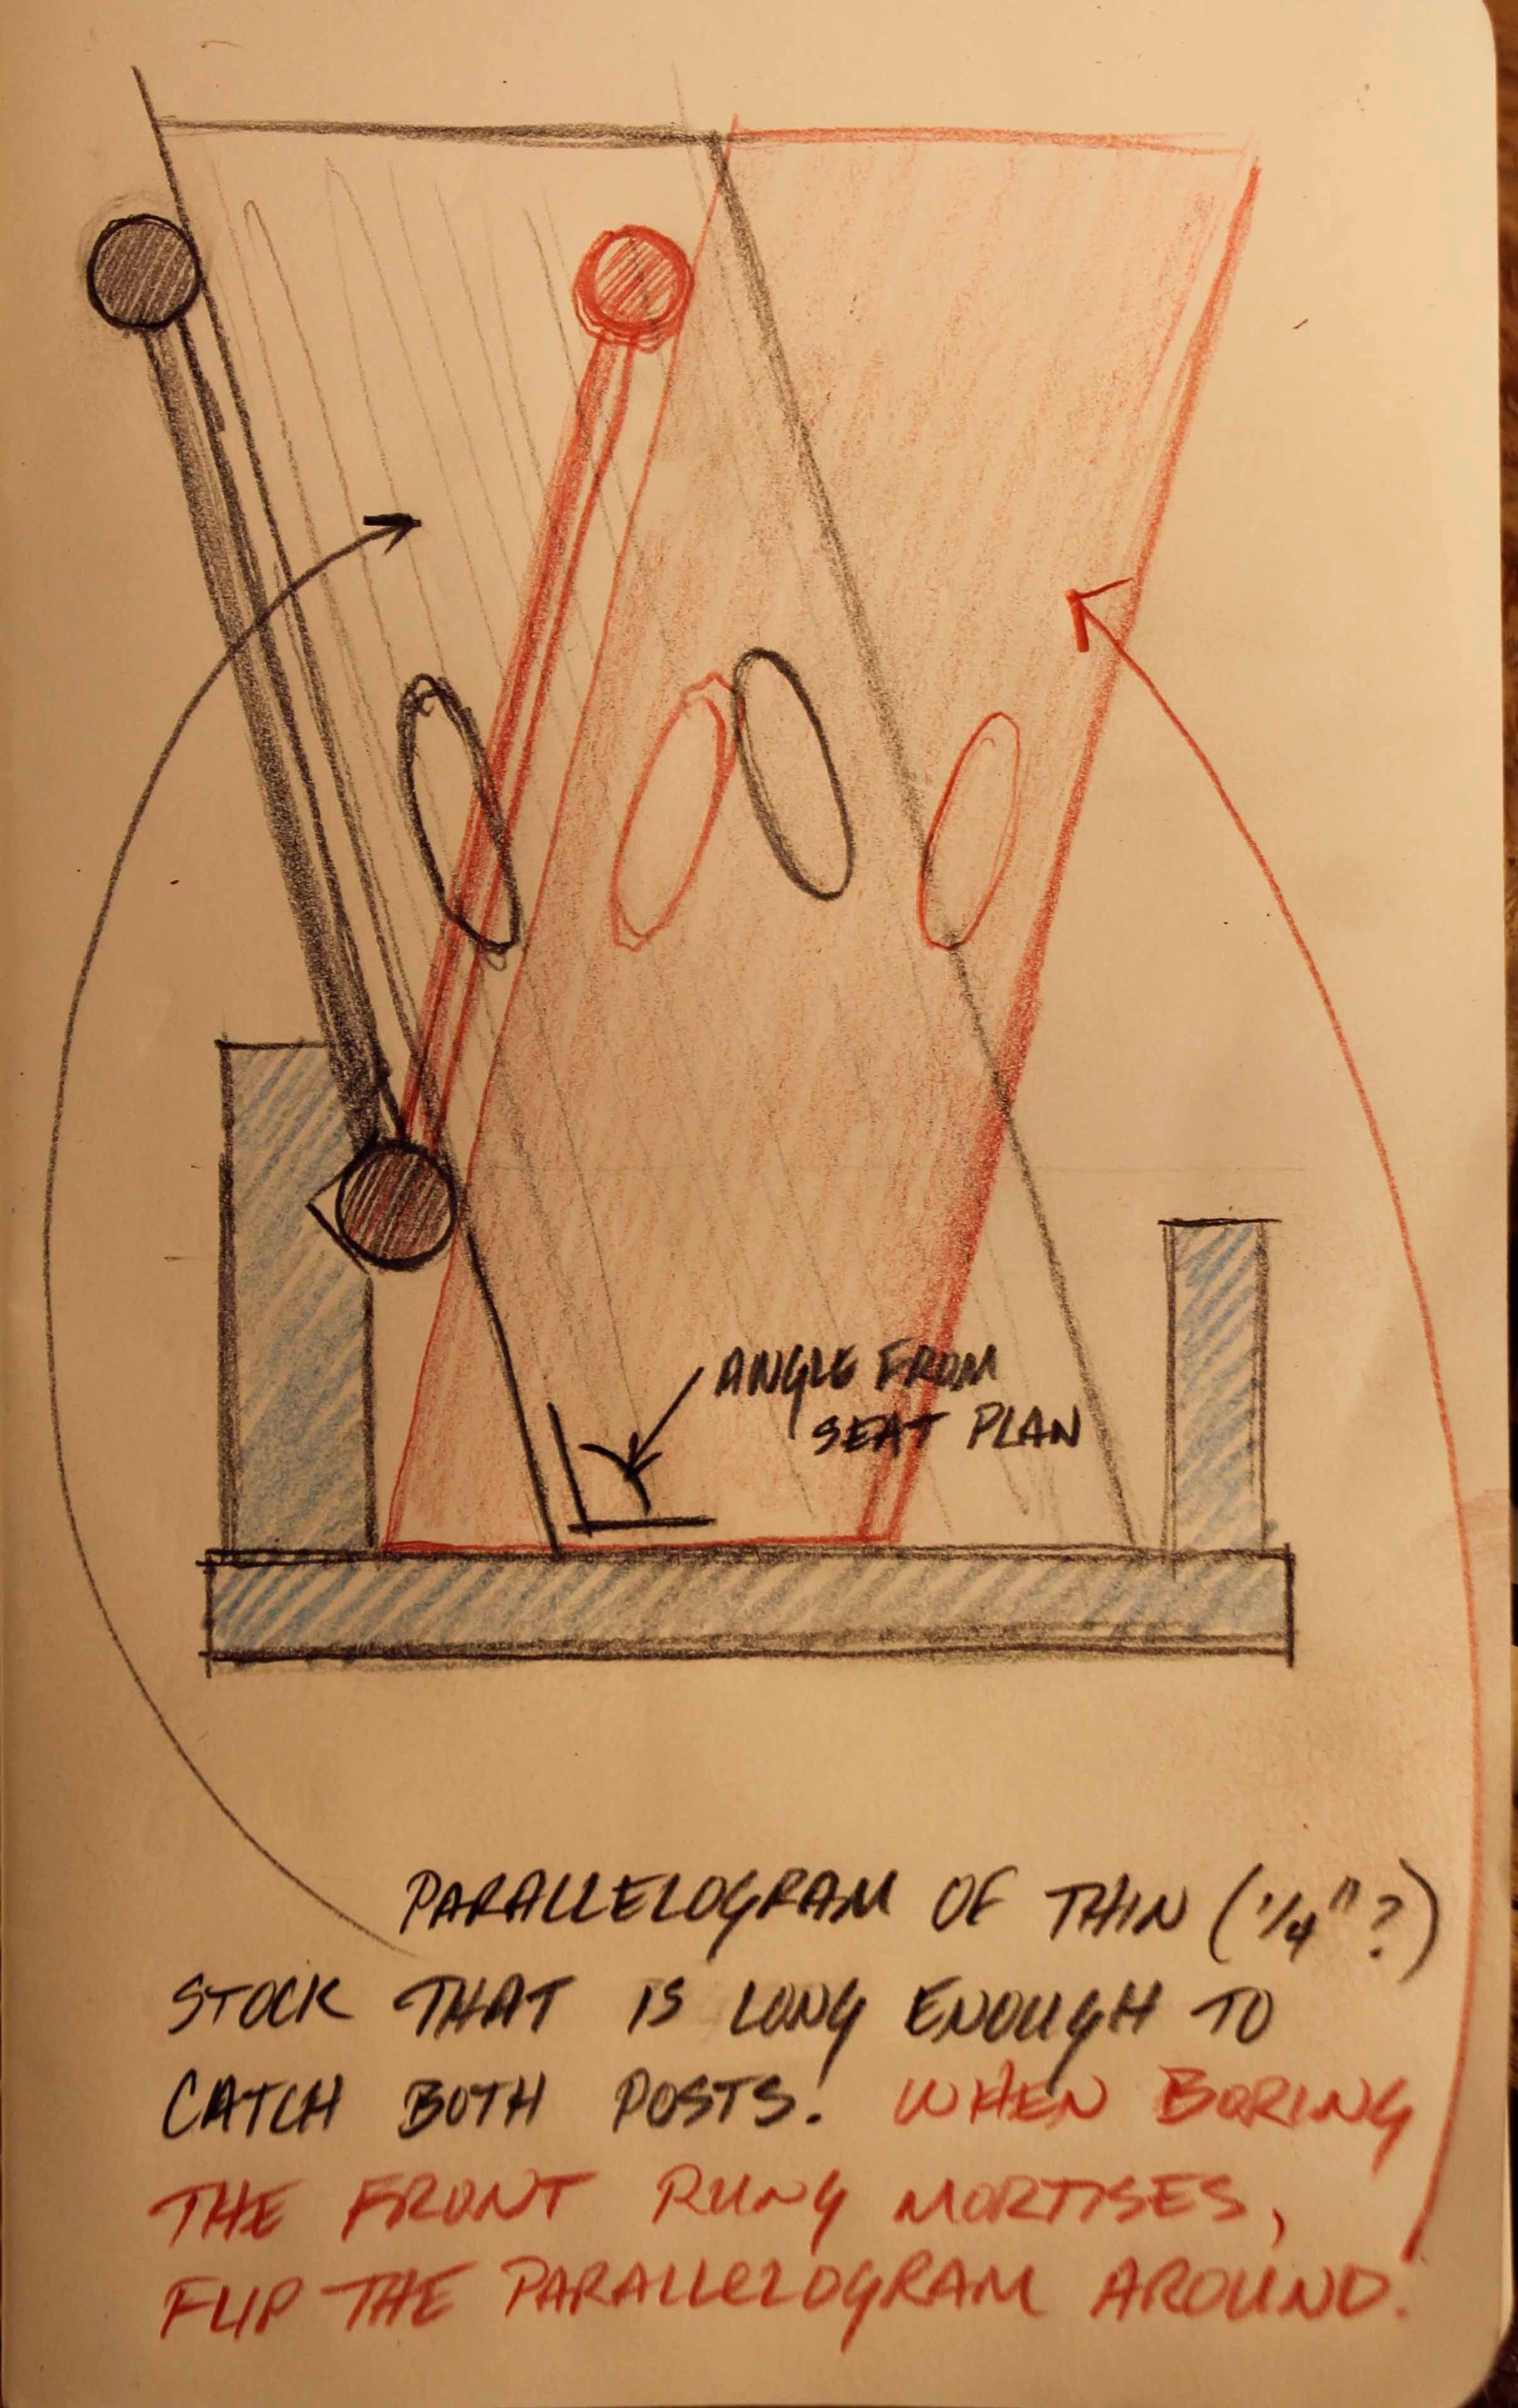
Here’s the whole lowdown in a new video I shot (two & 1/2 times) this week - including using Dave’s angle board.
Alexander’s book is here https://lostartpress.com/collections/chairmaking/products/make-a-chair-from-a-tree
Brilliant set up and easy way to set up the drilling. I’ve always struggled with how it is outlined in the book and getting the accuracy that I wanted. This should take care of that. I’ve always done my front legs in the opposite way by making the alignment with the growth rings vs. the radial plane. Is there one way that was used more historically?
With the "Charlie Boring jig" you can eliminate:
- Back post holder
- V-block (1/2 is now part of the "Charlie Boring jig")
- Center finder
- Seat plan
Correct?
Or am I missing something?