


a shop-made saw vise
an exercise in mortise & tenon joints

[this post is mostly re-hashed from an old one - thus I’m posting it here for all subscribers. I’m back in the shop full-time until bird migration begins in earnest - so lots more to come.]
First order of business - is thanks to all the response we’ve got for the fundraiser for our friend Joel Paul. It’s great to see people pull together to help. I saw him last week with Pete Galbert and as hard as it was to see him there in that hospital bed, one thought was “isn’t he lucky to be alive…” It could have easily gone the other way. His spirits were good, I heard good reports a day or so ago too, (I see now he’s out of ICU…that’s a plus..) but still a long hard road ahead. https://www.gofundme.com/f/joel-paul-emergency-funds-after-terrible-accident
Now to the shop work. It’s been a long time since I worked at the bench. Most of this past week was cleaning & sorting after coming home from teaching chairmaking. And the week before the chair class was all chair-related, getting ready. That said - boy was I out of practice. I picked my dressing box project back up, thinking all I had to do was knock out the two small drawers and then it would be on to decorating- applied moldings, turnings, paint, etc. -
After some clunky fumbling around, I got smart and sharpened the planes. Then things improved. Til I got to making the drawer bottoms - in this case, 1/2” thick white pine. I had a scrap just wide enough, only needing re-sawing. Whoops - time for more sharpening. Which bring me to the saw vise I use. I built it in 2013 - I know because I looked it up on my old blog. I based it on an oldie that was in the museum where I worked then.

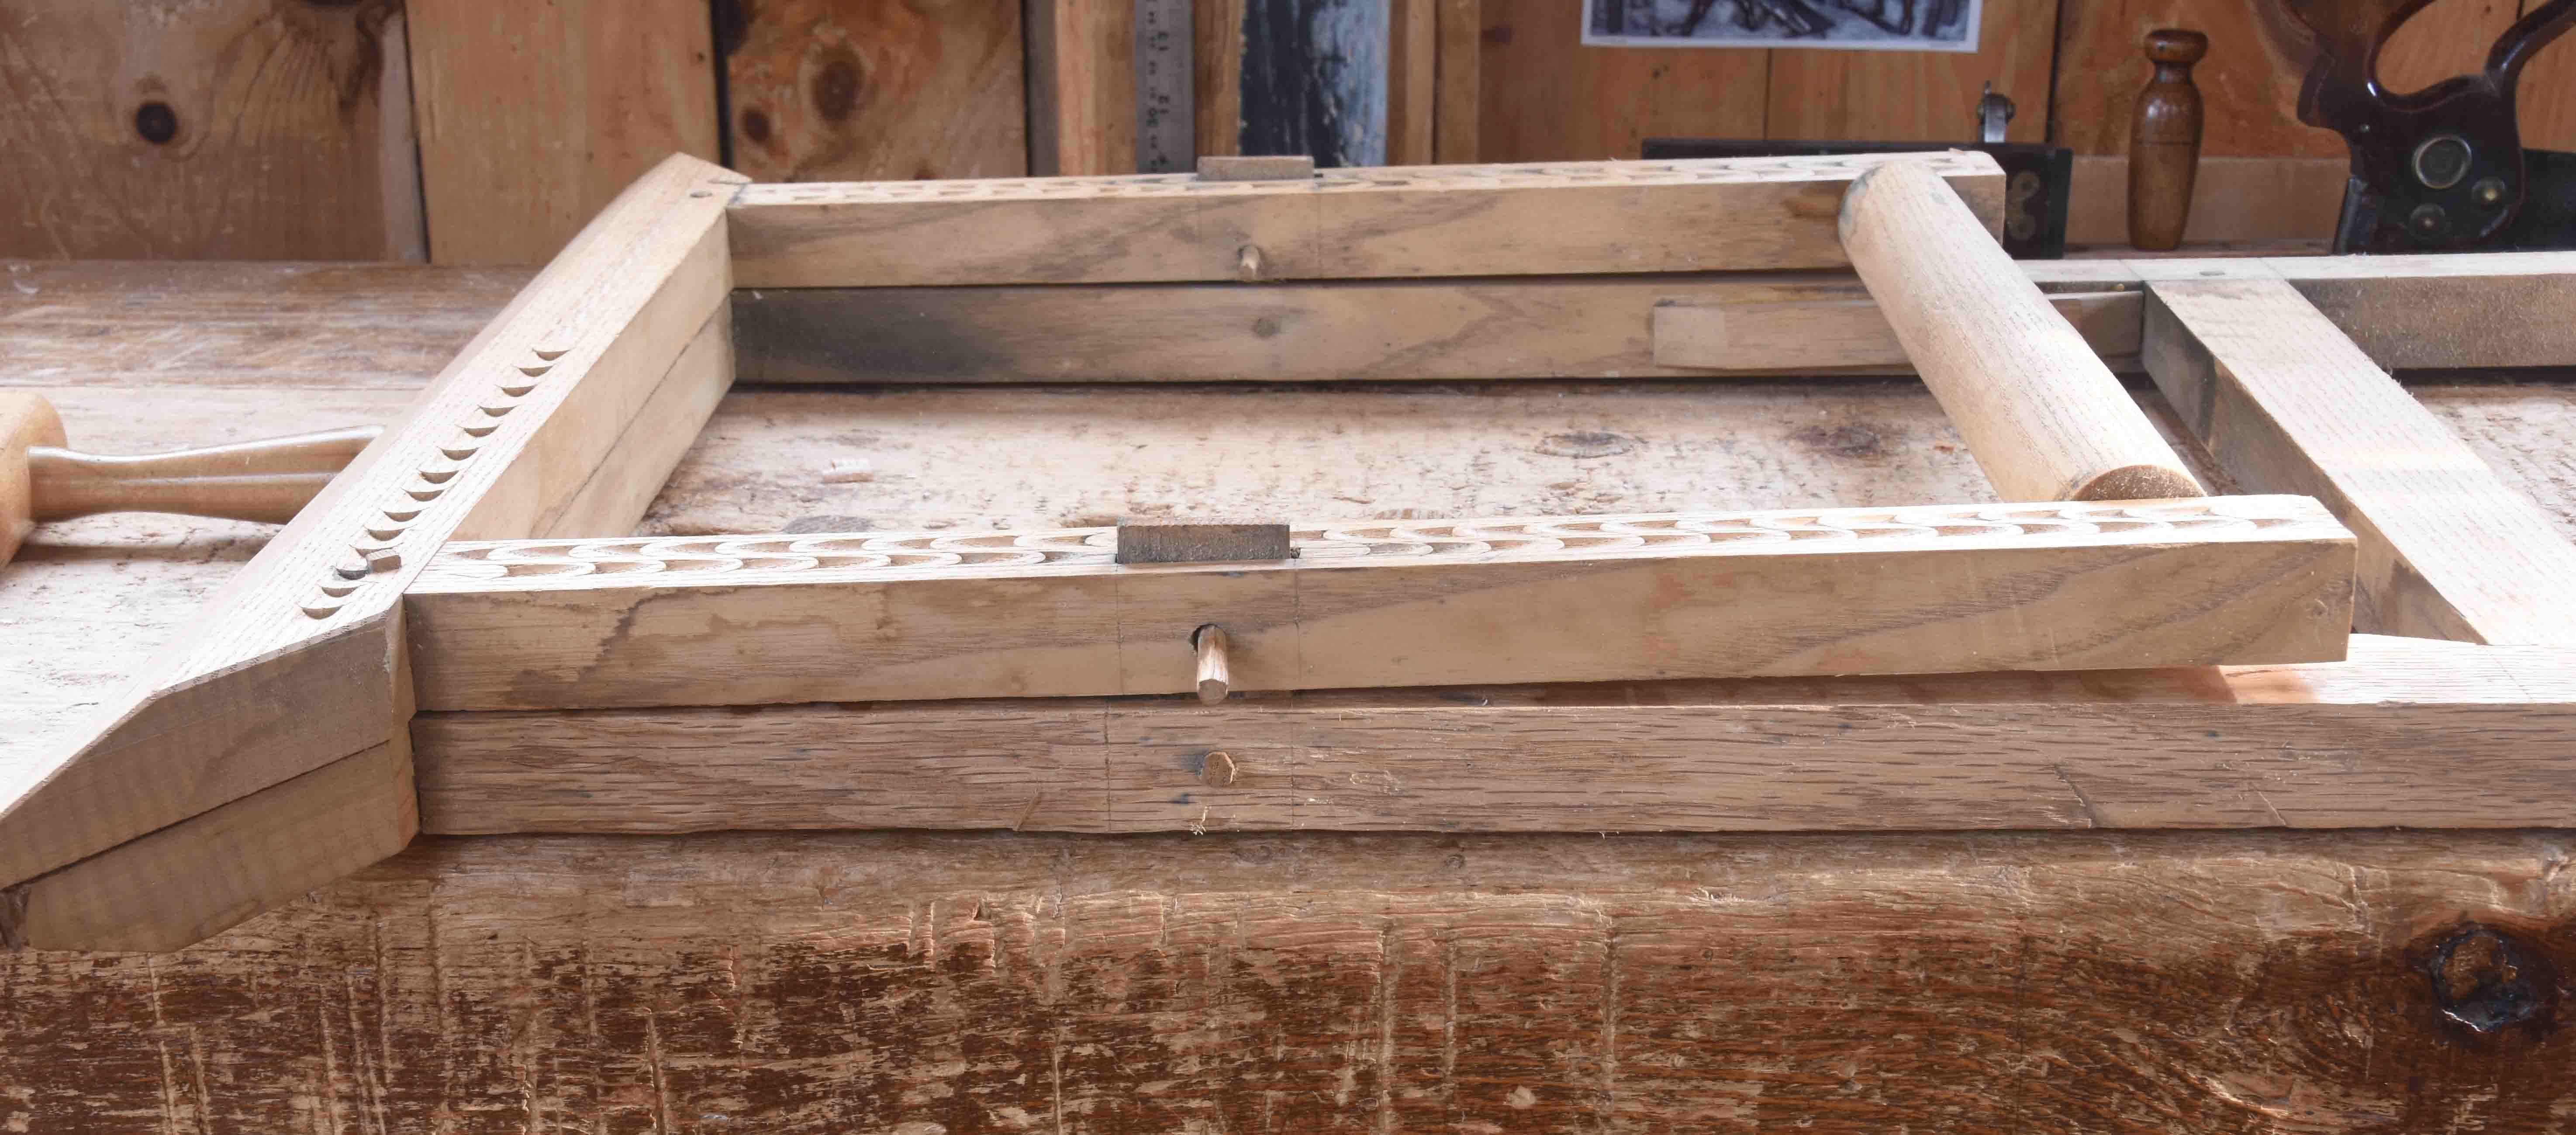
That one is mostly nailed together, mine is joined. The gist of it is 2 frames - the rear frame is 46 1/4” tall. That frame consists of two uprights with 2 rails connecting them - one mid-height and one near the bottom. The top rail is one of the “jaws” of the vise - so the uprights’ top ends are tenons fitting into the bottom edge of the jaw.
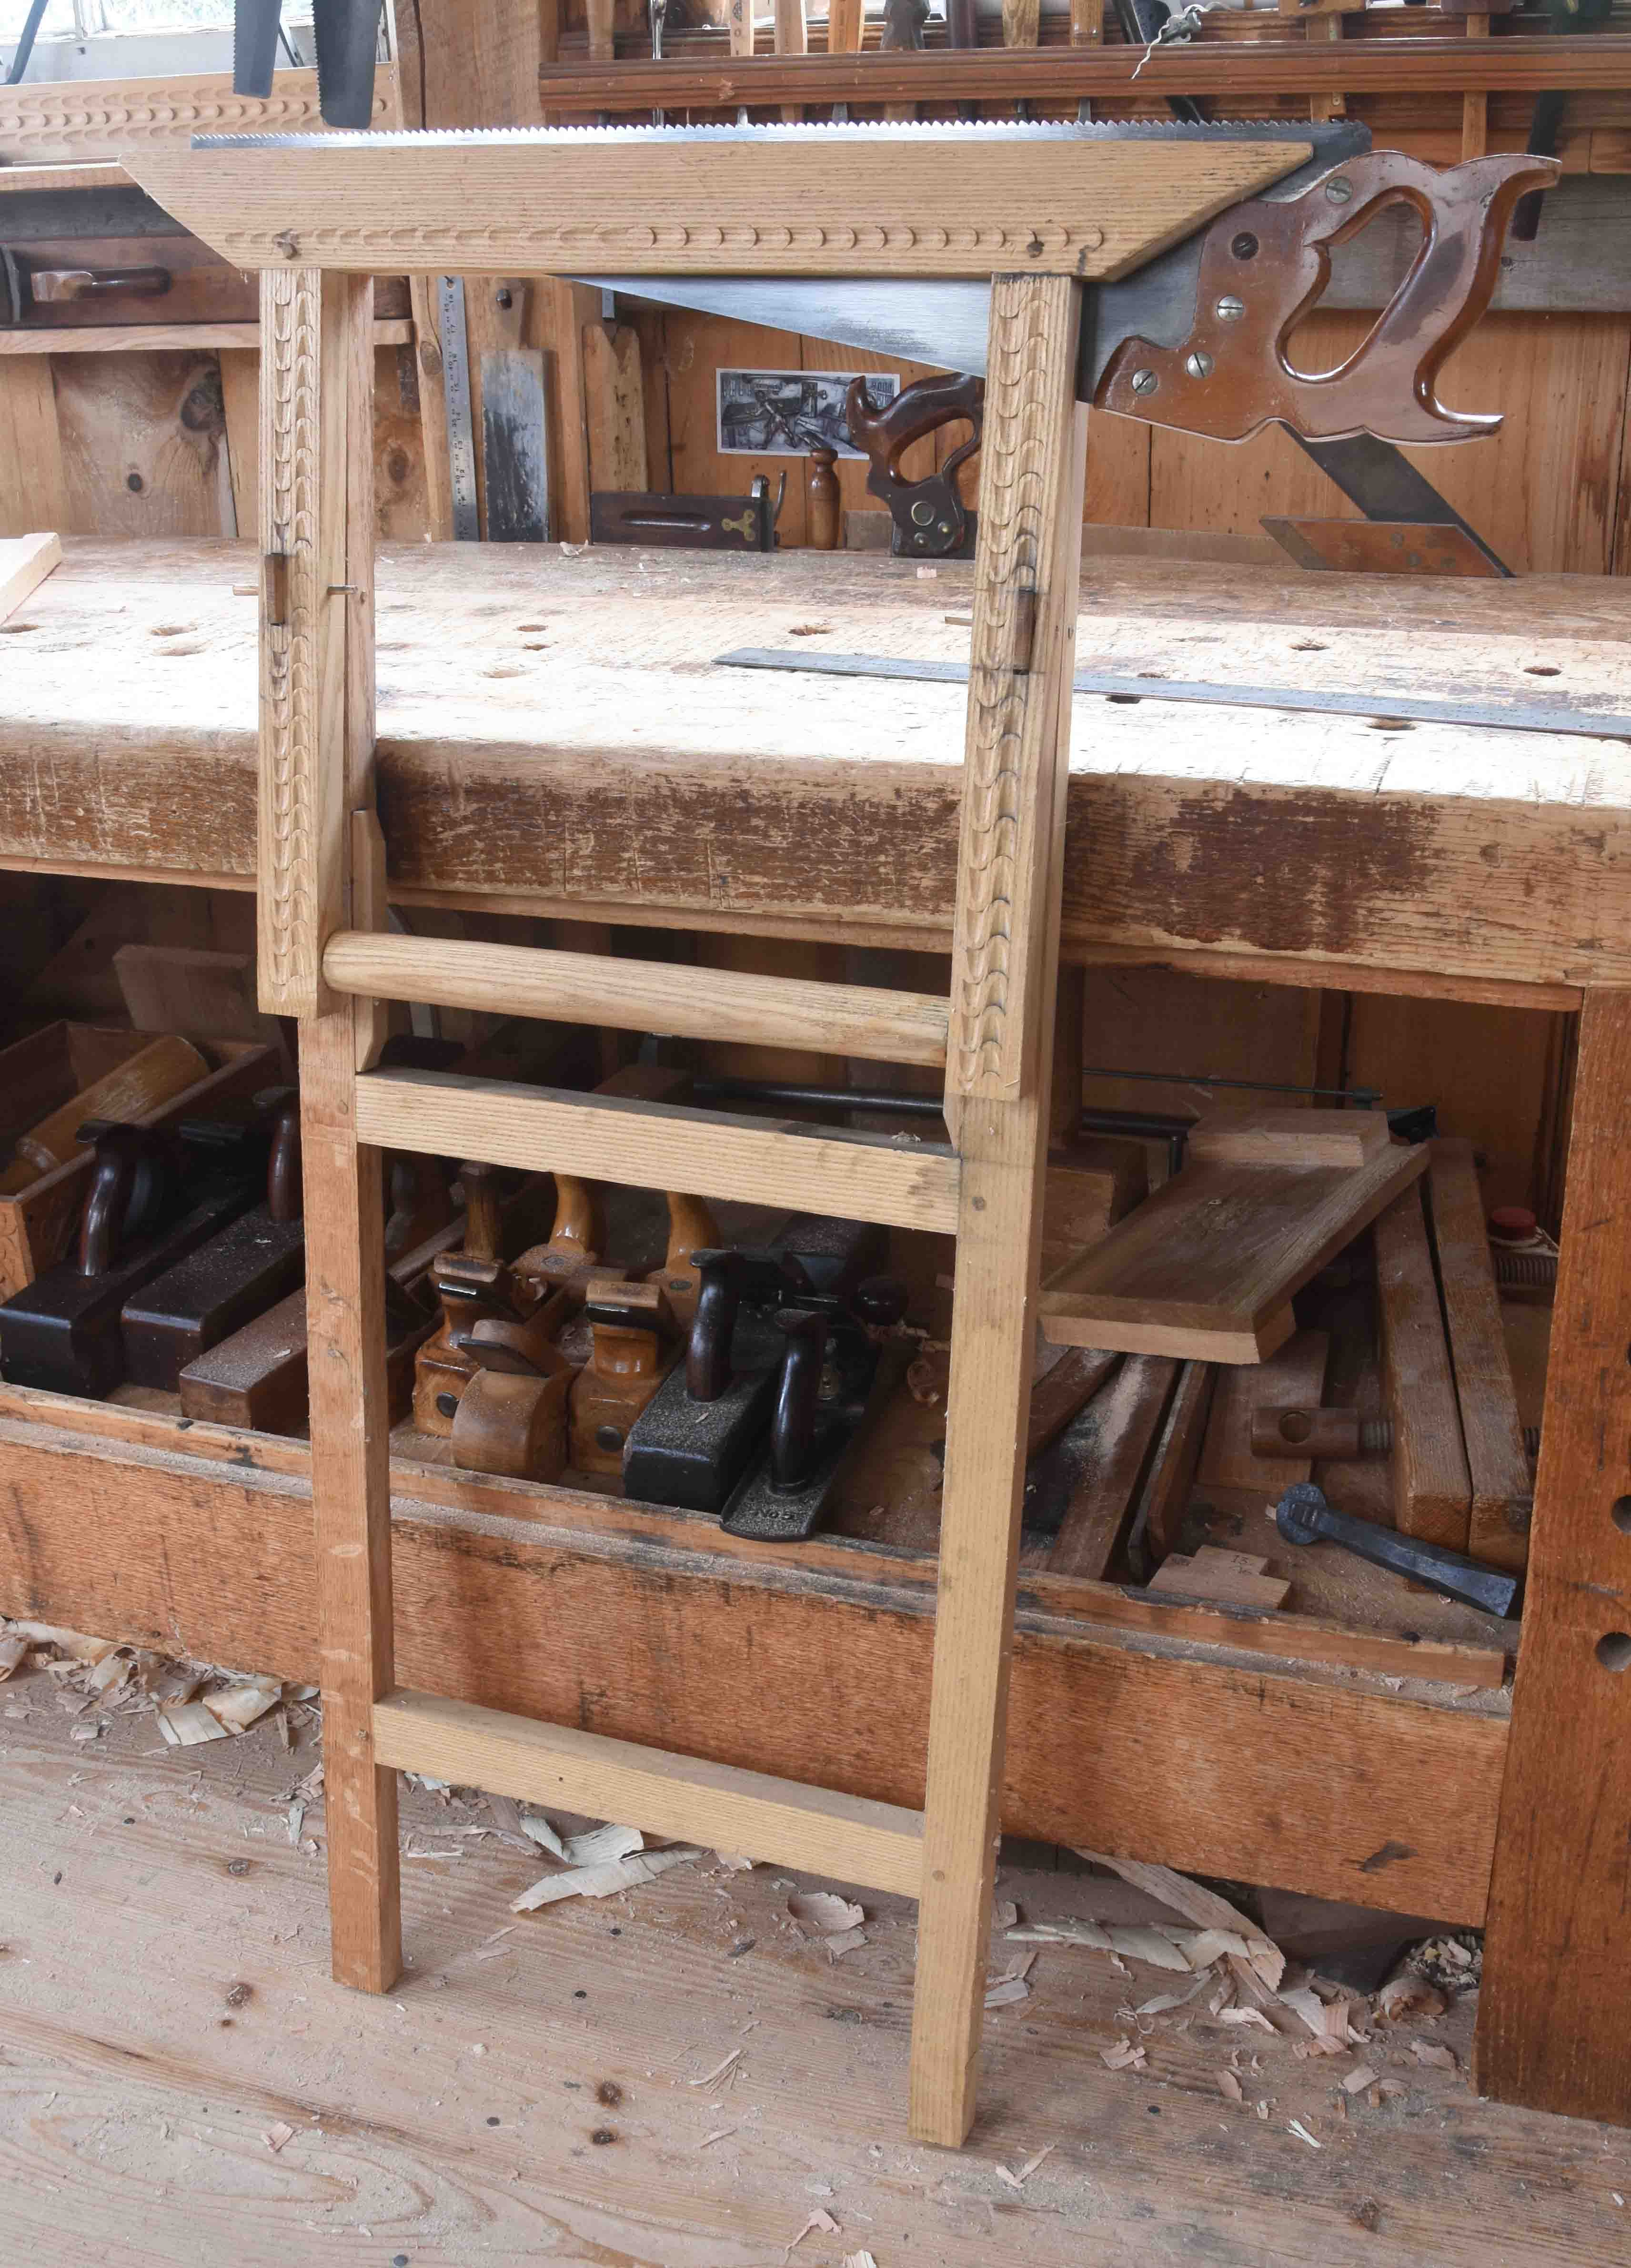
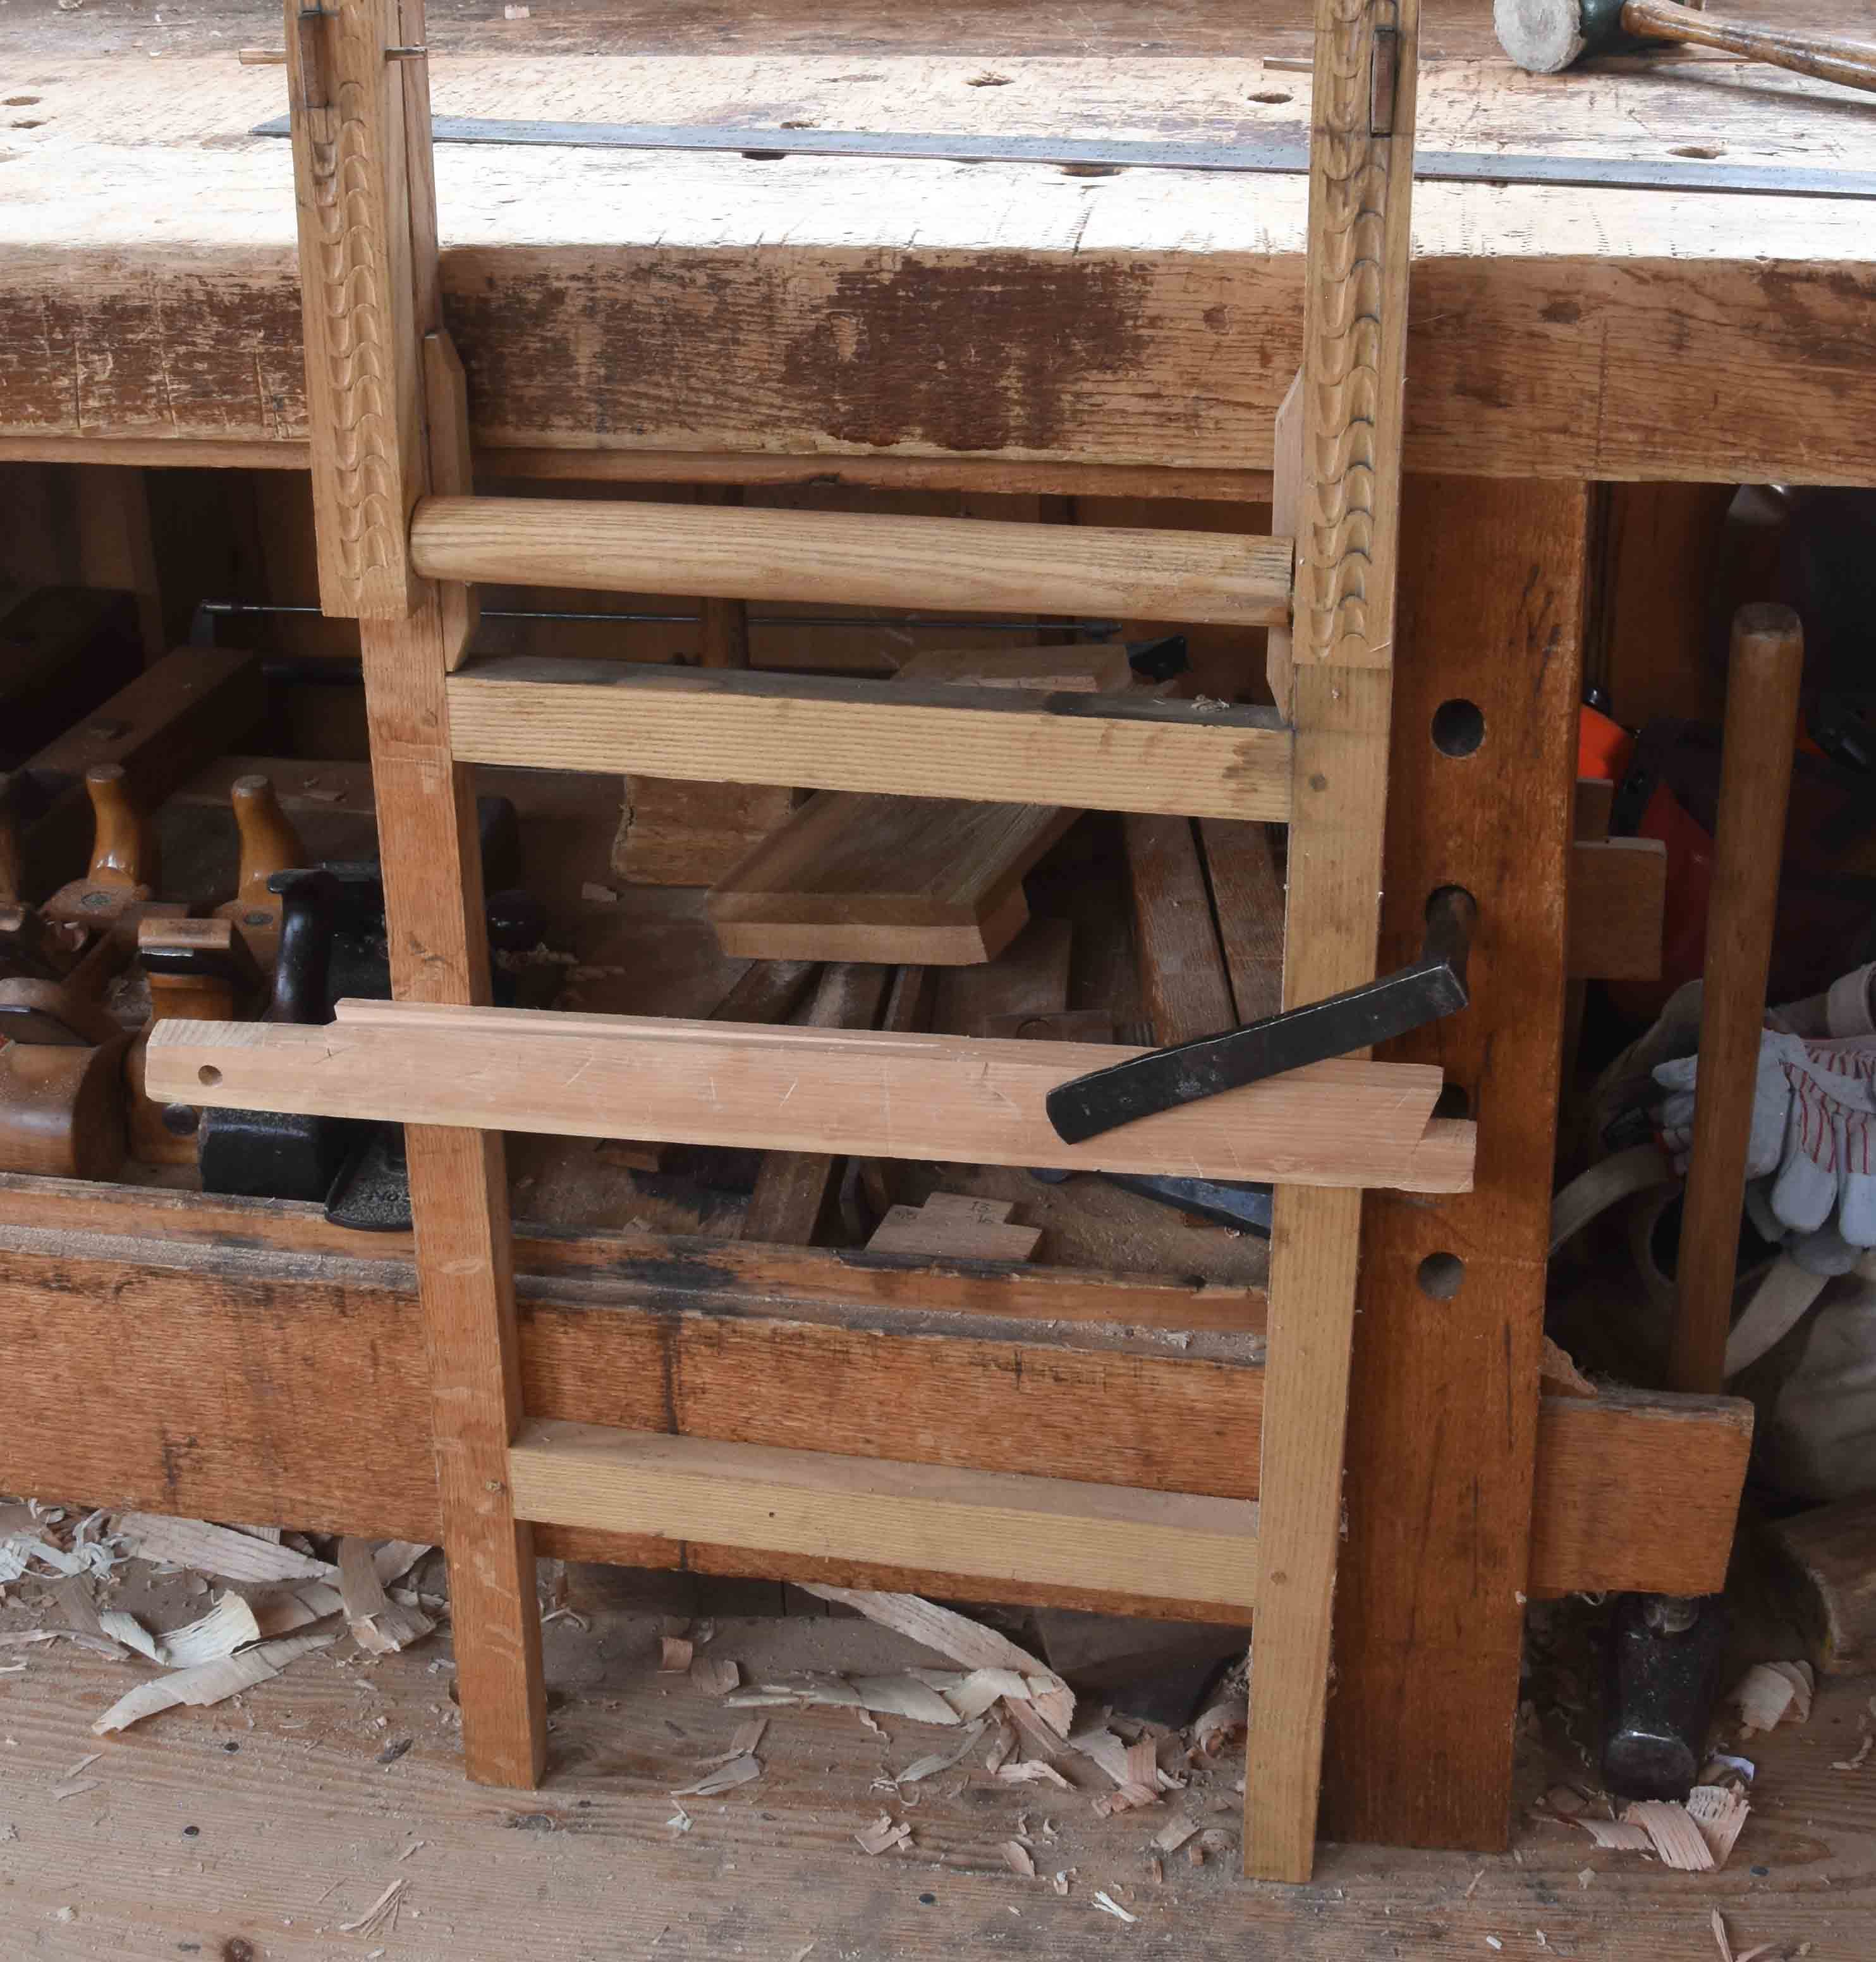
The front frame is shorter - about 18 5/8” top to bottom. Two uprights, one jaw to match the rear frame’s jaw and one roller in place of a bottom rail. The tenons on the roller are off-center, so you twist that roller to open and close the front frame/jaws. There’s a tenon connecting the two frames, but the front frame doesn’t sit right against the rear frame. There’s a bit of space between them and enough slop in the front uprights’ mortises so that frame can pivot - closing the jaws. Brilliant.
The roller bears against two blocks glued to the inside edges of the rear frame. In use I fasten the frame against my bench, grabbing it with a holdfast. Rather than fasten one leg of the vise, I set a board across the front of the lower rear frame and pinch the whole thing against the bench.
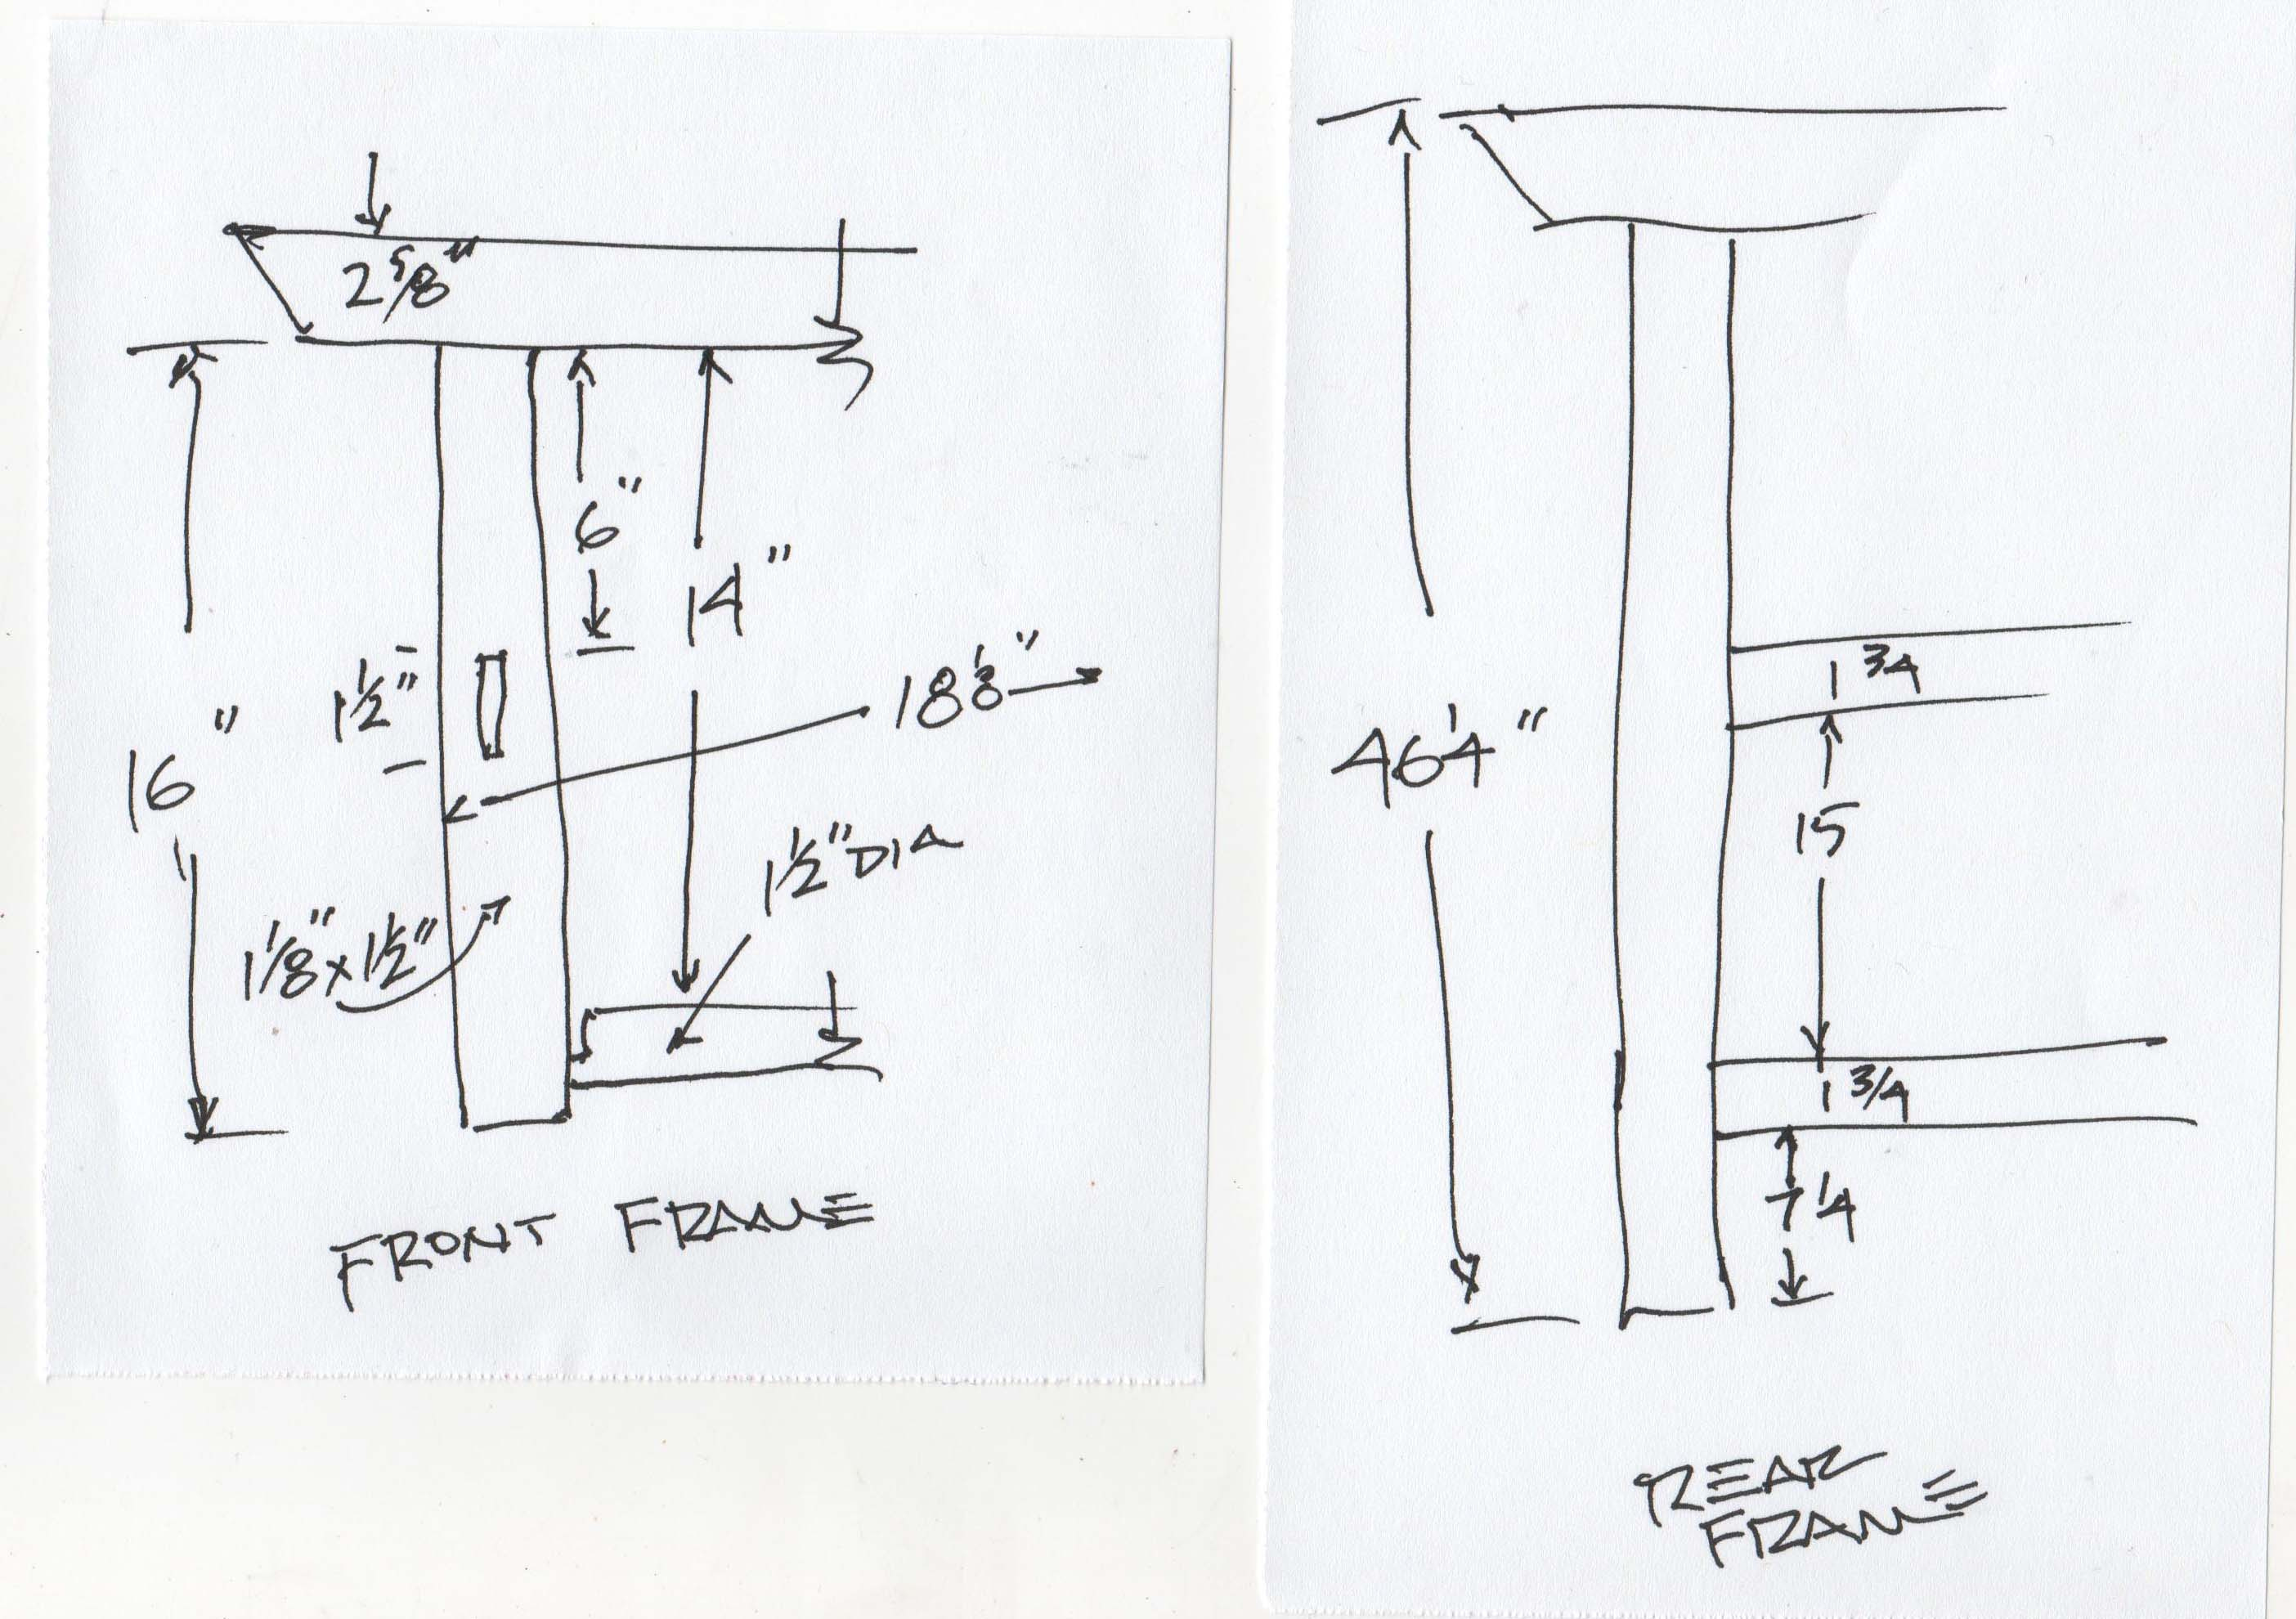
If you’d like to make one - this is as close as I can get to a detailed drawing.
Here’s a link to the old blog posts about the saw vise. https://pfollansbee.wordpress.com/2013/12/17/saw-vise-part-two/
Tomorrow should be on to moldings etc for the dressing box.
Can you tell anything about the saws for the saw nerds? In a previous life I followed saw auctions on eBay like some people follow sports. Good grief, I even wrote my son's history essay on Henry Disston. I've been clean for ten years.
I love the mechanics and simple utility of this saw vise. What really got me going was the carving! Why, indeed, should one’s shop made devices go undecorated? I’m inspired!