


A box with a drawer
I hope to never run out of questions

I work the riven green wood I use in stages - right when I get a log I bust it open and being splitting it into parts - then hewing, shaving & planing them into stock earmarked for this & that. So for quite a while, it’s as if I’m not making anything but pieces.
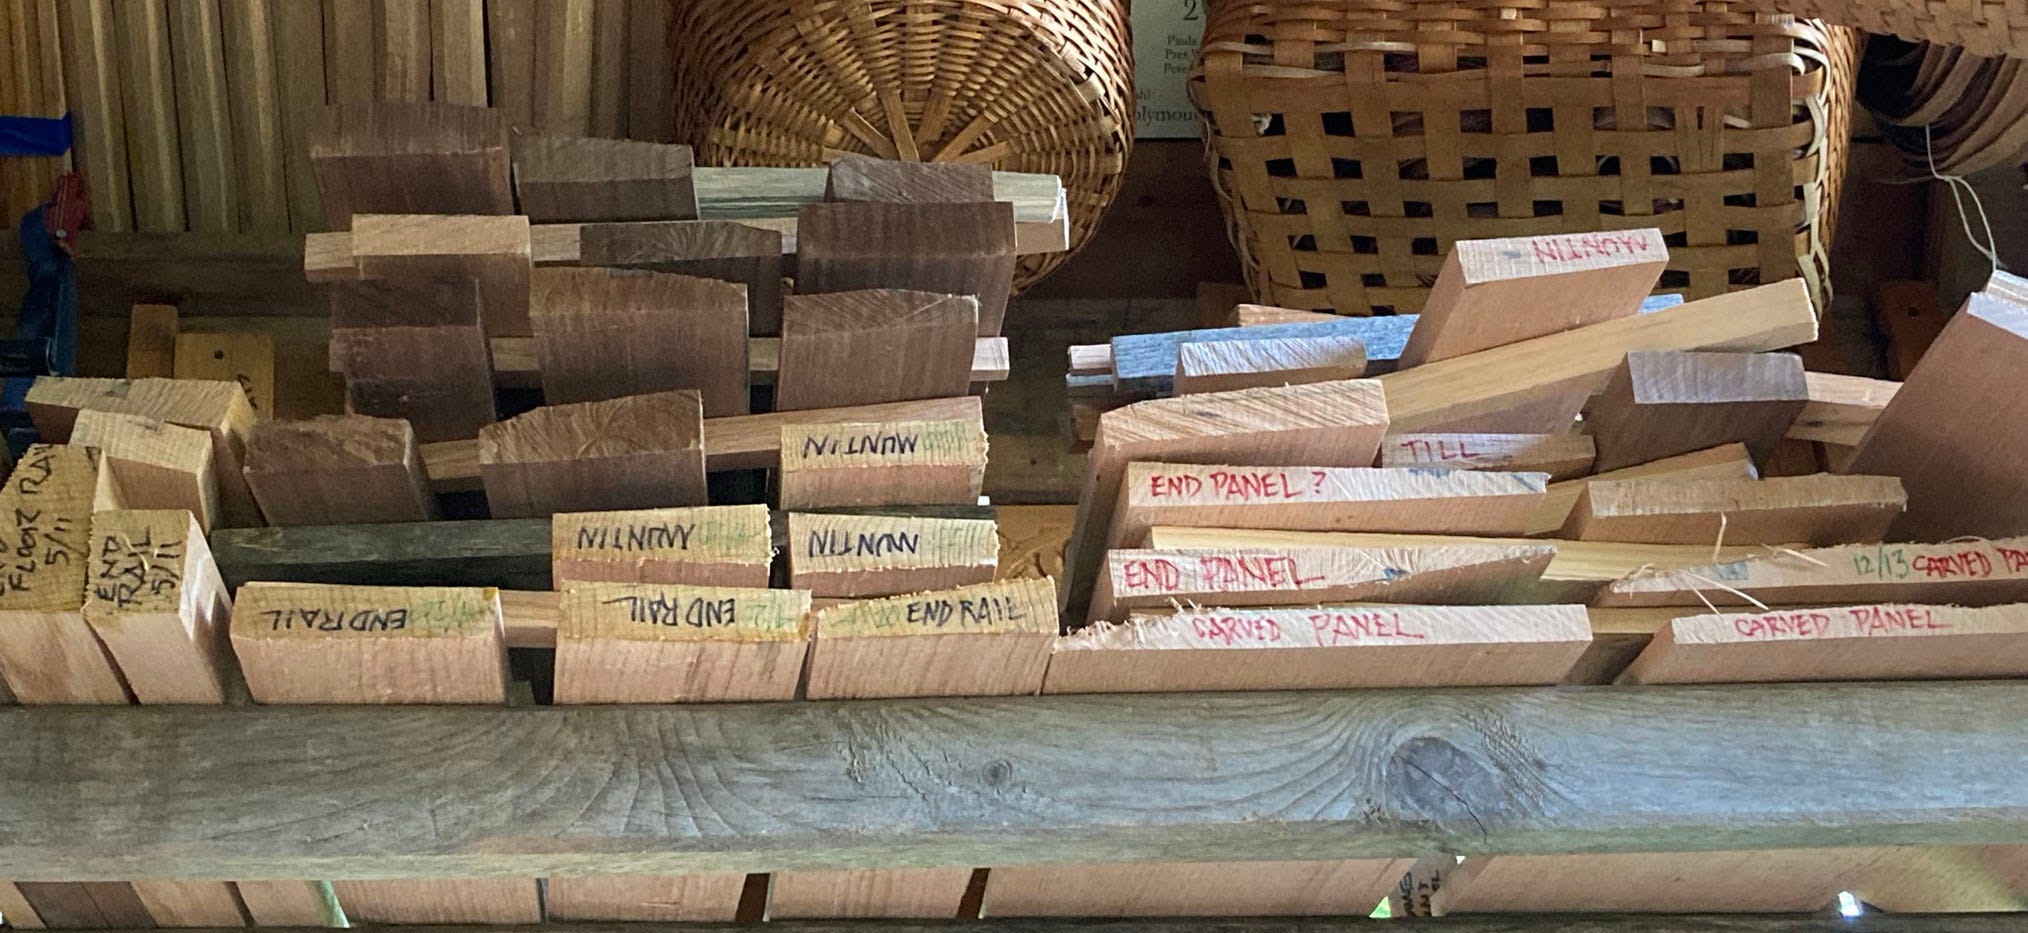
Then some time goes by, the freshly riven planed stock sits in the shop a while until it’s ready for the next steps - joinery, carving, turning, etc. People ask “how long?” - and it can vary a bit, but now I’m working stock I split & planed through the last part of the winter and into spring. There’s a minimum time lag that has to happen - but then the other end can wait and wait and there’s no detriment.
I don’t measure the moisture content in any way beyond a practical experiment - I try it. If it’s too green, the carving isn’t as crisp as it should be. Likewise, something like mortising - the green wood cuts easily, but not very cleanly. When I first did this work with Jennie Alexander back in the early 1990s, we often chopped mortises in dead-green stock. Turns out that made things more difficult. If you didn’t assemble soon after chopping those mortises, they’d shrink in their thickness - I remember going back to a mortised piece and the chisel would no longer fit into the mortise. I had similar problems with panel grooves - they’d shrink up enough to be really difficult to fit any panels in. Over time I learned to wait a bit before those steps - at least a month, a couple is better. For some parts like oak boards toward a box lid, even longer.
Most of the oak in this large box with a drawer that I’m working on now I planed in late March. I began assembling it in late June.
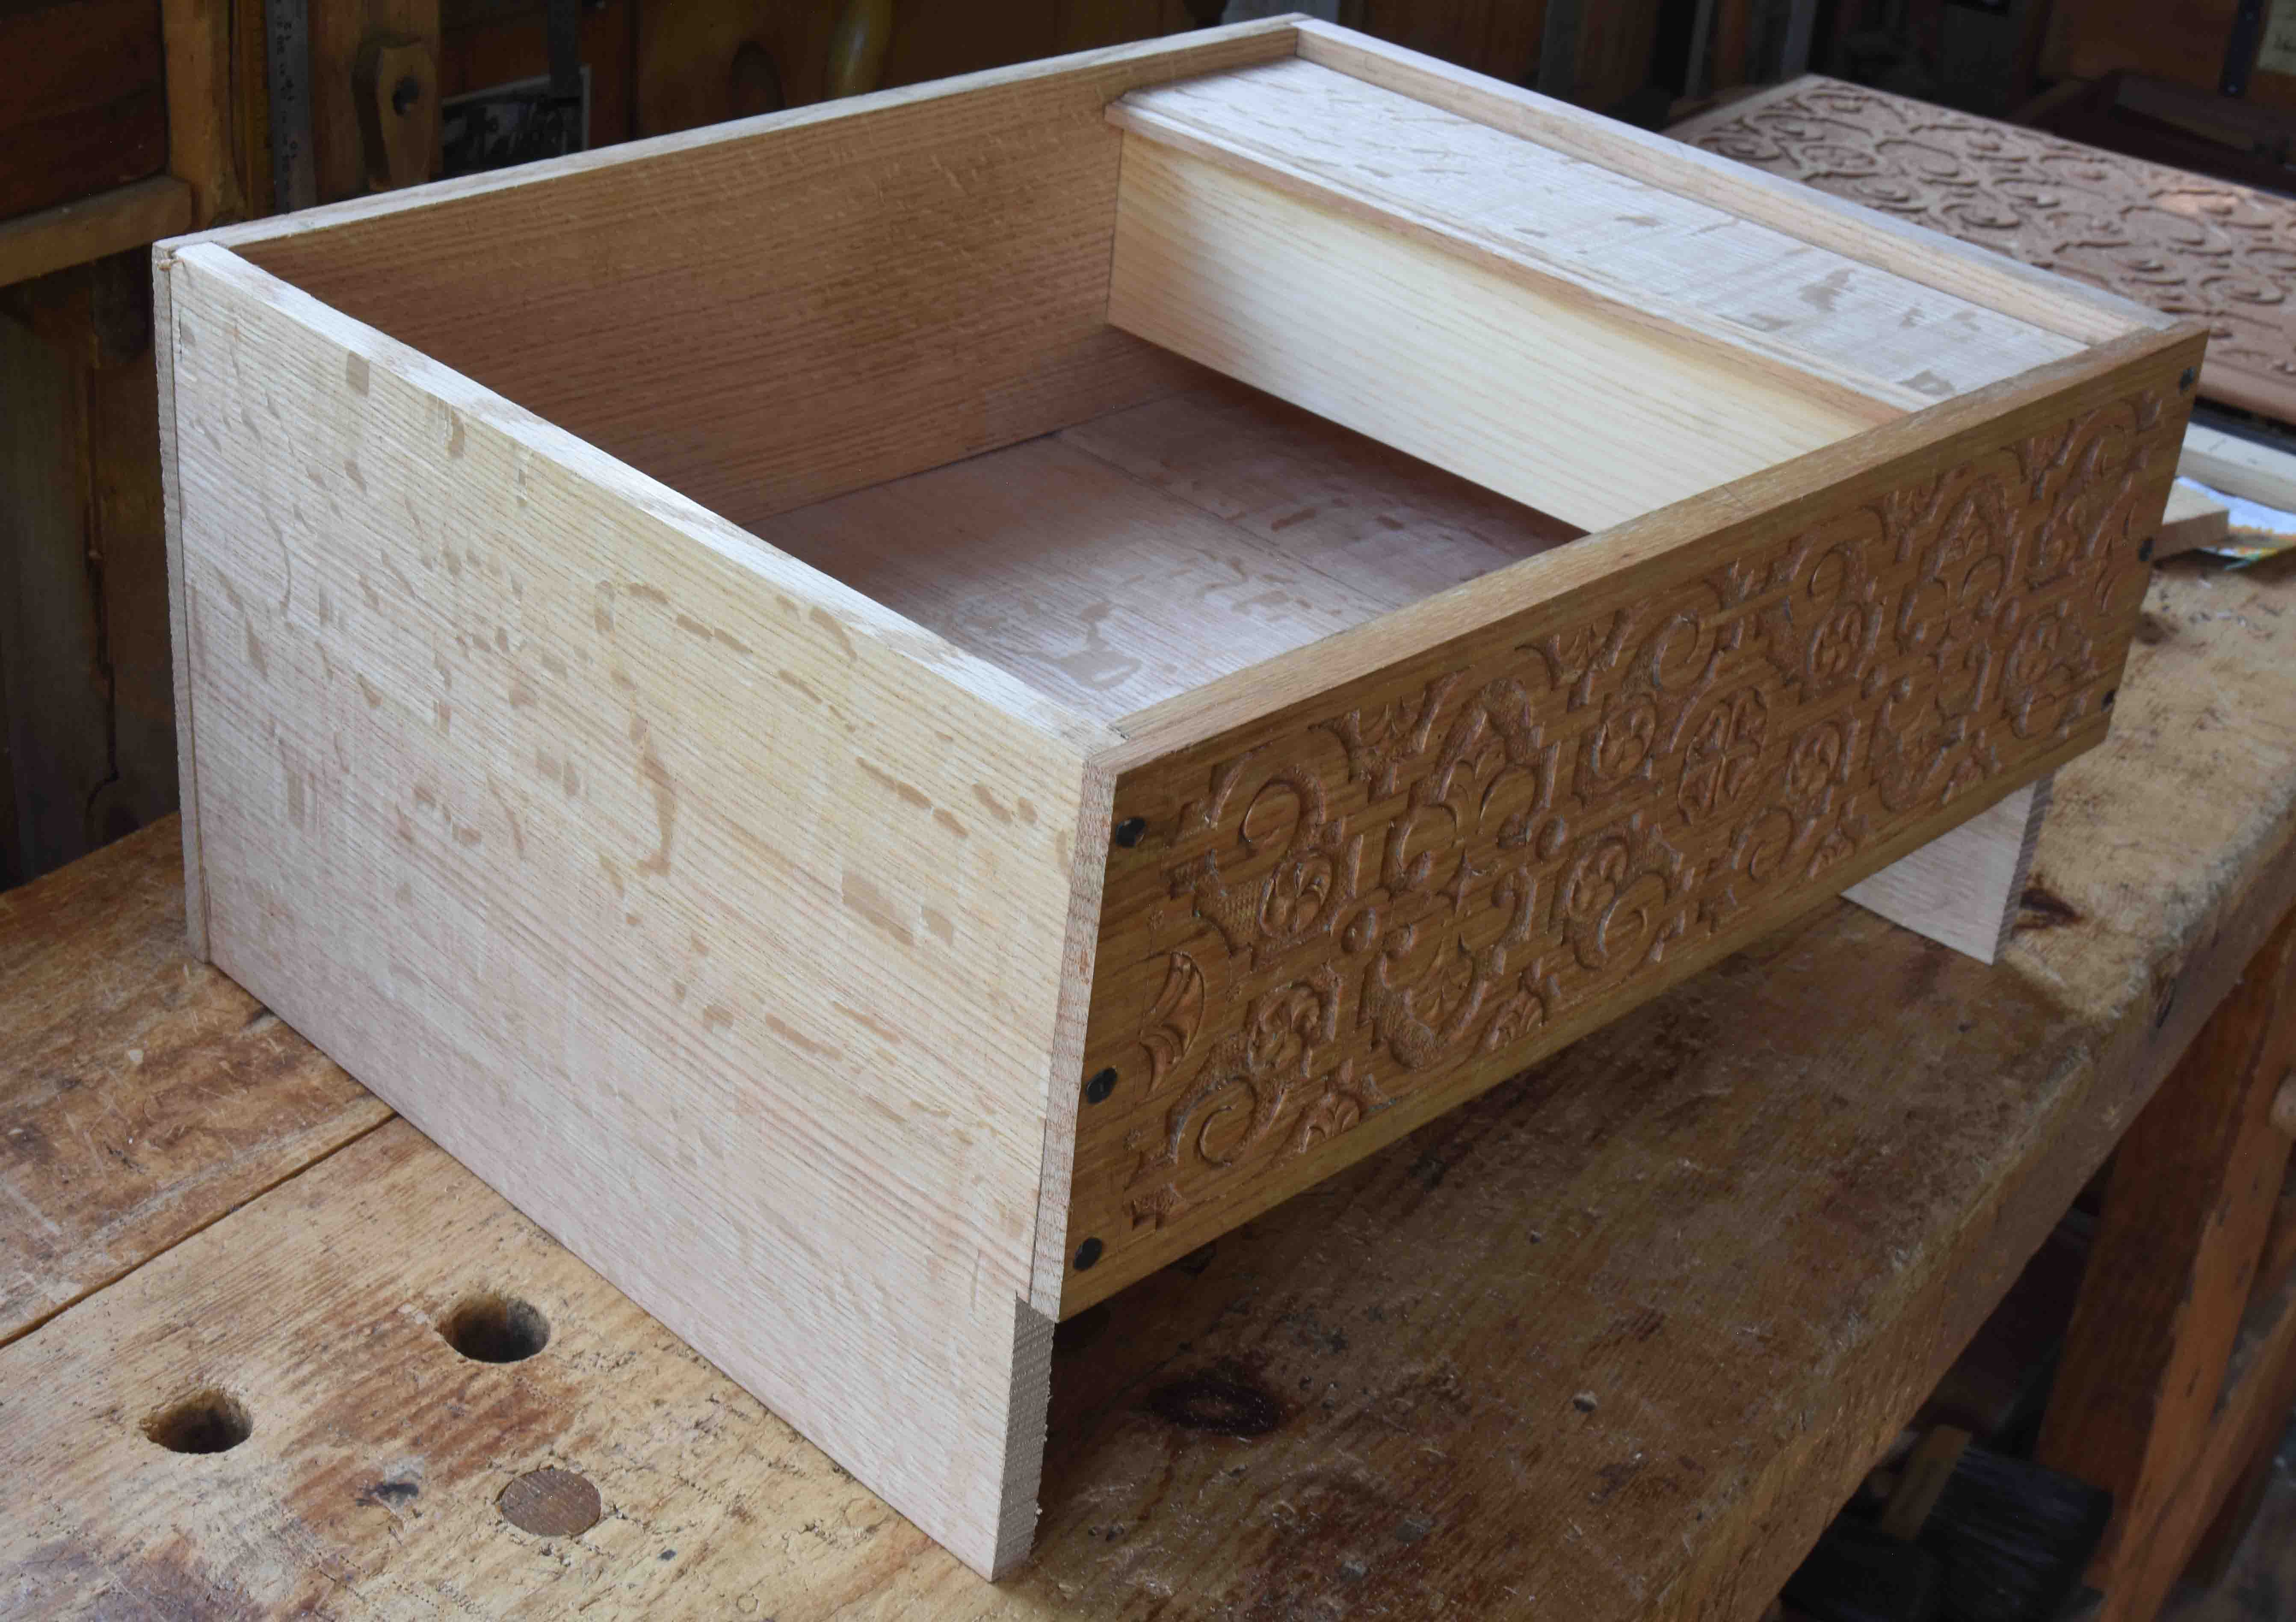
I haven’t made one of these in quite some time. Those end boards are glued-up from two narrower boards. The height of the box now is 10 1/4” - later it will have turned feet and of course its lid - so finishing over 13” high.
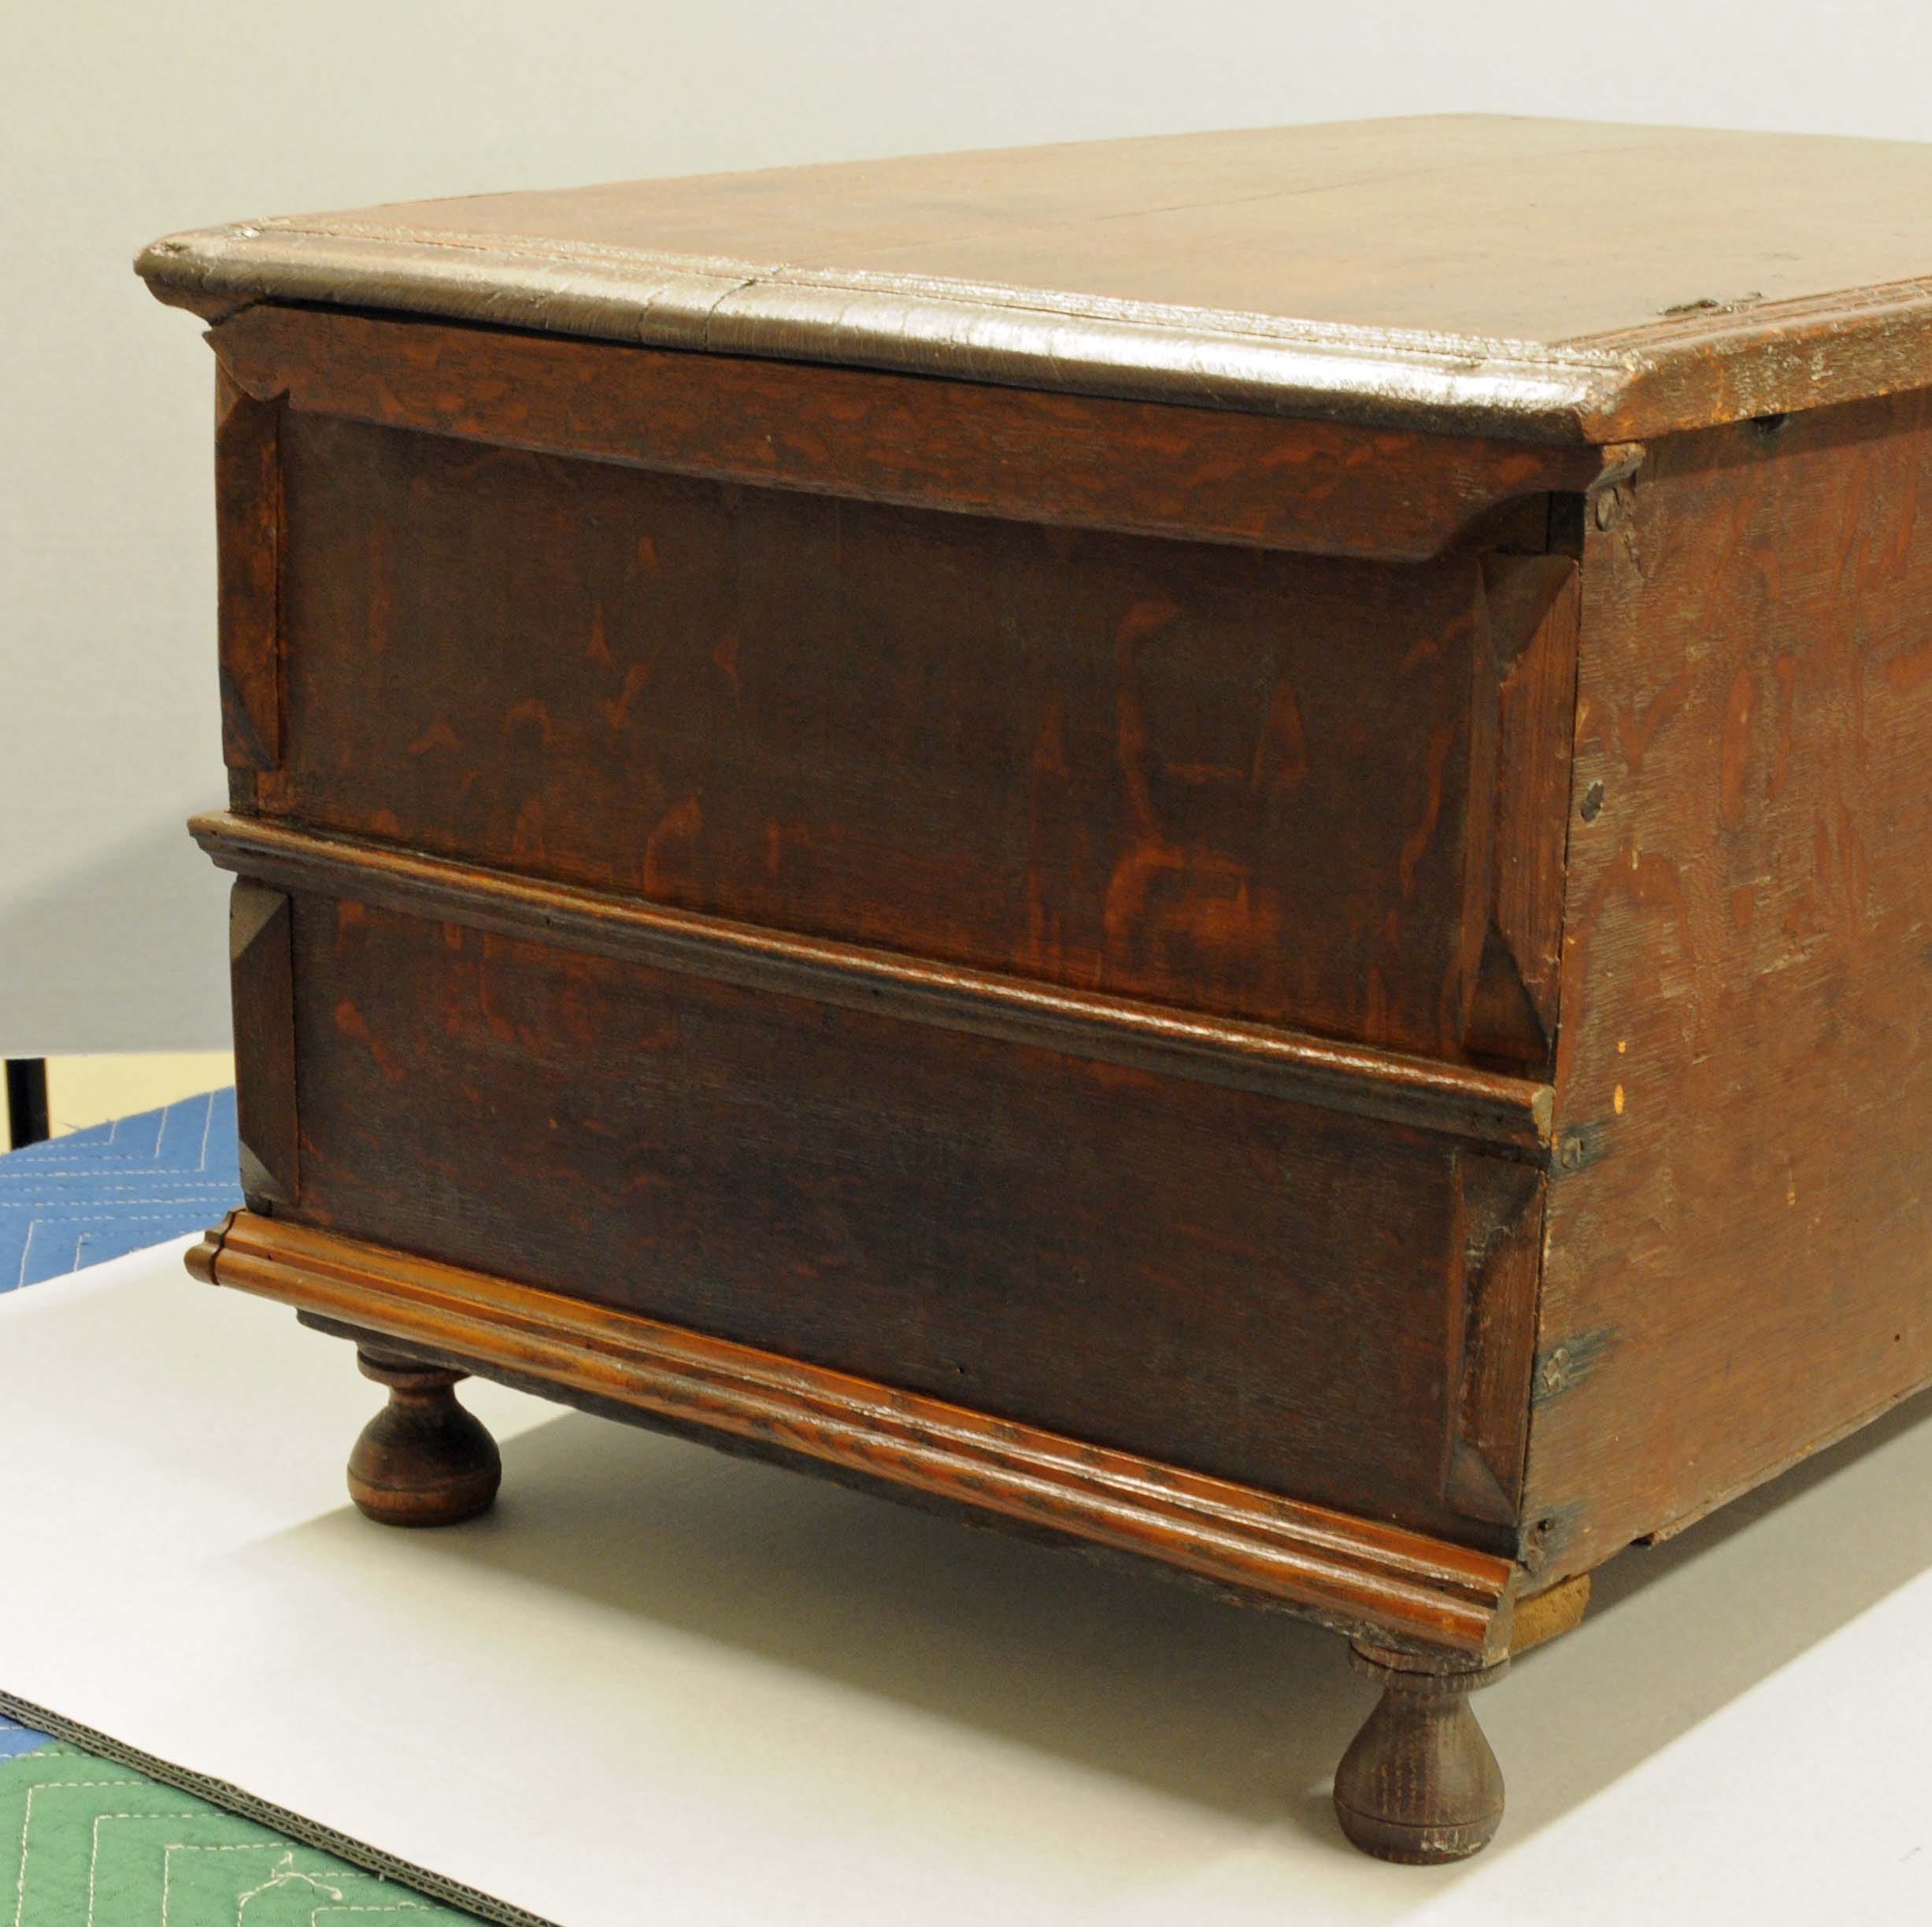
This box is based on one that descended in the family of Thomas Dennis, the joiner in Ipswich, Massachusetts. It’s the only New England box with a drawer that survives from the 17th century.

I had known about the box for years and years - it’s been published a lot. But I hadn’t seen it until maybe 10 years ago. When I went to examine it, I had a list of questions that I wanted answers to - mostly surrounding how the drawer works.
As I began making one of these boxes again, I thought back to two joiner-friends of mine - Rob Tarule and Ted Curtin. Rob & Ted preceded me at Plimoth Plantation - when I got there to be the joiner in 1994, Ted was splitting his time between working with the carpentry crew and being staff photographer. Rob had left some years before - but he & I crossed paths there & elsewhere for many years. When Jennie Alexander and I began studying joinery in 1989/90 Rob and Ted were a couple of years ahead of us. While our focus was on the Savell shop in Braintree, Rob’s was Thomas Dennis. He wrote his PhD thesis on TD - and turned it into the book The Artisan of Ipswich: Craftsmanship and Community in Colonial New England (Baltimore & London: Johns Hopkins University Press, 2004). Working on this box-with-drawer, I thought of Rob and one of his catch phrases - “I did not know what I did not know.”
There’s a section in the back of the book called “Essay on Method and Sources” in which Tarule describes the value and importance of shop-based research to understand the pre-industrial woodworker (any craft, really). In that essay, he talks about how until you really dig in and get hands-on involved in reproducing the artifacts, there are some questions you don’t know enough to ask.
So my trip ten years ago to Bowdoin College Museum of Art to study and record the box took care of many of my questions, but once I picked up the tools, I found out what else I needed to know - what I didn’t know I didn’t know. It’s about how the drawer front and the box front relate to each other. They’re different thicknesses - but they sit in the same plane to form the front of the piece.
The box front is rabbeted at its ends to meet the box sides - standard fare. I left 3/8” of the front in that rabbet. But the drawer front that will sit below the box is thicker than 3/8” - it will have a sliding dovetail housing to receive the drawer sides. So I made that board just under 3/4” thick. In 2018 I made a version of this box and didn’t address this issue at all -

You can see the glyphs - those narrow beveled strips attached front and back on the sides - that don’t line up near the front of the box. That means the drawer front is forward of the box front. The waist molding breaks it up enough so it doesn’t really matter. But looking over some of my photos of the original I thought somehow he’s cut it so the drawer front sits in the same plane as the box front. See the original here - those two glyphs on our left are at the front of the box and they line up one above the other.
Keep reading with a 7-day free trial
Subscribe to Follansbee's Substack to keep reading this post and get 7 days of free access to the full post archives.